


IoT has become the fast growing trend now to make our lifestyle easier by providing remote access to a wide range of electronic devices. In this series of hands-on IoT tutorials, we are covering the most popular hardware and software platforms readily available to create IoT applications. In our previous tutorial we learned to control an LED using Blynk app, now we will learn how to control an LED using Cayenne app or console. Cayenne is one of the popular IoT platform which makes it easy to build your own IoT setup. A drag and drop IoT project builder, Cayenne allows developers to quickly create and host their connected device on the internet, without spending a lot of time on programming side. Initially it was only available for Raspberry Pi, but now it has support for Arduino and other controllers.
In this tutorial we are using ESP8266 to work with Cayenne, earlier we have controlled the LED using cayenne and ESP32, and Raspberry Pi.
Features of Cayenne IoT Cloud Platform
- Cayenne App is used to remotely control your IoT projects with drag and drop widgets from an app.
- Cayenne Online Dashboard is used to setup and manage our IoT projects with the help of the browser.
- Cayenne Cloud store and process the device data.
- Cayenne Agent enables communication with the server, agent and hardware for implementing incoming and outgoing commands, actions, triggers and alerts.
Components required
- ESP8266 Node MCU
- USB cable
Setup Cayenne Dashboard for ESP8266
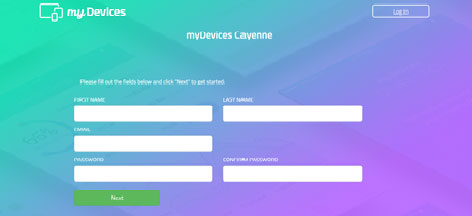
If you do not have an account on Cayenne, create an account from the following link: https://cayenne.mydevices.com/cayenne/signup
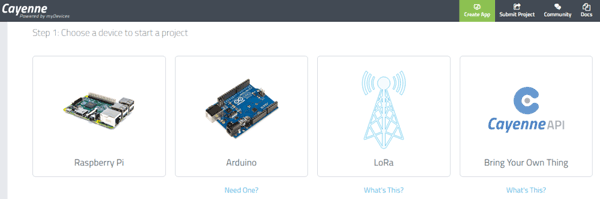
In this project we are using ESP8266 so select “Bring Your Own Thing” but if you are using Arduino or Raspberry Pi you may select the same as shown in the screenshot.
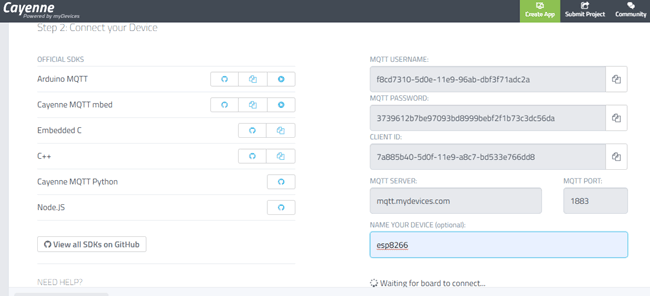
By clicking on Bring Your own thing we will get the MQTT username and password. Then name the device as ESP8266, as shown in the screenshot.
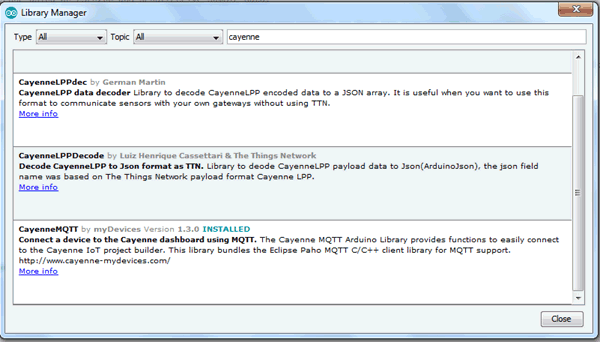
Now open Arduino IDE and install the Cayenne MQTT library or download the library from Github by clicking on the following link:https://github.com/myDevicesIoT/Cayenne-MQTT-ESP
Also, install ESP8266 board package and select your ESP8266 board from the Tools menu.
Programming Code Explanation
The complete code for controlling LED using ESP8266 and Cayenne is given at the end. Start the code with defining all the required libraries.
#define CAYENNE_PRINT Serial
#include <CayenneMQTTESP8266.h>
Now, enter your wifi connections details in place of SSID and PASSWORD.
char ssid[ ] = "ssid";
char wifiPassword[ ] = "wifiPassword";
Next we need to provide Cayenne authentication information. This should be obtained from the Cayenne Dashboard.
char username[] = "MQTT_USERNAME";
char password[] = "MQTT_PASSWORD";
char clientID[] = "CLIENT_ID";
In void setup() function ESP8266 communicating with cayenne dashboard using MQTT, and setting D2 pin of ESP8266 node MCU as output.
void setup() {
  Cayenne.begin(username, mqtt_password, cliend_id, ssid, password);
  pinMode(2, OUTPUT);
  digitalWrite(2, HIGH);
}
In the void loop() function we are sending sensor data continuously to Cayenne.
void loop() {
            Cayenne.loop();
}
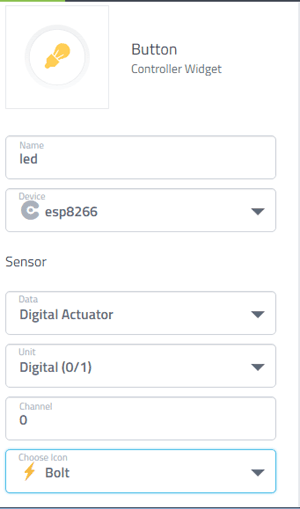
Here, in CAYENNE_IN(0) ‘0’ is the channel number mention in the code for cayenne dashboard.
CAYENNE_IN(0)
{
  digitalWrite(2, !getValue.asInt());  // to get the value from the website
}
Testing LED Control by Cayenne Dashboard using ESP8266
Compile and upload the complete code, and after uploading open the cayenne dashboard.
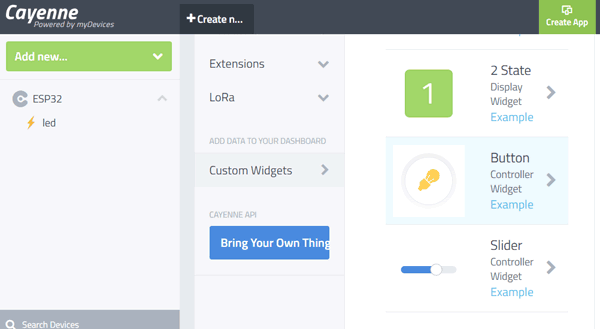
On the left hand side of the dashboard select the widget/device then select the custom widget and button widget as shown in the screenshot
After selecting the button widget, configure it as shown below -
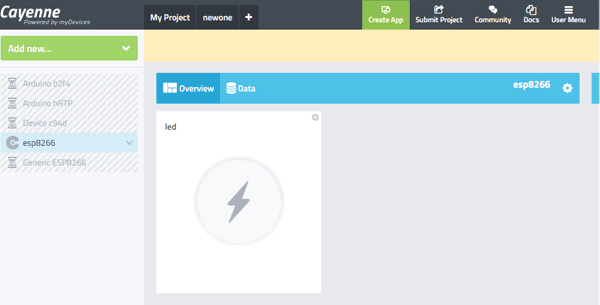
Now, click on “Add Widget”, the button will be created to control our LED.
Testing LED Control by Cayenne App using ESP8266
The same we can do with our smartphone, all we have to do is download the Cayenne app from play store and log in.
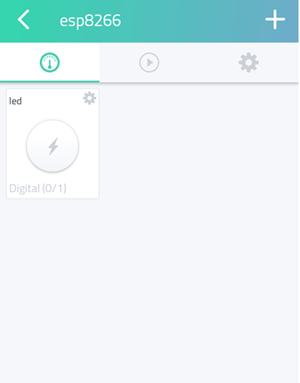
Open the app, and you will be automatically registered with your mail id and dashboard will appear on you app for controlling LED.
Therefore with the help of the cayenne app and browser we have controlled the led using ESP8266.
#include <CayenneMQTTESP8266.h>
#define CAYENNE_DEBUG
#define CAYENNE_PRINT Serial
char ssid[] = "SSID";
char password[]="SSID PASSWORD";
char username[] = "USER_NAME";
char mqtt_password[] = "MQTT_PASS-WORD";
char cliend_id[] = "MQTT_CLIENT ID";
void setup() {
Cayenne.begin(username, mqtt_password, cliend_id, ssid, password);
pinMode(2, OUTPUT);
digitalWrite(2, HIGH);
}
void loop() {
Cayenne.loop();
}
CAYENNE_IN(0)
{
digitalWrite(2, !getValue.asInt());
}


