


In the era of the Internet of Things, more and more devices are interconnected. But every device uses a different communication protocol that makes it hard to control them from a single device. Fortunately, there is a solution for this - OpenHAB. The open Home Automation Bus (OpenHAB) is an open-source, technology-agnostic home automation platform that runs as the center of your smart home. OpenHAB communicates with smart and not-so-smart devices, performs user-defined actions, and provides web pages with user-defined information as well as user-defined tools to interact with all devices. It allows users to control all devices from well-known manufacturers using one interface. To achieve this, the OpenHAB segments and compartmentalizes certain functions and operations.
So in this tutorial, we are going to install and setup OpenHAB on Raspberry Pi. In our previous tutorials, we have covered other smart home platforms like Home Assistant, ESPHome, and Tasmota, check them out if you are interested.
Components Required
Hardware
- Raspberry Pi
- Micro SD Card
- SD Card Reader
Software
- OpenHAB Image file
- Balena Etcher
Installing OpenHAB on Raspberry Pi
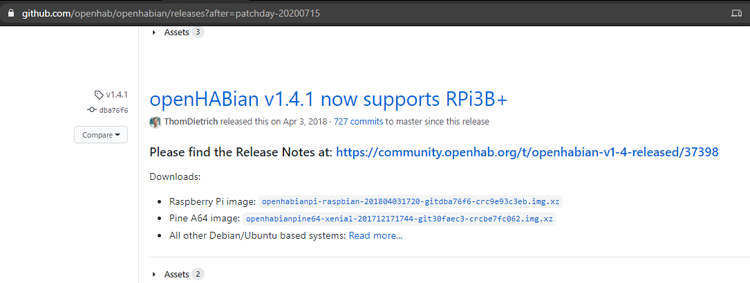
Step 1: For installing OpenHAB on Raspberry Pi, first, download the appropriate OpenHabian Disk Image for your Raspberry Pi from the OpenHAB page. We will be using the Raspberry Pi 4B for this project.
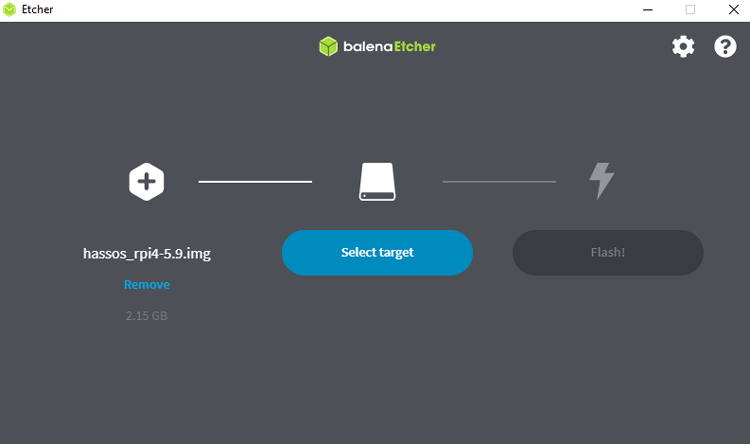
Step 2: Then download balenaEtcher for flashing image file on Raspberry Pi. Etcher is a free and open-source utility that helps in burning image files such as .iso, .img files, and zipped folders to create live SD cards and USB flash drives.

Step 3: Once the installation is done, open the Etcher app. Etcher installs the operating system in three steps; the first step is to select the image. To select an image file, click on Select Image in Etcher and select the OpenHabian image file. Then select the right SD card and click Flash.
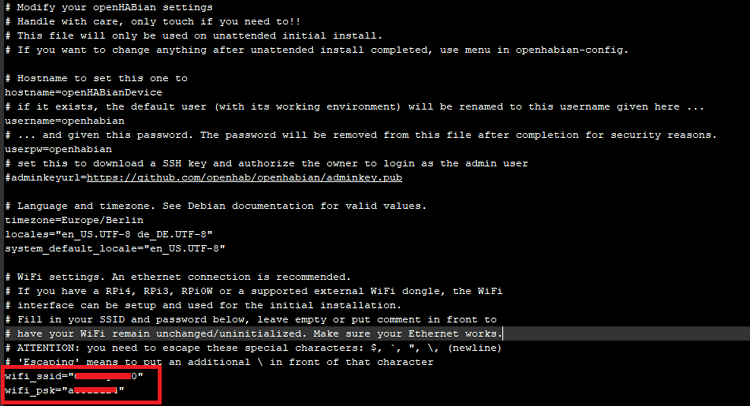
The most reliable networking setup for your Raspberry Pi is to connect it using an Ethernet cable; however, if you want to configure Wi-Fi, you can try this. Navigate to your SD card i.e. openhabian boot and open a file called ‘openhabian.conf’. Now, inside the file, uncomment and complete the lines reading wifi_ssid="" and wifi_psk="" and enter the Wi-Fi name and password.
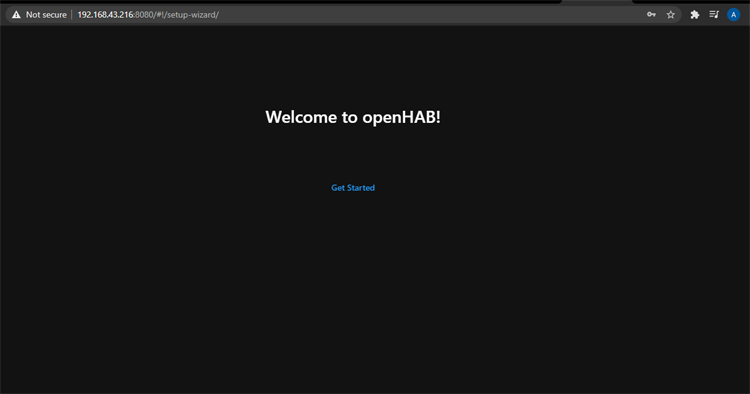
Step 4: Now, unmount the SD card, remove it from your card reader and insert it into Raspberry Pi. Connect your power supply to the Raspberry Pi and wait until the installation is done. It will take 20 to 30 minutes. After that, you should be able to access OpenHAB web UI from any device on the same local network. To access the OpenHAB page, navigate to the browser, and type http://your-pi-ip-address:8080. If the page doesn’t open, wait for another 10 minutes.
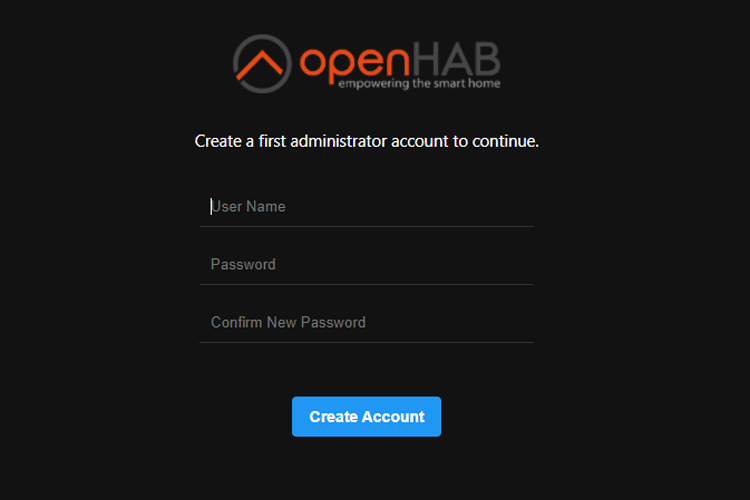
After this, you will be asked to create an administrator OpenHAB account. Enter a User name, Password, and click on “Create Account”.
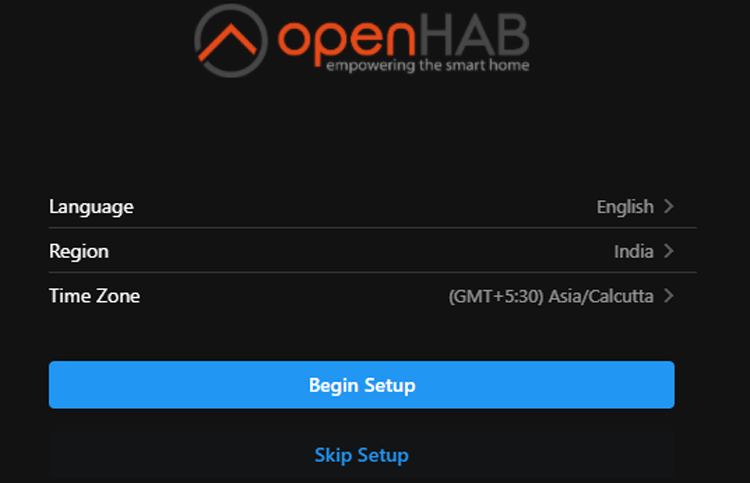
After creating the account, on the next screen, set your language, region, time zone, and location. You can skip the location setting step and complete it later.
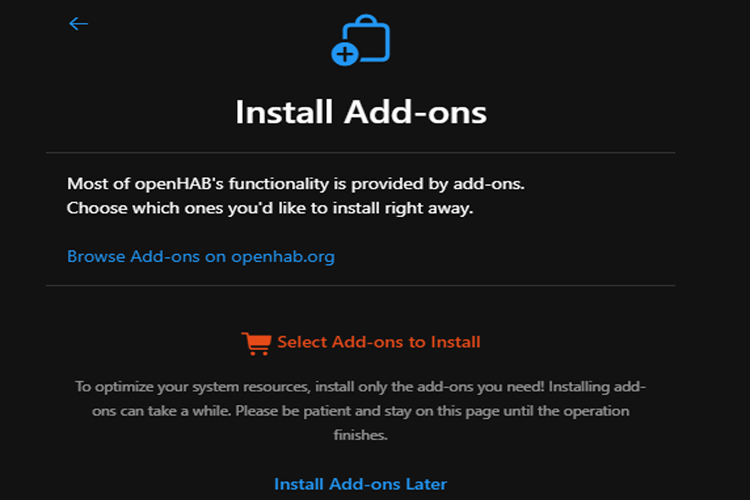
You now have the option to install OpenHAB add-ons. If you prefer to install add-ons later, click on ‘Install Add-ons Later’. You can always install/remove add-ons in the future, enabling you to modify and improve your system over time.
After finishing the setup, you will be redirected to your OpenHAB dashboard.
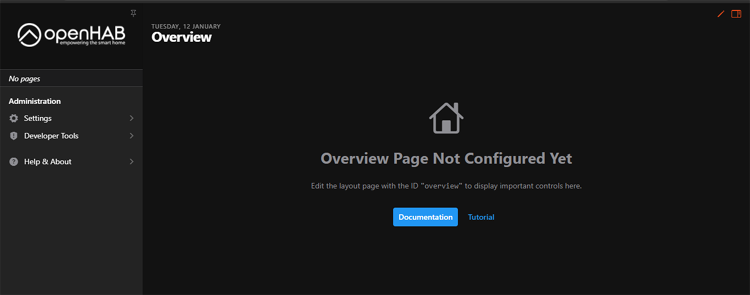
With this, the OpenHAB setup is complete. On the left side, you will find the menu. From here you can change the system setting and install Bindings.

Reading 1-Wire Sensor (ds18b20) data on OpenHAB
Install OneWire & Exec Bindings:
To be able to use certain modules such as MQTT or one-wire, the necessary bindings must first be installed. In this example, we start with OneWireGPIO binding. This binding is used to read temperature values from OneWire sensors connected to the Raspberry Pi GPIO.
To install OneWireGPIO binding, click on ‘Settings’ from the sidebar, then click on ‘Things’. Then click on the blue "+" button located at the bottom-right corner.
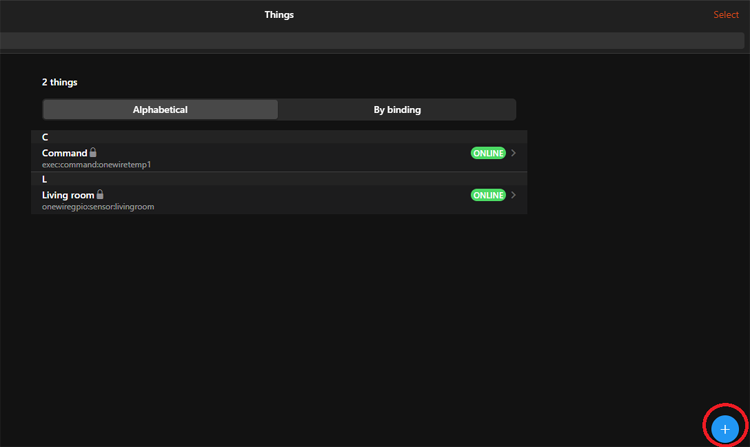
On the next screen, click on ‘Install Bindings’. Now, search for the ‘OneWireGPIO’ binding. Click on the binding, then on Install.

Now, in the next step, follow the same procedure to install ‘Exec Binding’. This binding is used to execute arbitrary shell commands.
Connect Raspberry Pi with DS18B20 Temperature Sensor
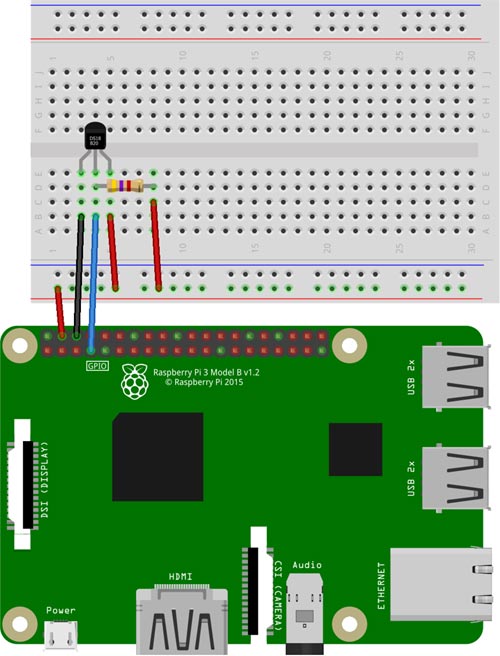
Connect DS18B20 GND [Pin 1] to the GND of the Raspberry Pi. Connect DS18B20 VDD [Pin 3] to the 5V pin of the Raspberry Pi. Then connect DS18B20 DQ [Pin 2] to GPIO 4 of Raspberry Pi. Finally, place a 4.7k pull-up resistor between the DS18B20 DQ pin and 5V.
Enable the One-Wire Interface:
Now, we need to enable the One-Wire interface before the Pi can receive data from the sensor. Once you’ve connected the DS18B20, SSH into your OpenHABian, and navigate to the boot folder and open the config.txt file using the below commands:
cd /boot
sudo nano config.txt
Add the line given below at the end of the file and save the changes.
dtoverlay=w1-gpio,gpiopin=4
Reboot the Raspberry Pi, and then navigate to the 1-Wire device folder and list the devices to ensure that the sensor has loaded correctly.
cd /sys/bus/w1/devices/
ls
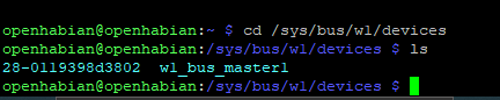
The 1-wire temp sensor has a UID (28-xxxxxxxxxxxx) as displayed in the above image. If the w1 directory does not exist, the 1-wire driver was not loaded, and you need to check config.txt and make sure it is correct.
Now, enter cd 28-XXXXXXXXXXXX (change the X’s to your address). For example:
cd 28-0119398d3802
Then use the command given below to read the sensor data;
cat w1_slave

In the above image, the temperature reading is t=22250, which means a temperature of 22.2500C
Creating the OpenHAB Items, Things, and Sitemap
In this final step, we will create OpenHAB modules to show temperature data. For that, we will add Items, Things, and Sitemaps.
First, we will create a .thing. For that go to the things directory using the below command:
cd /etc/openhab/things
Now, create a new file in the things directory using the command given below:
nano onewiregpio.things
And paste the below lines
Thing onewiregpio:sensor:livingroom "Living room" [gpio_bus_file="/sys/bus/w1/devices/28-0119398d3802/w1_slave",refresh_time=30]
Now, in the next step create a new .items file. For that go to the items directory using the below command:
cd /etc/openhab/items
Now, create a new file in the items directory using the below command:
nano onewiregpio.items
And paste the below lines
Number LivingRoomTemperature "Temperature: [%.2f °C]" <temperature> {channel="onewiregpio:sensor:livingroom:temperature"}
Now in the next step create a new .sitemap file. For that go to the items directory using the below command:
cd /etc/openhab/sitemaps
Now, create a new file in the items directory using the below command:
nano demo.sitemap
And paste the below lines
sitemap demo label="My home automation" {
    Frame label="Date" {
        Text item=Date
    }
    Frame label="Demo" {
        Text item=LivingRoomTemperature label="Livingroom [%.1f °C]"
    }
}
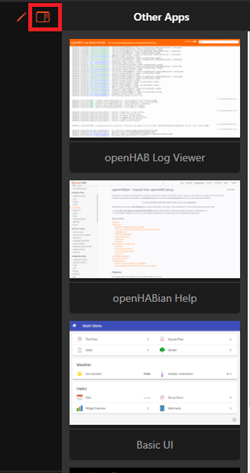
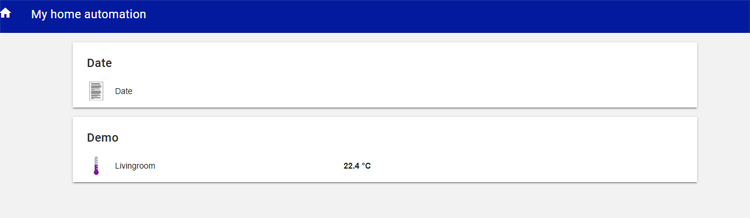
With this done, you should now have a fully functioning 1-wire temperature sensor network, displaying live temperature. To access the Web UI click on the ‘Other Apps’ icon on the top right corner and then click on ‘Basic UI’.
You will be redirected to Web UI:
This is how you can install OpenHAB on Raspberry Pi. Hope you’ve found this tutorial useful. Share your views and queries (if any) in the comment section below.


