


Telegram is all about freedom and open-sources, it announced the new Telegram bot API in 2015, which allowed third parties to create telegram bots for ESP32 that utilize the messaging application as their main communication interface. This means we can control our smart home applications and other smart devices with it. So, in this article, we will be discussing a new way of controlling your smart appliances and knowing the status of them. Yeah, you’re right, we will be controlling them with a social media app, “Telegram”.
Previously we have built projects like,
- Using Telegram Bot with Raspberry Pi: Sharing Text and Files
- Raspberry Pi GPIO control using Telegram App
So, do check out those if these interests you.
What is Telegram?
Telegram is a cross-platform cloud-based instant messaging, videotelephony, and VoIP service with end-to-end-encrypted chat for secret chat only, whereas server-client / client-server encryption is used in cloud chats.

But what differentiates it from other such messaging platforms is the ability to create bots.
Telegram bots are AI-based apps that can be configured to serve many different functions, some examples would be like, send relevant information about the weather or useful news articles, some are preconfigured to send reminders, also there are some which can play tunes or create to-do lists, and so much more.

Today we’ll also be creating one such bot which will communicate with our ESP32.
Project Overview
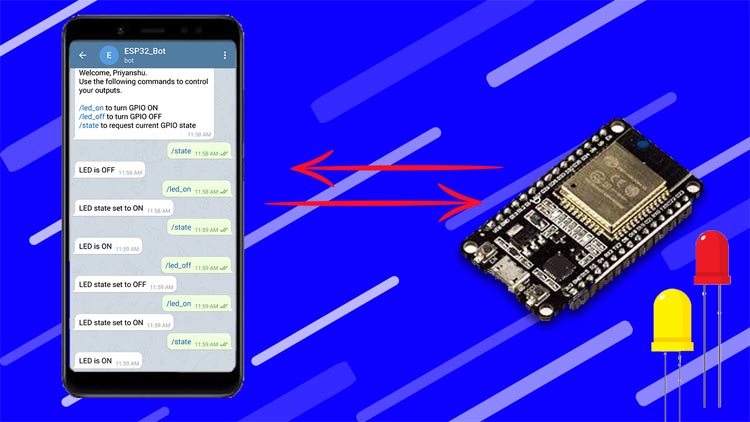
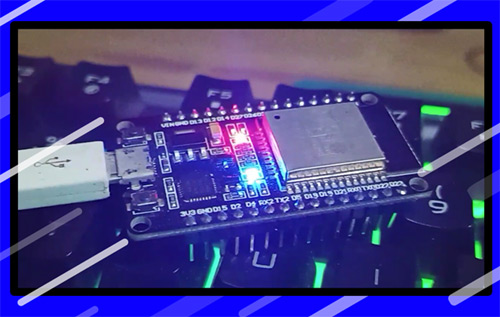
In this tutorial, we will be controlling a LED with the Telegram bot, the LED is connected to the ESP32 board. Instead of the LED, you can control any pin connected to any other appliance or component.
Requirements for Building the ESP32 Based Telegram Bot
As this project is a software heavy project, it doesn’t require that much hardware, but there are quite a few steps that need to be followed in the software side of things, we will discuss those steps as we move forward in the article.
Hardware Requirements:
- ESP32 Development board
Software Requirements:
- Arduino IDE
- Specific Arduino Libraries
- Telegram App
Making a Telegram Bot
As we discussed earlier, Telegram allows us to create several bots with different functionalities. For our project, we will be creating a simple bot using Telegram. The rest of the command declarations and replies will be coded in the ESP board itself, which will communicate to our bot using the chat ID. We will discuss those as we proceed further in the article. As that out of the way, we can turn our focus to build the bot in Telegram.
- Install Telegram from Play Store.
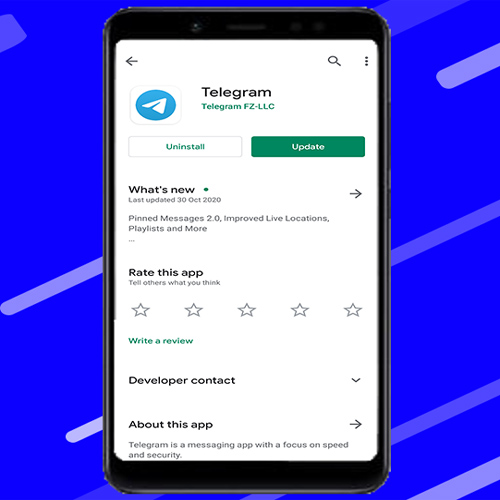
- After installing, make an account if you don’t have one already and follow the next steps to get your TG bot working.
- First, search for “botfather” and click the BotFather as shown below. Or open this link t.me/botfather on your smartphone.
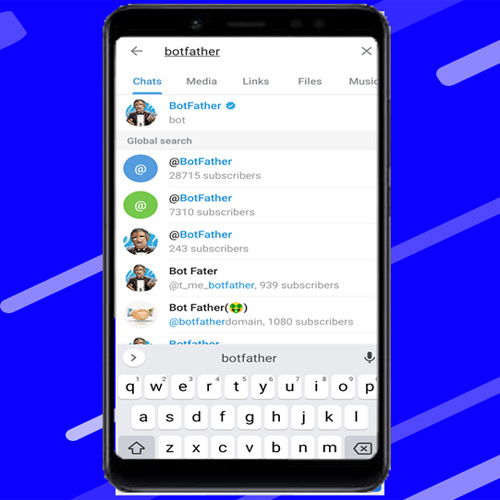
- Botfather is a pre-built Telegram bot that lets you create, manage, and delete your bots.
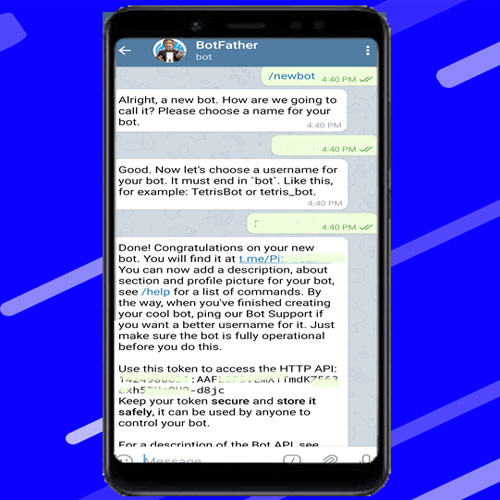
- Click on the start button and choose /newbot

- Give your bot a name and username.
- If your bot is successfully created, you’ll receive a message with a link to access your newly created bot and the bot token. Bot token is a unique id that we will be using later to communicate with the bot.
Get your Telegram chat id
A telegram user id is a unique number for every chat, group, and user which helps Telegram to identify users and chats. In this project of ours, anyone with the link to the bot may interact with the bot. To prevent any unauthorized access, we can encrypt it using the unique user id.
By doing so, every time ESP receives a message from the bot, it checks whether the id corresponds with the id stored in it and then only executes the commands.
Steps for getting your Telegram User ID:
- In your Telegram account, search for “IDBot” or open this link t.me/myidbot on your smartphone.
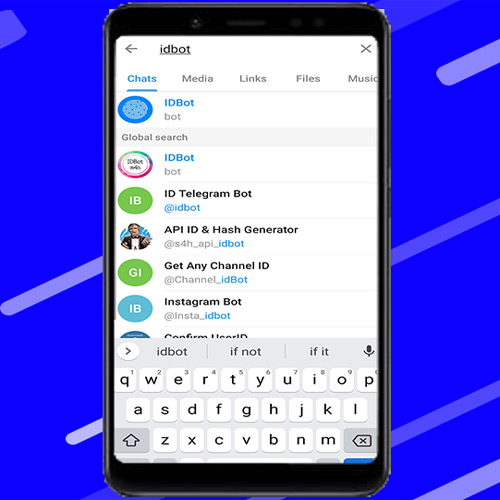
- Start a conversation with that bot and type /getid. You will get a reply back with your user ID.
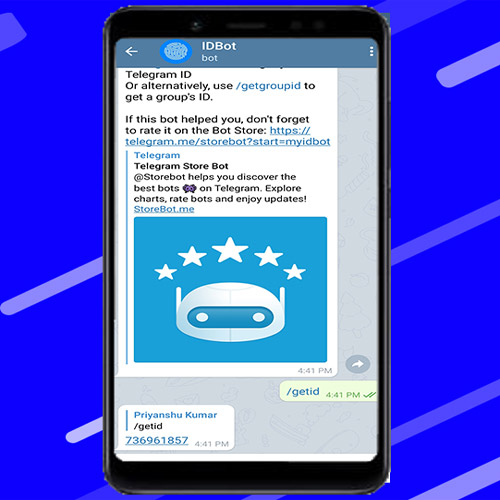
- Note the user id as we’ll need it later.
Installing the Telegram Bot Library
We will be using Arduino IDE for programming the ESP32 board. So, make sure you have the IDE as well as the board package installed on your PC. We need to install two libraries in the Arduino IDE, using these libraries will make the coding process a lot simpler and convenient.
To establish communication with the Telegram bot, we’ll be using the Universal Telegram Bot Library created by Brian Lough that provides an easy interface for Telegram Bot API.
Follow the next steps to install the latest release of the library.
1. Click this link to download the Universal Arduino Telegram Bot library.
2. Go to Sketch > Include Library > Add.ZIP Library...
3. Add the library you’ve just downloaded. And that’s it. The library is installed.
For details about the library, you can check out the Universal Arduino Telegram Bot Library GitHub page.
ArduinoJson Library:
You also have to install the ArduinoJson library. Follow the next steps to install the library.
1. Go to Sketch > Include Library > Manage Libraries.
2. Search for “ArduinoJson”.
3. Select the latest version available.
4. Install the library.
As we have done installing all the required libraries we can.
Programming the ESP32 Based Telegram Bot
We have to flash our ESP32 in such a way that it receives any message being sent from the bot, compares the user id, and turn the LED on or off according to the received message.
In the very first of the code, we start with importing the required libraries.
#ifdef ESP32
#include <WiFi.h>
#else
#include <ESP8266WiFi.h>
#endif
#include <WiFiClientSecure.h>
#include <UniversalTelegramBot.h> // Universal Telegram Bot Library written by Brian Lough: https://github.com/witnessmenow/Universal-Arduino-Telegram-Bot
#include <ArduinoJson.h>
After that, we initialize the variables to store the SSID and Password of your Wi-Fi.
const char* SSID = "Your_SSID";
const char* password = "Your_pass";
Similarly, we define the variables for holding the bot token and chat id. You need to put your credentials in these variables.
#define BOTtoken "Your_Bot_Token" // your Bot Token (Get from Botfather)
#define CHAT_ID "Your_chat_id"
Afterward, we create a new WiFi client with WiFiClientSecure.
WiFiClientSecure client;
Create the bot with a token and client, which we have saved earlier.
UniversalTelegramBot bot(BOTtoken, client);
The two variables botRequestDelay and lastTimeBotRan are used to check for new Telegram messages every x number of seconds. In our case, we will check every (1000ms) for new messages. We can change that delay time as our specific requirement by changing the botRequestDelay variable.
int botRequestDelay = 1000;
unsigned long lastTimeBotRan;
The handleNewMessages() function keeps a tab of what happens when new messages arrive.
void handleNewMessages(int numNewMessages) {
  Serial.println("handleNewMessages");
  Serial.println(String(numNewMessages));
for (int i=0; i<numNewMessages; i++) {
We need to get the chat ID for that message and store it in the chat_id variable. This ID allows us to identify who sent the message.
String chat_id = String(bot.messages[i].chat_id);
If the chat_id is different from your chat ID (CHAT_ID), it means that someone else has sent a message to your bot. If that’s the case, we need to ignore all the messages and wait for a new one.
if (chat_id != CHAT_ID) {
  bot.sendMessage(chat_id, "Unauthorized user", "");
  continue;
}
Otherwise, it means that the message was sent from a valid user, so we’ll save it in the text variable and check its content.
String text = bot.messages[i].text;
Serial.println(text);
The from_name variable saves the name of the sender.
String from_name = bot.messages[i].from_name;
If we receive the /start message, we’ll send a valid command to the ESP32. This feature can be very useful if you forget the specific commands which control your board.
if (text == "/start") {
  String welcome = "Welcome, " + from_name + ".\n";
  welcome += "Use the following commands to control your outputs.\n\n";
  welcome += "/led_on to turn GPIO ON \n";
  welcome += "/led_off to turn GPIO OFF \n";
  welcome += "/state to request current GPIO state \n";
  bot.sendMessage(chat_id, welcome, "");
}
We can send a message to the chatbot very simply by using the sendMessage() method on the bot object and passing the recipient’s chat ID, the message, and the parse mode as an argument.
bool sendMessage(String chat_id, String text, String parse_mode = "")
In our particular example, we’ll send the message to the ID stored on the chat_id and send the message saved on the welcome variable.
bot.sendMessage(chat_id, welcome, "");
If it receives the /led_on message, turn the LED on and send a message confirming we’ve received the message. Also, update the ledState variable with the new state.
if (text == "/led_on") {
  bot.sendMessage(chat_id, "LED state set to ON", "");
  ledState = HIGH;
  digitalWrite(ledPin, ledState);
}
Do something similar for the /led_off message.
if (text == "/led_off") {
  bot.sendMessage(chat_id, "LED state set to OFF", "");
  ledState = LOW;
  digitalWrite(ledPin, ledState);
}
Finally, checking the received message by using the /state, check the current GPIO state, and send the message accordingly.
if (text == "/state") {
  if (digitalRead(ledPin)){
    bot.sendMessage(chat_id, "LED is ON", "");
  }
  else{
    bot.sendMessage(chat_id, "LED is OFF", "");
  }
}
Initialize Wi-Fi, and connect the ESP to your network SSID and password which we defined earlier.
WiFi.mode(WIFI_STA);
WiFi.begin(ssid, password);
while (WiFi.status() != WL_CONNECTED) {
  delay(1000);
  Serial.println("Connecting to WiFi..");
}
In the loop(), we are checking for a new message every 1000ms, one second in short.
void loop() {
  if (millis() > lastTimeBotRan + botRequestDelay)  {
    int numNewMessages = bot.getUpdates(bot.last_message_received + 1);
    while(numNewMessages) {
      Serial.println("got response");
      handleNewMessages(numNewMessages);
      numNewMessages = bot.getUpdates(bot.last_message_received + 1);
    }
    lastTimeBotRan = millis();
  }
}
When new messages arrive, call the handleNewMessages() function.
while(numNewMessages) {
  Serial.println("got response");
  handleNewMessages(numNewMessages);
  numNewMessages = bot.getUpdates(bot.last_message_received + 1);
}
That concludes the working of our code. Now, you just need to upload it by selecting the proper board and port from the Arduino IDE and you are good to go.
ESP32 Based Telegram Bot - Testing
Now that we have completed setting up everything. Upload the above-mentioned code to your ESP32 board through Arduino IDE. Don’t forget to choose the correct board and port while uploading the sketch.
After uploading the sketch, press the EN/Reset button on the board, so that it starts executing the code. Open the serial monitor, and wait for the board to get connected with your Wi-Fi router. Now, open Telegram and start a conversation with your bot by going to the link provided by Botfather and typing /start.
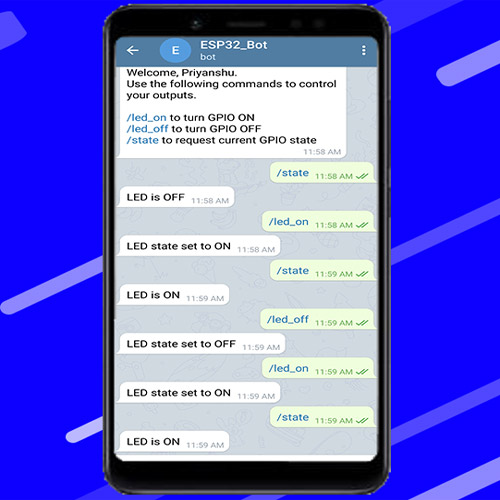
Now you can control the LED or know the state by typing the corresponding commands.
You can also check out the video which demonstrates the working of this tutorial. If you have any questions, you can also leave them in the comment section below.
#ifdef ESP32
#include <WiFi.h>
#else
#include <ESP8266WiFi.h>
#endif
#include <WiFiClientSecure.h>
#include <UniversalTelegramBot.h> // Universal Telegram Bot Library written by Brian Lough: https://github.com/witnessmenow/Universal-Arduino-Telegram-Bot
#include <ArduinoJson.h>
// Replace with your network credentials
const char* ssid = "Your_SSID";
const char* password = "Your_pass";
// Initialize Telegram BOT
#define BOTtoken "Your_Bot_Token" // your Bot Token (Get from Botfather)
// Use @myidbot to find out the chat ID of an individual or a group
// Also, you need to click "start" on a bot before it can
// message you
#define CHAT_ID "Your_chat_id"
WiFiClientSecure client;
UniversalTelegramBot bot(BOTtoken, client);
// Checks for new messages every 1 second.
int botRequestDelay = 1000;
unsigned long lastTimeBotRan;
const int ledPin = 2;
bool ledState = LOW;
// Handle new receive messages
void handleNewMessages(int numNewMessages) {
Serial.println("handleNewMessages");
Serial.println(String(numNewMessages));
for (int i=0; i<numNewMessages; i++) {
// Chat id of the requester
String chat_id = String(bot.messages[i].chat_id);
if (chat_id != CHAT_ID){
bot.sendMessage(chat_id, "Unauthorized user", "");
continue;
}
// Print the received message
String text = bot.messages[i].text;
Serial.println(text);
String from_name = bot.messages[i].from_name;
if (text == "/start") {
String welcome = "Welcome, " + from_name + ".\n";
welcome += "Use the following commands to control your outputs.\n\n";
welcome += "/led_on to turn GPIO ON \n";
welcome += "/led_off to turn GPIO OFF \n";
welcome += "/state to request current GPIO state \n";
bot.sendMessage(chat_id, welcome, "");
}
if (text == "/led_on") {
bot.sendMessage(chat_id, "LED state set to ON", "");
ledState = HIGH;
digitalWrite(ledPin, ledState);
}
if (text == "/led_off") {
bot.sendMessage(chat_id, "LED state set to OFF", "");
ledState = LOW;
digitalWrite(ledPin, ledState);
}
if (text == "/state") {
if (digitalRead(ledPin)){
bot.sendMessage(chat_id, "LED is ON", "");
}
else{
bot.sendMessage(chat_id, "LED is OFF", "");
}
}
}
}
void setup() {
Serial.begin(115200);
#ifdef ESP8266
client.setInsecure();
#endif
pinMode(ledPin, OUTPUT);
digitalWrite(ledPin, ledState);
// Connect to Wi-Fi
WiFi.mode(WIFI_STA);
WiFi.begin(ssid, password);
WiFi.setSleep(false);
while (WiFi.status() != WL_CONNECTED) {
delay(1000);
Serial.println("Connecting to WiFi..");
}
// Print ESP32 Local IP Address
Serial.println(WiFi.localIP());
}
void loop() {
if (millis() > lastTimeBotRan + botRequestDelay) {
int numNewMessages = bot.getUpdates(bot.last_message_received + 1);
while(numNewMessages) {
Serial.println("got response");
handleNewMessages(numNewMessages);
numNewMessages = bot.getUpdates(bot.last_message_received + 1);
}
lastTimeBotRan = millis();
}
}


