


In this tutorial, we are going to build something beyond Electronics domain. Being an electronics engineers, most of us would have wanted to build some user interfaces for our Internet of Things applications and in most cases, an Android Application would be the right choice for a user to interact with our IoT devices. So, if you want to build some Android application for your IoT applications, then the following tutorial is right for you to get started. But, before we start our journey, let's discuss about some basics of Android applications.
There are lots of options available on the internet to build an Android app. Those resources are giving us various kind of facilities like Drag and Drop features, Code in Blocks, etc. But if you want to give your IoT applications some customizable features, then the best and the traditional way is to use the native platforms. We have three programming approaches to build an Android app from scratch with hard coding. Yes, I am talking about the Java, Kotlin and Dart. In this tutorial, we are going to build some attractive android application by using Java in android studio software. But, our primary focus will be to make an Android App for our Internet of Things applications.
What are you going to learn?
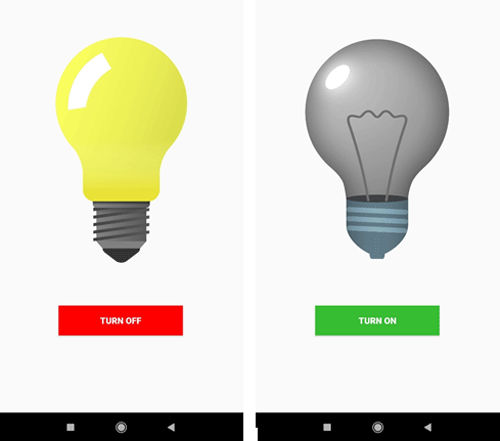
We are going to follow the simple Android architecture where we need to create some activities and layouts and we need to design the layout for particular activity. Confused right? You can visit this link for more details about the Android workflow, models and architecture. In this tutorial, our main focus is to create an Android app for the Wi-Fi and Bluetooth applications. So, I have divided this tutorial in two sections. In the first section, I will show you how to make your first Android application in Android Studio and we will add a button and two images of a light bulb (for both ON and OFF state). Then we will change the state of the button and images as ON or OFF whenever we will click the button. So, at the end of this tutorial, you would have learnt how to build a simple Android application with a button to control the light bulb as shown below.
Installing Android Studio and Creating our first Project
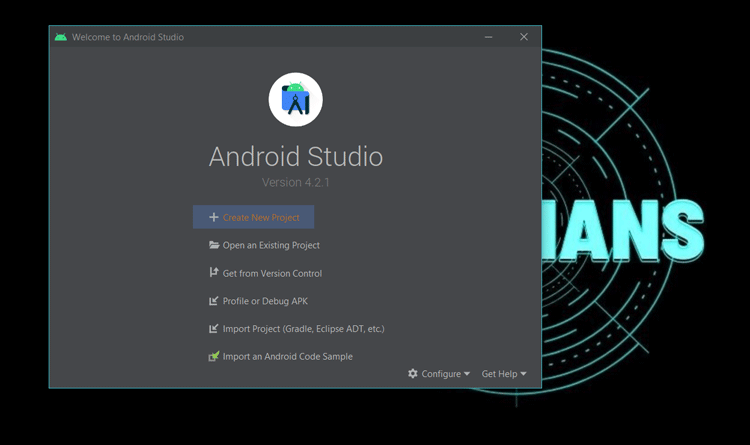
Click the link to download the latest version of the Android Studio. The installation window of the Android studio is so simple. Just follow the instructions that were given in the Android studio installation window. When the installation is complete, click on the create a new project button.
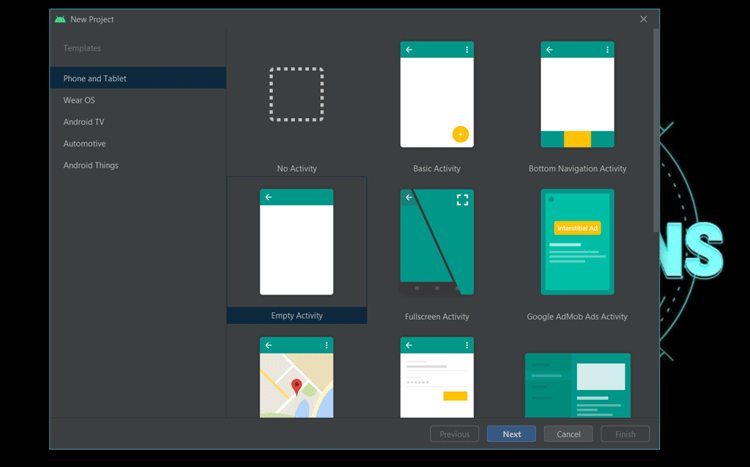
A new window will pop up on your screen. Then select an empty activity from the list of activities and click on next.
Now, you need to mention the project name and select the language as Java. In the minimum SDK section, you need to select the SDK version of the Android. In simple words, you need to select which minimum Android version will support your application. In my case, I have selected “API23: Android 6.0 (Marshmallow)”. Now click on Finish to start the project.

It will take some time to build the new project. Make sure that you have a good internet connection because it will download some dependencies. When the building of the project will finish, you will find the following directory structure on the left corner of the android studio IDE.
Folder Structure in Android Studio:
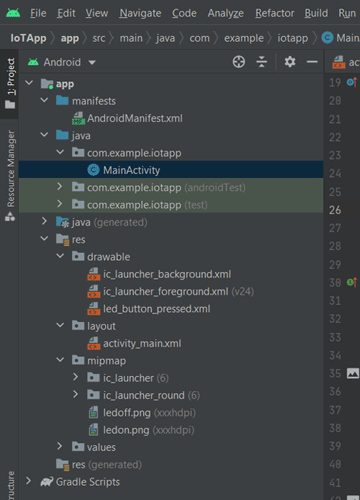
The above picture shows the structure of the project directory. In this tutorial, we are going to write some code in two major files in the project directory. One is “MainActivity.java” (You can find this file in the “app > java > com.example.yourappname” folder) The another one is, “activity_main.xml” (You can find this file in the “app > res > layout” folder). Let's open the “activity_main.xml” file.
Understanding activity_main.xml file:
We have three options available in the top right corner of the xml file (I have circled this in orange color in the below image). These three options are Code, Split and Design.
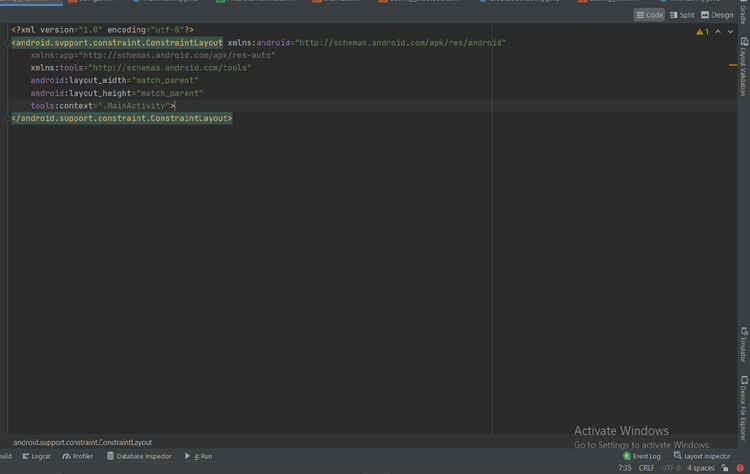
Code Section:
The code section will allow you to make the entire layout with coding. In the below image, you can see the code section of the activity_main.xml file. The below code inside the editing window has been automatically generated. It is the default layout component that is constraint layout. You can change the layout to the other layouts like Relative Layout, Linear layout, etc.
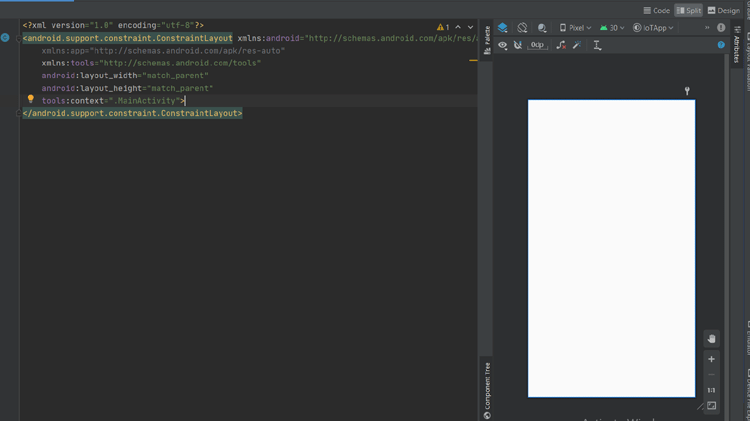
Split Section:
The split section will allow you to view the layout while making some changes in the code. As you can see in the below image, we have a code window and a layout window attached together. We can view our changes in the layout window in realtime.
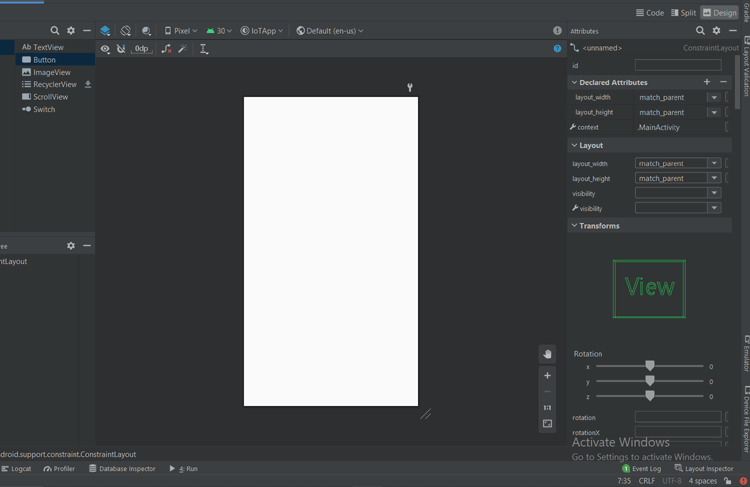
Design Section:
The Design section will give you the Drag and Drop features to add any items in the layout. In the following image, you can see that we have only the design window which allow us to drag and drop the components and we can change the attributes of the components by using the attributes window that is given in alongside the layout window.
Adding a Button in the activity_main.xml:
We need to add a button in the layout file (i.e. activity_main.xml). So, go to the code section of the activity_main.xml layout file and add the code given below.
Code snippet for buttons layout:
<?xml version="1.0" encoding="utf-8"?>
<android.support.constraint.ConstraintLayout xmlns:android="http://schemas.android.com/apk/res/android"
    xmlns:app="http://schemas.android.com/apk/res-auto"
    xmlns:tools="http://schemas.android.com/tools"
    android:layout_width="match_parent"
    android:layout_height="match_parent"
    tools:context=".MainActivity">
   <Button
    android:id="@+id/button1"
    android:layout_width="200dp"
    android:layout_height="wrap_content"
    android:layout_marginBottom="124dp"
    android:background="#36BD31"
    android:text="TURN ON"
    android:textColor="@color/white"
    android:textStyle="bold"
    app:layout_constraintBottom_toBottomOf="parent"
    app:layout_constraintEnd_toEndOf="parent"
    app:layout_constraintHorizontal_bias="0.497"
    app:layout_constraintStart_toStartOf="parent" />
</android.support.constraint.ConstraintLayout>
Explanation:
In the above code snippet, I have used the Button class and I gave it a Unique Id that is “Button1”. I used “android:text” to add the text on the button which is initially set to “TURN ON” and we will change this text from the MainActivity.java file whenever user will press the button.
Adding an ImageView in the activity_main.xml:
An ImageView class is used to display any kind of image resource in the app. We need to add an ImageView in the layout file (i.e. activity_main.xml) to display the ON/OFF state images of the light bulb. So, first of all we need two images of light bulbs (for both on and off state). I have downloaded this into the “app > res > mipmap” directory of the project.
Code snippet for LED image:
<ImageView
    android:id="@+id/led"
    android:layout_width="263dp"
    android:layout_height="362dp"
    android:layout_marginBottom="32dp"
    android:src="@mipmap/ledoff"
    app:layout_constraintBottom_toTopOf="@+id/button1"
    app:layout_constraintEnd_toEndOf="parent"
    app:layout_constraintStart_toStartOf="parent"
    app:layout_constraintTop_toTopOf="parent"
    app:layout_constraintVertical_bias="0.751"
    android:contentDescription="TODO" />
Explanation:
In the above code snippet, I have used the ImageView class and I gave it a Unique Id that is “led”. I used “android:src” to add the image of the led which is in off state. As I am using constraints layout, I have set some constraints to the Image item. I am not going too much in detail about the layout here. You can find the details in the link that I have shared above.
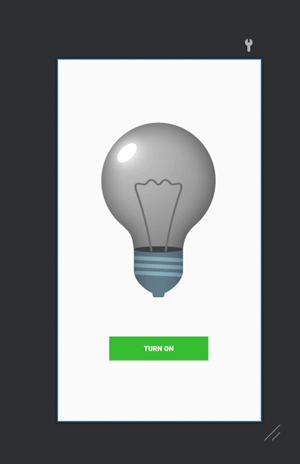
So, we have finished the layout of our project. Let’s have a look on the layout below. The below image of the light bulb is in off state. Now, we need to switched this image with the image of the light bulb which is in the on State. We are going to code our MainActivity.java file in the next section.
MainActivity.Java:
In the MainActivity.java file, we need to add a Button and an ImageView class and we need to assign the layout of the Button and ImageView to their individual classes respectively. You can find a Boolean variable “isSwitchOn” in the code. This variable is used to maintain the status of the both on or off state of the button and the images. To listen the click from the user, I have used onClick() function of the setOnClickListener() method of the Button class. Then under the onClick() you can find an if-else statement which is used to maintain the status of the button and the images. There are some functions for the wifiButton like setText(), setTextColor(), setBackgroundColor(). These are used to change the layout attributes of the wifiButton. If you want to know further on these kind of functions, you can visit the developer’s guide for the android development.
Code Snippet for the main activity java file:
public class MainActivity extends AppCompatActivity {
    boolean isSwitchOn;
    @Override
    protected void onCreate(Bundle savedInstanceState) {
        super.onCreate(savedInstanceState);
        setContentView(R.layout.activity_main);
        Button wifiButton = (Button) findViewById(R.id.button1);
        ImageView ledImage = (ImageView) findViewById(R.id.led);
        isSwitchOn = false;
        wifiButton.setOnClickListener(new View.OnClickListener() {
            @SuppressLint("SetTextI18n")
            @Override
            public void onClick(View view) {
                if (!isSwitchOn) {
                    wifiButton.setText("Turn On");
                    wifiButton.setTextColor(Color.parseColor("white"));
                    wifiButton.setBackgroundColor(Color.parseColor("#36BD31"));
                    ledImage.setImageResource(R.mipmap.ledoff);
                    isSwitchOn=true;
                }else{
                    wifiButton.setText("Turn Off");
                    wifiButton.setTextColor(Color.parseColor("white"));
                    wifiButton.setBackgroundColor(Color.parseColor("red"));
                    ledImage.setImageResource(R.mipmap.ledon);
                    isSwitchOn=false;

                }
            }
        });

 }
}
Running Our First Android Application:
Now, let’s run our app before we proceed further towards the Wi-Fi activity section. We have multiple options available to run our app during testing.
Although we have an inbuilt android virtual device(AVD) manager in the Android Studio, the best option is to connect your Android phone to your PC in debugging mode. To turn on the debugging mode, you need to enable the developer options from the settings of your android phone. The procedure to enable the developer mode can be varying with the devices. When you connect your phone to the PC in debugging mode, the Android Studio will automatically recognize the device and then it will ask for your permission. Allow this and your Android phone is now connected in debugging mode to the Android studio. Then you need to allow the permission to install APKs via USB. Now, click on the run button on the toolbar. WIth that, we have successfully built our own Android app.
Demo of Our First Android Application for IoT
The following video is for demonstrating what we have built so far. I recorded this video with a screen recorder in my phone. You can see that whenever I am pressing the button, the text on the button is getting changed and the image too is getting changed.

Code snippet for buttons layout:
<?xml version="1.0" encoding="utf-8"?> <android.support.constraint.ConstraintLayout xmlns:android="http://schemas.android.com/apk/res/android" xmlns:app="http://schemas.android.com/apk/res-auto" xmlns:tools="http://schemas.android.com/tools" android:layout_width="match_parent" android:layout_height="match_parent" tools:context=".MainActivity"> <Button android:id="@+id/button1" android:layout_width="200dp" android:layout_height="wrap_content" android:layout_marginBottom="124dp" android:background="#36BD31" android:text="TURN ON" android:textColor="@color/white" android:textStyle="bold" app:layout_constraintBottom_toBottomOf="parent" app:layout_constraintEnd_toEndOf="parent" app:layout_constraintHorizontal_bias="0.497" app:layout_constraintStart_toStartOf="parent" /> </android.support.constraint.ConstraintLayout>
Code snippet for LED image:
<ImageView android:id="@+id/led" android:layout_width="263dp" android:layout_height="362dp" android:layout_marginBottom="32dp" android:src="@mipmap/ledoff" app:layout_constraintBottom_toTopOf="@+id/button1" app:layout_constraintEnd_toEndOf="parent" app:layout_constraintStart_toStartOf="parent" app:layout_constraintTop_toTopOf="parent" app:layout_constraintVertical_bias="0.751" android:contentDescription="TODO" />
Code Snippet for the main activity java file:
public class MainActivity extends AppCompatActivity { boolean isSwitchOn; @Override protected void onCreate(Bundle savedInstanceState) { super.onCreate(savedInstanceState); setContentView(R.layout.activity_main); Button wifiButton = (Button) findViewById(R.id.button1); ImageView ledImage = (ImageView) findViewById(R.id.led); isSwitchOn = false; wifiButton.setOnClickListener(new View.OnClickListener() { @SuppressLint("SetTextI18n") @Override public void onClick(View view) { if (!isSwitchOn) { wifiButton.setText("Turn On"); wifiButton.setTextColor(Color.parseColor("white")); wifiButton.setBackgroundColor(Color.parseColor("#36BD31")); ledImage.setImageResource(R.mipmap.ledoff); isSwitchOn=true; }else{ wifiButton.setText("Turn Off"); wifiButton.setTextColor(Color.parseColor("white")); wifiButton.setBackgroundColor(Color.parseColor("red")); ledImage.setImageResource(R.mipmap.ledon); isSwitchOn=false; } } }); } }


