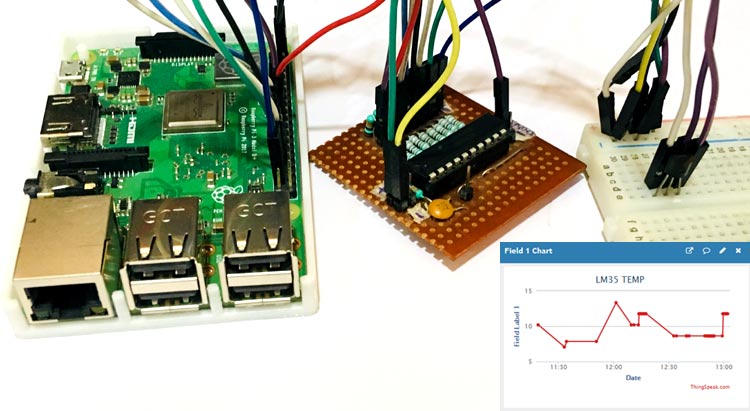
In previous project, we learned about sending data to IoT platform ThingSpeak using Raspberry pi. In this DIY tutorial we are going to send the LM35 temperature sensor data to ThingSpeak cloud to build a Temperature Monitoring System. Using ThingSpeak we can log and monitor the temperature from anywhere in the world. This IoT based temperature monitor is built using Raspberry pi, ADC0804 and LM35 temperature sensor. Raspberry pi reads the current temperature from LM35 using ADC and sends it to ThingSpeak server for live monitoring from anywhere in the world.
Components Required
- Raspberry Pi
- LM35 Temperature Sensor
- ADC0804
- Breadboard
- Resistors
- Connecting Wires
Raspberry Pi LM35 Connection Circuit Diagram

Connection details
|
Pin name |
Raspberry Pi GPIO name |
|
ADC0804 Vcc |
Vcc (+5V) |
|
ADC0804 B0 |
GPIO 12 |
|
ADC0804 B1 |
GPIO 13 |
|
ADC0804 B2 |
GPIO 14 |
|
ADC0804 B3 |
GPIO 30 |
|
ADC0804 B4 |
GPIO 22 |
|
ADC0804 B5 |
GPIO 23 |
|
ADC0804 B6 |
GPIO 24 |
|
ADC0804 B7 |
GPIO 25 |
|
LM35 VCC |
VCC |
|
LM35 GND |
GND |
|
LM35 OUT |
ADC0804 Vin+(7) |
ADC0804
As Raspberry pi don’t has inbuilt ADC, here we are using external ADC chip ADC0804 with Raspberry Pi. It is a very commonly used 8-bit Analog to digital convertor. It is a single channel IC, i.e., it can take only one analog signal as input.

As shown in the pinout of the IC below, the pins DB0 to DB7 are used to read digital values.
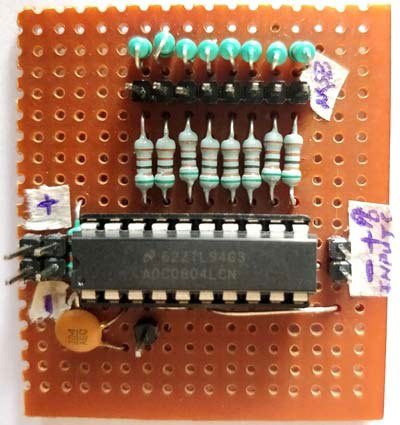
Below is the picture of ADC Module using ADC0804 that we have built on Perf Board:
Steps for building Raspberry Pi Data Logger on Cloud
Step 1: Signup for ThingSpeak
For creating your channel on ThingSpeak you first need to sign up on ThingSpeak. In case if you already have account on ThingSpeak just sign in using your id and password.
For creating your account go to www.thinspeak.com
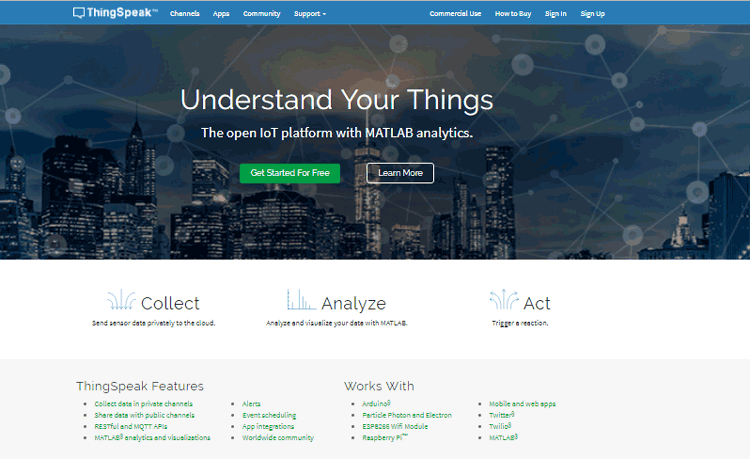
Click on signup if you don’t have account and if you already have account click on sign in.
After clicking on signup fill your details.
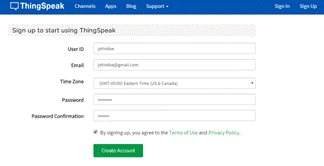
After this verify your E-mail id and click on continue.
Step 2: Create a Channel for Your Data
Once you Sign in after your account verification, Create a new channel by clicking “New Channel” button
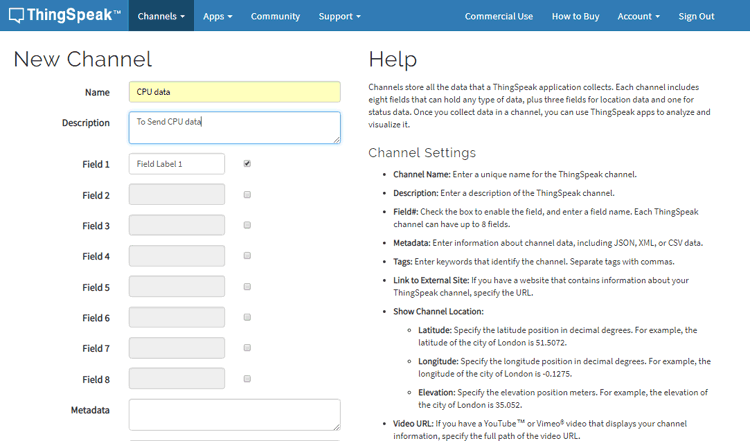
After clicking on “New Channel”, enter the Name and Description of the data you want to upload on this channel. For example I am sending my CPU data (temperature), so I named it as CPU data.
Now enter the name of your data (like Temperature or pressure) in Field1. If you want to use more than one Field you can check the box next to Field option and enter the name and description of your data.
After this click on save channel button to save your details.
Step 3: Getting API Key in ThingSpeak
To send data to ThingSpeak, we need an unique API key, which we will use later in our python code to upload our CPU data to ThingSpeak Website.
Click on “API Keys” button to get your unique API key for uploading your CPU data.
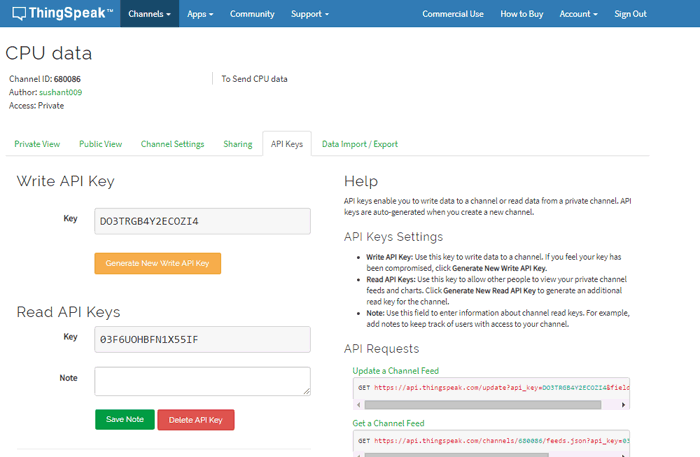
Now copy your “Write API Key”. We will use this API key in our code.
Step 4: Python Code for Raspberry Pi Temperature Monitoring
Complete code is given at the end of this tutorial, just make a file with any name and .py extension and copy-paste the code and save the file. Don’t forget to replace the API key with yours. You can run the python file any time using below command:
python /path/filename.py
Assuming you already installed python in Raspberry pi using this command
sudo apt-get install python
Case 1: If you are using monitor screen then just use the given code.
Now install all libraries:
sudo apt-get install httplib
sudo apt-get install urllib
After installing libraries run your python code (python /path/filename.py)
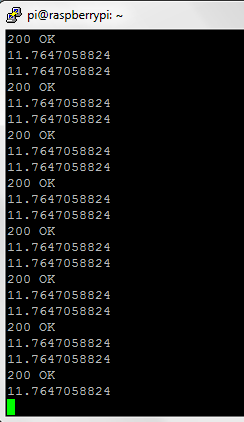
If the code runs properly you will see some CPU temperature values as shown in below image.
Case 2: If you are using “Putty” then you should follow these commands:
First update your pi using:
sudo apt-get update
After this make a file cpu.py using:
nano cpu.py
After creating this file copy your code to this file and save it using CTRL + X and then ‘y’ and Enter.
After this install all libraries using:
sudo apt-get install httplib
sudo apt-get install urllib
After installing libraries run your python code using:
python cpu.py
If the code runs properly you will see some CPU temperature values as shown in above image.
Step 6: Check ThingSpeak site for Temperature Logging
After completing these steps open your channel and you will see the temperature updating into ThingSpeak website.
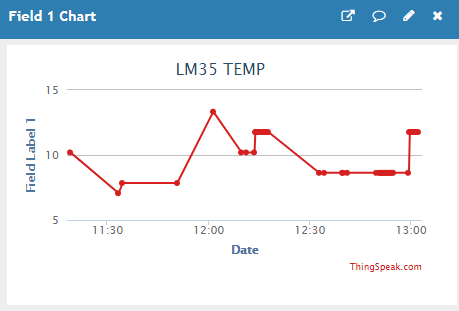
Like this you can send any sensor data connected with Raspberry pi to the ThingSpeak Cloud. You can also use DHT11 sensor with Raspberry Pi and send the temperature & humidity data to ThingSpeak and for using DHT11 sensor you don’t need to use ADC module.
Complete Python code for this Raspberry Pi based temperature monitor is given below. Code is easy and self-explanatory.
import RPi.GPIO as IO
import time
import urllib
import httplib
import sys
IO.setwarnings(False)
key = "BJ4IXB77RG348LRW"
b0 =0
b1 =0
b2 =0
b3 =0
b4 =0
b5 =0
b6 =0
b7 =0
IO.setmode (IO.BCM)
IO.setup(12,IO.IN)
IO.setup(13,IO.IN)
IO.setup(14,IO.IN)
IO.setup(30,IO.IN)
IO.setup(22,IO.IN)
IO.setup(23,IO.IN)
IO.setup(24,IO.IN)
IO.setup(25,IO.IN)
while 1:
if (IO.input(25) == True):
time.sleep(0.001)
if (IO.input(25) == True):
b7=1
if (IO.input(24) == True):
time.sleep(0.001)
if (IO.input(24) == True):
b6=1
if (IO.input(23) == True):
time.sleep(0.001)
if (IO.input(23) == True):
b5=1
if (IO.input(22) == True):
time.sleep(0.001)
if (IO.input(22) == True):
b4=1
if (IO.input(30) == True):
time.sleep(0.001)
if (IO.input(30) == True):
b3=1
if (IO.input(14) == True):
time.sleep(0.001)
if (IO.input(14) == True):
b2=1
if (IO.input(13) == True):
time.sleep(0.001)
if (IO.input(13) == True):
b1=1
if (IO.input(12) == True):
time.sleep(0.001)
if (IO.input(12) == True):
b0=1
x = (1*b0)+(2*b1)
x = x+(4*b2)+(8*b3)
x = x+(16*b4)+(32*b5)
x = x+(64*b6)+(128*b7)
x = x/1.275
#temp=100,ref=2000mv,read=255/200=1.275countper10mv or 1.275count for 1degree
print(x)
params = urllib.urlencode({'field1': x, 'key':'BJ4IXB77RG348LRW' })
headers = {"Content-typZZe": "application/x-www-form-urlencoded","Accept": "text/plain"}
conn = httplib.HTTPConnection("api.thingspeak.com:80")
conn.request("POST", "/update", params, headers)
response = conn.getresponse()
print x
print response.status, response.reason
data = response.read()
conn.close()


