


A Camera is used to record visual images in the form of photographs, film, or video signals. Here, we are also going to do the same by interfacing the camera with the Raspberry Pi. In this project, we are going to stream our Pi camera video live over the internet using Pi.
To stream Pi camera video over the internet we will use the below-mentioned methods:
- Stream video live to the web browser using MJPG-streamer application.
- Stream video to Adafruit IO dashboard.
By using MJPG-streamer application we can stream our video live without any delay, you can access this live video using any device that is connected to the same network with Pi.
But in the case of Adafruit IO, the camera will detect the motion and upload the images on Adafruit IO dashboard in every 2 seconds.
Here, in this tutorial, we are going to demonstrate you both the methods of streaming the live video over the internet.
Components Required
- Raspberry Pi
- Pi camera

Raspberry Pi Camera Setup
To interface Pi Camera with Raspberry Pi, follow the steps below:
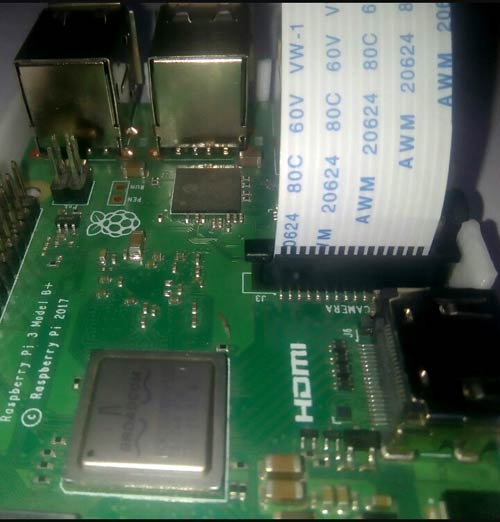
Step 1:- First, turn off your Pi and then locate the camera connector, a long black connector between the HDMI port and Ethernet port. The connector is marked with ‘CAMERA’ on the board.
Step 2:- To connect camera pull up on the ends of the black plastic connector and insert camera cable as shown in below image. Camera cable’s metal pads should face the metal pads inside the connector. Now press down on the ends of the black connector.
Step 3:- Now after this will need to enable the camera. Go to the interfacing options using the below command:
sudo raspi-config
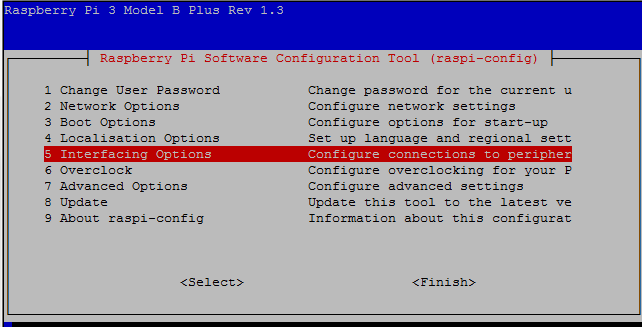
Step 4:- After this, a screen will open, and on that screen click on ‘Interfacing Options’.
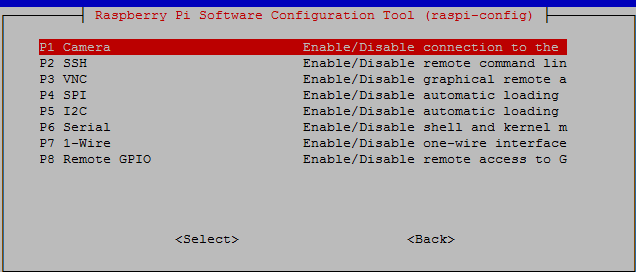
Step 5:- Now in the next screen click on ‘Camera’.
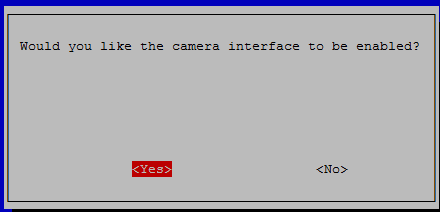
Step 6:- Confirm the selection by choosing ‘Yes’.
Step 7:- Now exit from this window by selecting the ‘Finish’ option.
In the next window, a dialog will appear asking to reboot the system, select the ‘Yes’ option.
Step 8:- After the reboot, test the camera to check whether its working or not by using the following command:
raspistill -o cam_test.jpg
Step 9:- If the camera works properly, the on-board red LED of the camera will glow whenever you click as photo.
Step 10:- If you see the command fail error, go back and check that you have enabled the camera or not and make sure the camera cable is connected firmly with the board.
You can also see our other projects for interfacing Raspberry Pi with different sensors.
Method 1: Stream video to Adafruit IO dashboard
Step 1 Adafruit IO Setup
For Adafruit IO setup, first sign up on Adafruit IO website by clicking on ‘Get started for Free’ at the top right corner of the screen.
Now after this you need to create a feed, which you can do by clicking on ‘Feed’.
Click on ‘Actions’ to proceed and then click on ‘Create a New Feed’.
Note: For detailed description about creating a feed, follow the link.
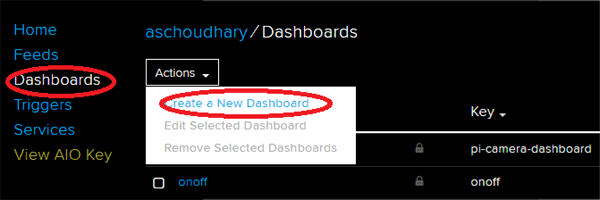
After creating a feed now you need to create a ‘Dashboard’. To create dashboard click on the “Create Dashboard” button in the upper right corner and give name to the new dashboard like Pi Camera Dashboard.
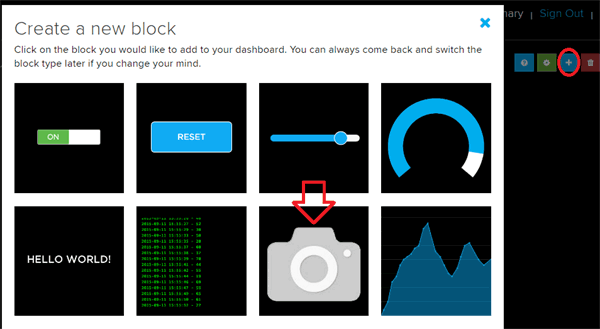
Now to add block click on ‘+ sign’ on the top right corner of the screen and scroll down to the image block and click on Create.
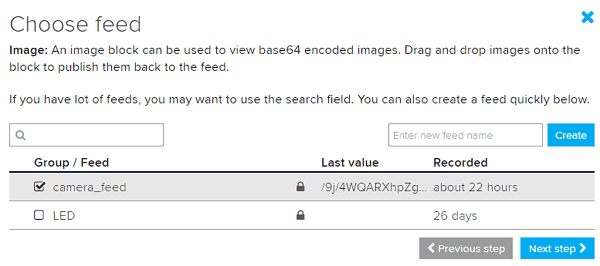
In the ‘Choose feed’ window, click on the feed named camera_feed and click on ‘Next step’.
After that click on Create Block to create the image block. Also, you can use Adafruit IO for developing various IoT projects.
Step 2 Raspberry Pi Setup
To setup the Pi, you need to install the Node.js on your Raspberry Pi. For installing the Node.js go to home directory using ‘cd ~’ command and then download a pre-built Node.js package from the node-arm project and install it.
cd ~
wget http://node-arm.herokuapp.com/node_latest_armhf.deb
sudo dpkg -i node_latest_armhf.deb
For checking, whether the Node.js is installed or not use the below commands:
node –v
npm –v
This will show you the current version of Node.js.
v4.2.1
2.14.7
After installing the Node.js, now you need to install ‘adafruit-io-camera’ on your Pi. This tool is used to monitor the Pi camera and send pictures to an Adafruit IO feed.
sudo apt-get update
sudo apt-get install -y imagemagick
sudo npm install --global --no-optional forever forever-service adafruit-io-camera
After this use your ‘Username’ and ‘AIO Key’ to provide a path to your Adafruit IO account.
adafruit-io camera config --username YOUR USERNAME --key AIO KEY
Enter your username and AIO key on the place of ‘YOUR USERNAME’ and ‘AIO KEY’ respectively.
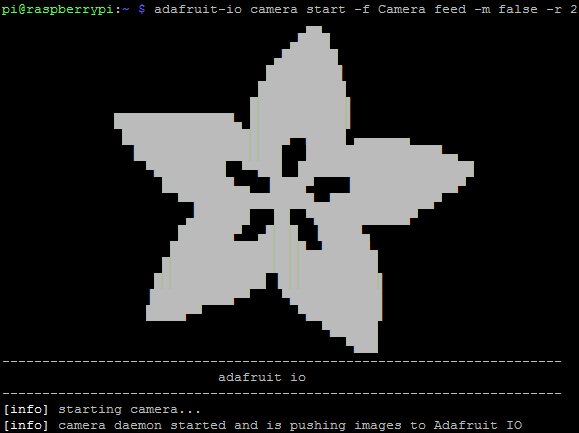
Now start your camera using the following command:
adafruit-io camera start -f camera_feed -m false -r 2
Here ‘camera_feed’ is the name of feed that you have created earlier. You can change it according to your feed name.
Once the camera tool loads, the terminal should look like this:
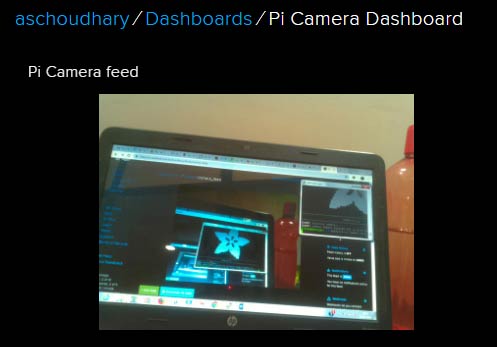
Now navigate to your Adafruit IO dashboard. It takes some time for the camera to start and upload images on the dashboard.
Method 2: Stream video live to the web browser using MJPG-streamer application
In this method, we will use MJPG-streamer application to stream our Pi camera video on web browser.
First of all, create a new folder on your Pi, by using the below command:
mkdir projects
cd projects/
Now to install MJPG-streamer application we first need to install source control system called git by using the below command:
sudo apt-get install git
Now download MJPG-streamer application using this command :
git clone https://github.com/jacksonliam/mjpg-streamer.git
To install MJPG-streamer application use these commands:
cd mjpg-streamer/
cd mjpg-streamer-experimental/
sudo apt-get install cmake
sudo apt-get install python-imaging
sudo apt-get install libjpeg-dev
make CMAKE_BUILD_TYPE=Debug
sudo make install
Now we need to set a path for libraries, so that the program can easily find libraries. Don't forget the dot ('.') at the end of the command.
export LD_LIBRARY_PATH=.
Now after completing the setup, run the MJPG-streamer.
./mjpg_streamer -o "output_http.so -w ./www" -i "input_raspicam.so -hf"
Then, navigate to your browser and browse for the following address:
http://Hostname:8080
Change the hostname with your Pi’s IP address.
Hence, we have successfully streamed our video live on the internet using Adafruit IO and MJPG-streamer.
You can also use other IoT platforms like ThingSpeak, IFTTT, Blynk, Firebase, Artik, Particle Cloud, for designing amazing IoT projects.


