If This Then That, also known as IFTTT is a free web-based service to create chains of simple conditional statements, called applets. IFTTT provides a platform that connects apps, devices, and services from different developers in order to trigger some actions involving those apps, devices, and services. So in this project, we are going to integrate Particle Cloud with IFTTT so that IFTTT can read temperature data from Particle and can trigger a warning message to the user. To trigger messages we will create an IFTTT applet for a particular variable. Previously, we have controlled LED using Particle App, Particle Cloud Console, and Particle using Raspberry Pi
Components Required
Hardware components
- Raspberry Pi
- DHT11 Sensor
- Jumper Wires
Online Services
- IFTTT
- Particle Build Web IDE
Circuit Diagram
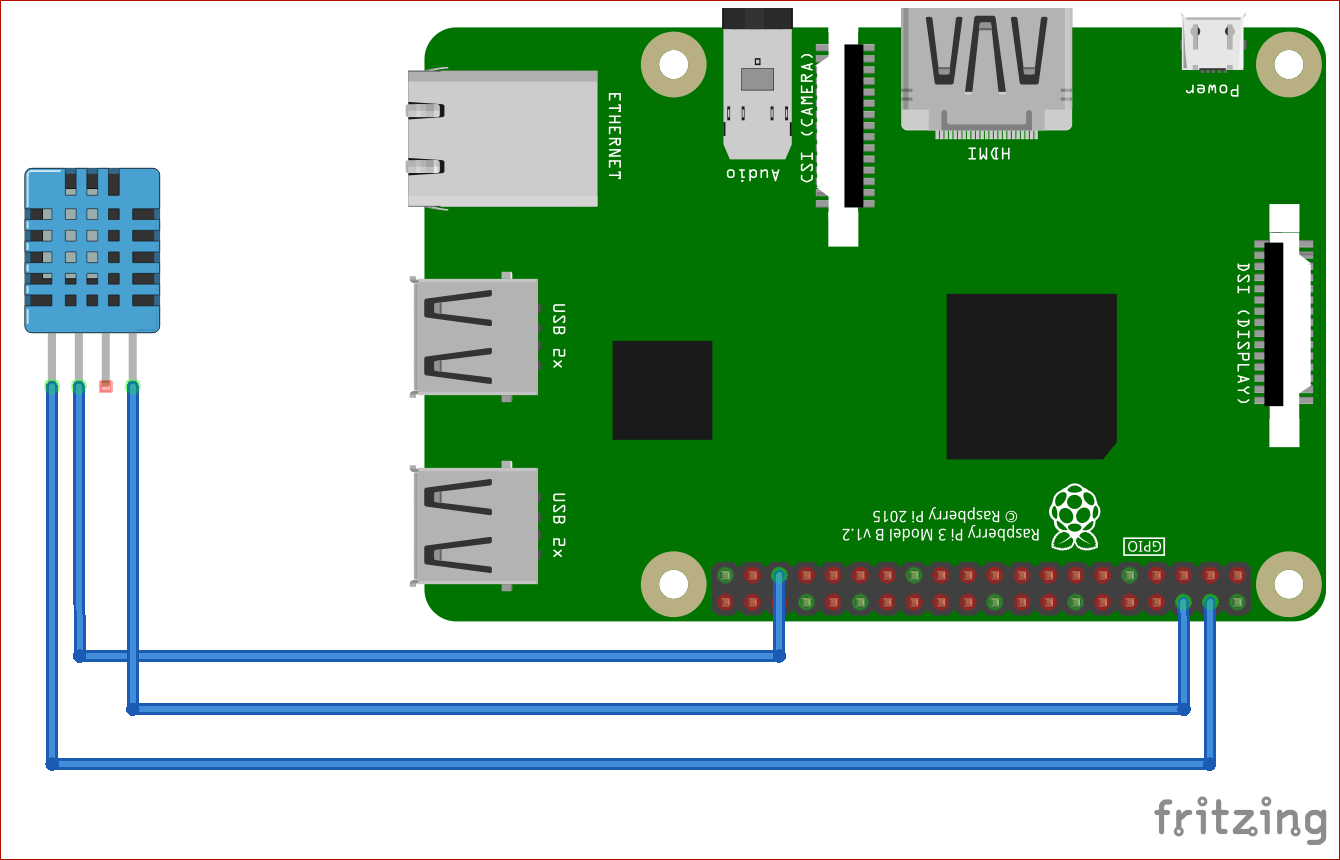
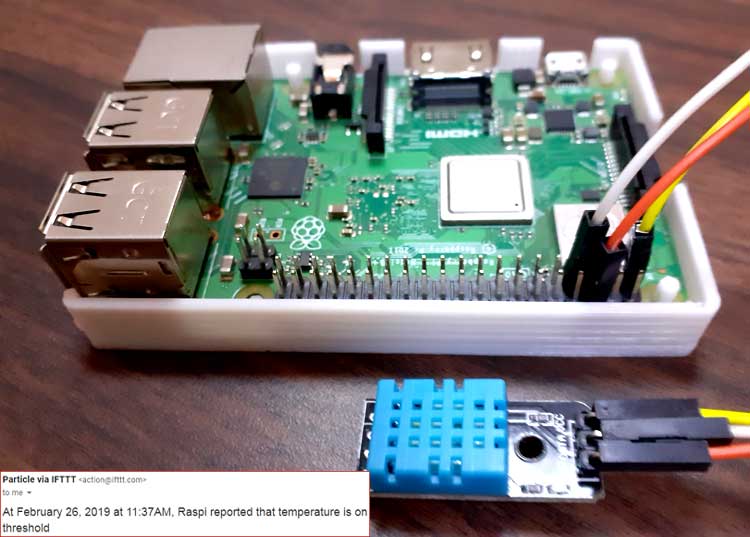
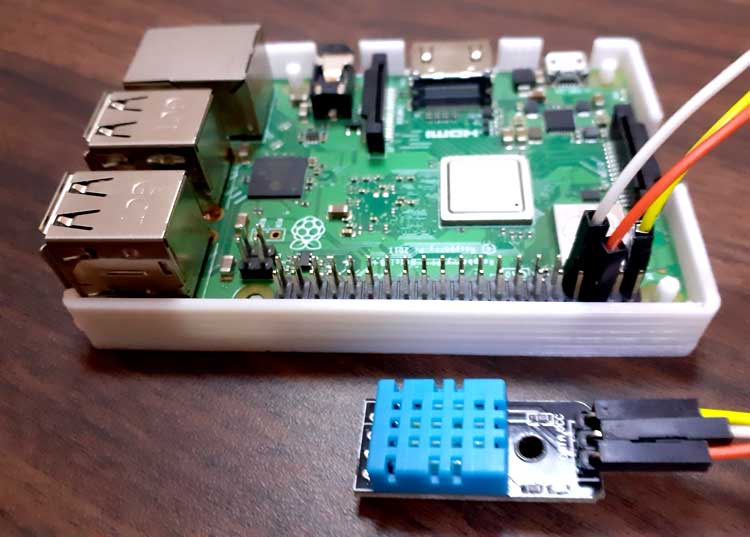
Connect Raspberry Pi and DHT11 as mentioned below:
|
S.NO. |
Raspberry Pi |
DHT11 |
|
1 |
Vin |
VCC |
|
2 |
Data |
D7/GPIO19 |
|
3 |
GND |
GND |
Particle Web IDE Setup
Start from creating account on Particle cloud , if you don’t have one and then add your device. If you need any help regarding account creation and adding a device on particle cloud, navigate to our previous project Control LED Using Particle Cloud Console and Raspberry Pi.
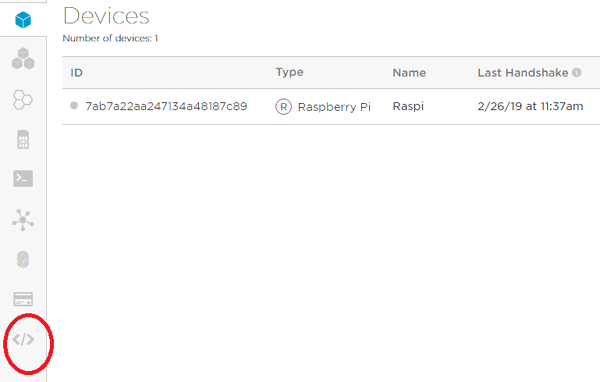
Now after adding your, device go to Web IDE in the options on the left side.
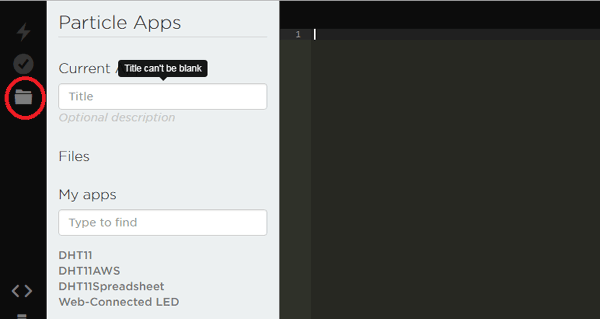
Now create a new app and save it using save option in the top left corner.
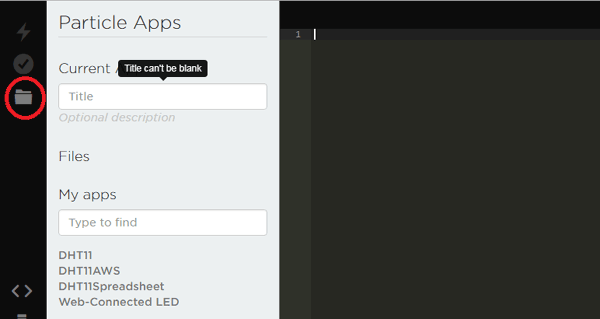
After creating app, now copy and paste the complete code (given at the end) into Web IDE.
Programming Code Explanation for Interfacing Particle and Pi
The complete code for Interfacing Particle with Raspberry Pi is given at the end.
Include library for DHT sensor, and if it gives any error during flashing then reinstall the library from the library menu in Web IDE.
#include <Adafruit_DHT.h> // Adafruit Library
Now, initialize the DHT11 pin, which is connected to pi and the DHT sensor type
#define DHTPIN D7    // Define DHT pin connected to Raspberry Pi’s GPIO19/D7 Pin
#define DHTTYPE DHT11    // Define DHT Sensor Type
In next step initialize the variables that will be used in code
// Initialize Variables
int temperature = 0;
int humidity;
In void setup declare particle.variable function. This function will be used to trigger messages and dht.begin() starts the DHT sensor.
void setup() {
    Particle.variable("temperature", temperature);   //Declare Temperature Variable
    dht.begin();
}
In this void loop function, the DHT sensor will measure temperature and humidity. And, Particle.publish function is used to publish the data Particle cloud.
void loop() {
    // Temperature measurement in farenheit
    temperature = dht.getTempFarenheit();

    // Humidity measurement
    humidity = dht.getHumidity();
    Particle.publish ("temperature", String(temperature) + " °F");

     delay(500);
     Particle.publish ("humidity", String(humidity) + "%");
     delay(500);

     String temp = String(temperature);
     Particle.publish("temp", temp, PRIVATE);
Here, if condition will check whether the temperature is low or high and publish it on Particle Cloud using Particle. publish function.
  if( temperature > 30 ) {
 // if condition is true then print the following
  Particle.publish("High Temp", "True");
} else {
 // if condition is false then print the following
  Particle.publish("Low Temp", "True");
}
IFTTT Setup for Particle Cloud
To create an IFTTT applet and get the URL for triggering the E-mail to specific mail id go according to the below mentioned steps:
Step 1:- Open IFTTT website, create an account if you are new with this.
Step 2:- After creating an account, click on My Applets.
Step 3:- Now in the next window click on ‘New Applet’ on the top right corner.

Step 4:- After this click on ‘+ this’ to add Particle cloud.

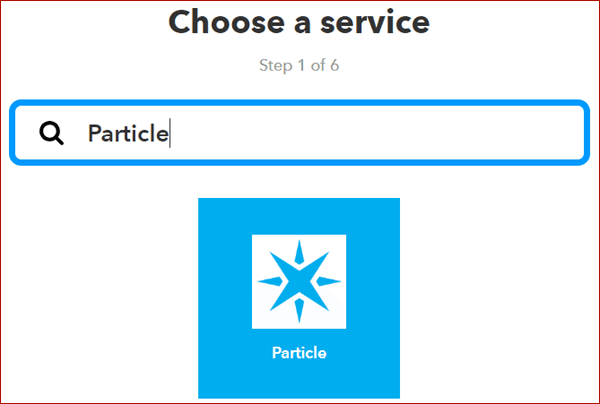
Step 5:- Search for particle then click on the Particle Icon under services.
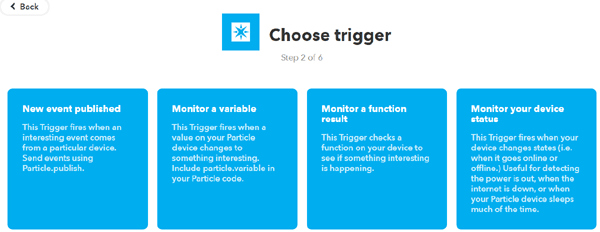
Step 6:- Then, click on ‘Monitor a Variable ’.
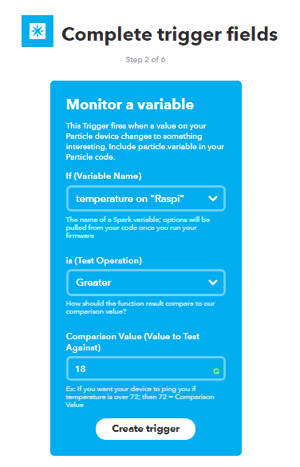
Step 7:- Here, in this window enter the Variable name, test operation (Greater, Equal or Lower) and the value at which you want to trigger a message and then click on ‘Create Trigger’.
Step 8:- After creating trigger now in the next window click on ‘+ that’.

Step 9:- Choose the service by which you want to send trigger message. Click on Email.

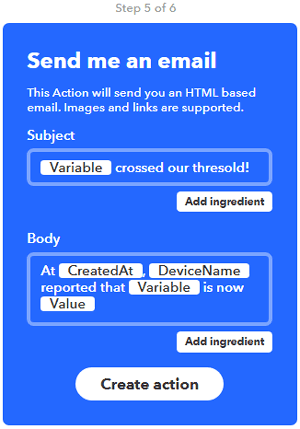
Step 10:- Now, enter the subject and body of your mail in the next window and then click on create action.
Step 11:- At last, click on finish to complete your setup.
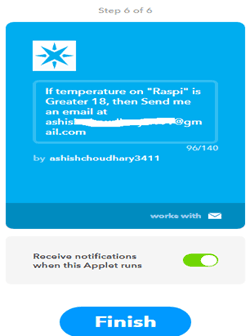
Now your applet is created. Go to Particle Web IDE and flash your code. Whenever temperature will go past 18 it will you send you a mail like this:

Hence, we have successfully monitored the temperature using Raspberry Pi, IFTTT and Partcile Cloud
#include <Adafruit_DHT.h> // Adafruit Library
// DHT parameters
#define DHTPIN D7 // Define DHT pin connected to Raspberry Pi’s GPIO19/D7 Pin
#define DHTTYPE DHT11 // Define DHT Sensor Type
// Initialize Variables
int temperature = 0;
int humidity;
// DHT sensor
DHT dht(DHTPIN, DHTTYPE);
void setup() {
Particle.variable("temperature", temperature); //Declare Temperature Variable
dht.begin();
}
void loop() {
// Temperature measurement in farenheit
temperature = dht.getTempFarenheit();
// Humidity measurement
humidity = dht.getHumidity();
Particle.publish ("temperature", String(temperature) + " °F");
delay(500);
Particle.publish ("humidity", String(humidity) + "%");
delay(500);
String temp = String(temperature);
Particle.publish("temp", temp, PRIVATE);
delay(30000);
if( temperature > 30 ) {
// if condition is true then print the following
Particle.publish("High Temp", "True");
} else {
// if condition is false then print the following
Particle.publish("Low Temp", "True");
}
}


