


ARTIK is an IoT platform which allows data sharing for IoT. In this session we are using ARTIK cloud service with Raspberry Pi to make a demo IoT application. Raspberry pi has on-board GPIO pins to connect other peripherals and sensors, has inbuilt Wi-Fi to connect with network and upload sensor data directly to any IoT cloud platform without using any external components. In some of our previous tutorials we used Raspberry pi to connect with various other popular cloud platforms:
- Control Raspberry Pi GPIO with Adafruit IO to trigger an LED
- IoT Controlled LED with Blynk App and Raspberry Pi
- How to Trigger LED using IFTTT and Raspberry Pi
- How to Send Data to ThingSpeak Cloud using Raspberry Pi
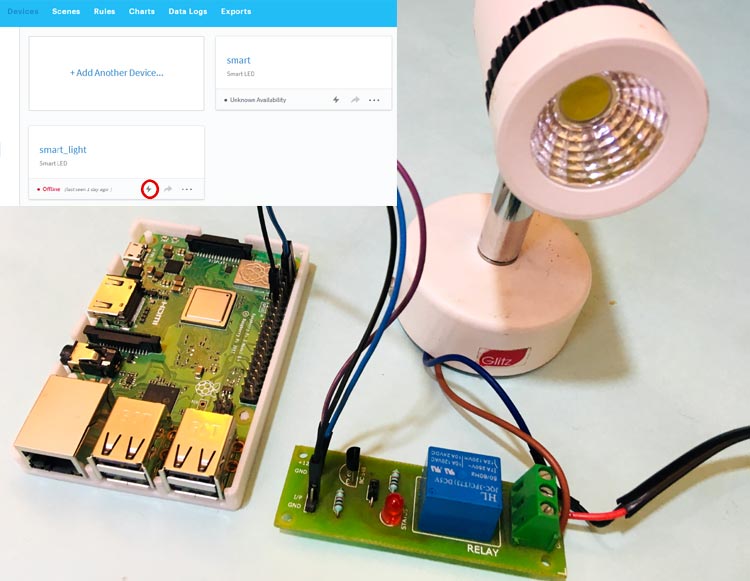
In our daily life we sometime forget to turn off our home appliances like TV, fan, AC etc. By using ARTIK Cloud we can turn off them from anywhere. As in the previous project we have demonstrated LED control using Artik Cloud and Raspberry Pi.
Components Required
- Raspberry Pi
- Lamp
- Relay
- Jumper Wires
- ARTIK Cloud
Relay
Relay is an electrically operated switch. Relays are used when we have to control many circuits by one signal. Relay is controlled by small current and used to switch larger current. Generally relay has 5 terminals as shown below:
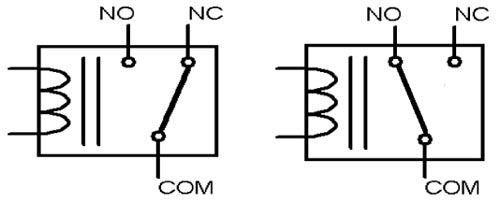
When no voltage applied to the coil, COM terminal will be connected to NC (normally closed) terminal. And, when voltage is applied to the coil, an electromagnetic field generated that attract the armature. By which the COM and NO (normally open) terminal gets connected and allows a much larger current to flow.
A small Driver circuit that consist a Transistor, Diode and a resistor is used to configure the relay. Where the transistor is used to amplify the current and resistor is used to provide biasing voltage to transistor. In case when the transistor is Off, Diode is used to prevent the relay from reverse current flow. Here, in this project we have used 6V Relay module.
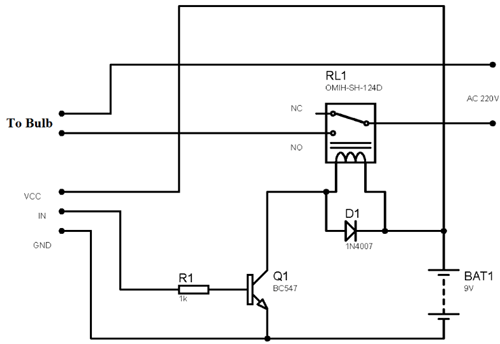
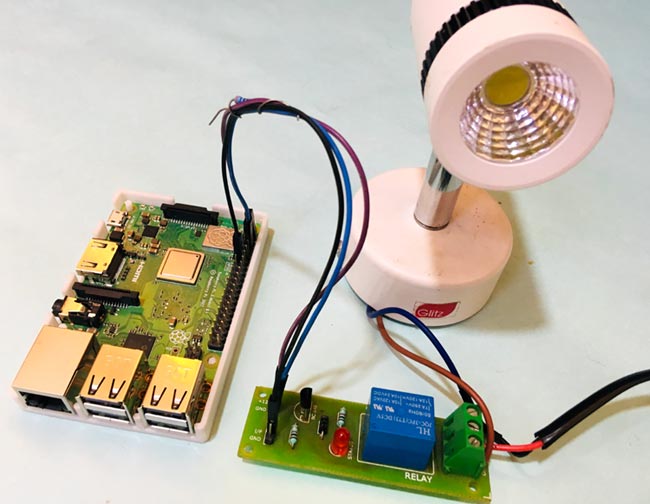
Circuit Diagram
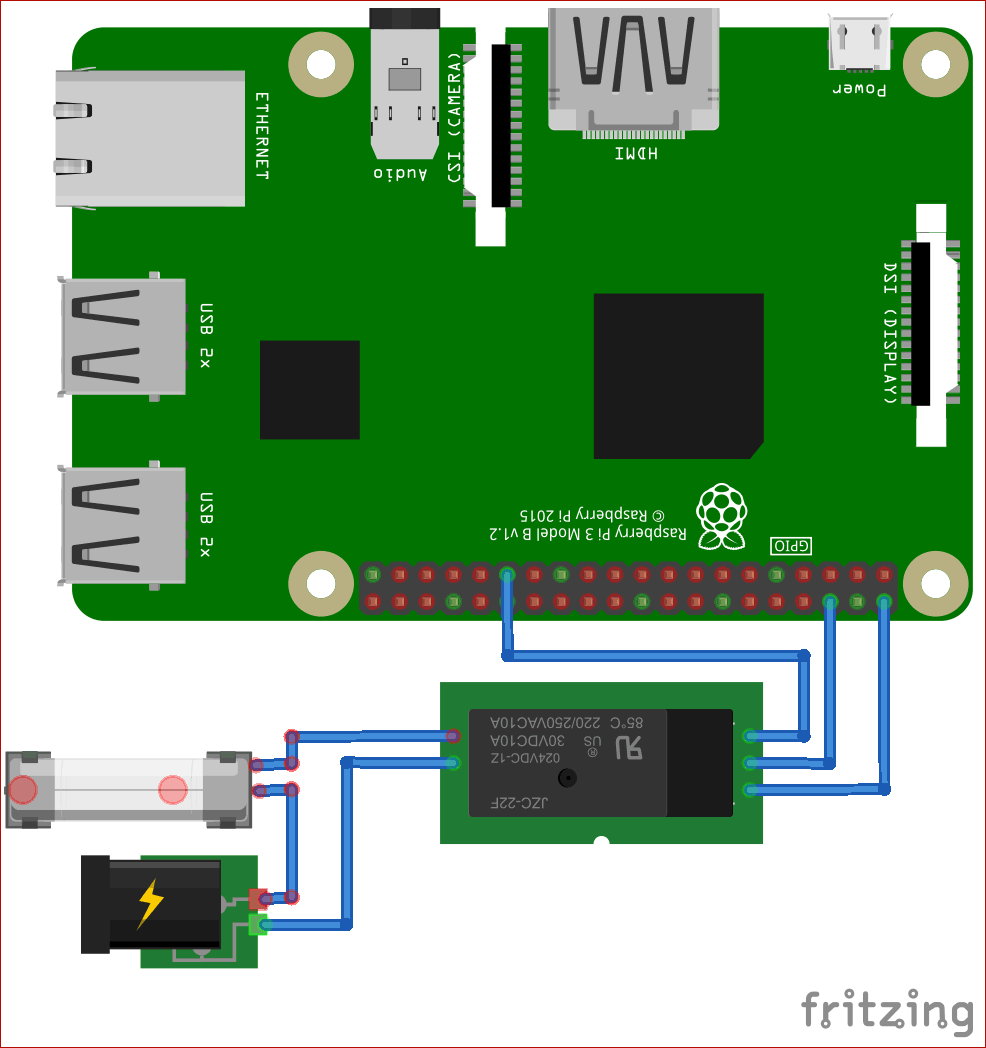
Raspberry Pi’s Vcc is connected to the Relay's Vcc. Connect the Raspberry's GND to the Relay's GND and Connect the Raspberry Pi’s 29th pin to the Relay's IN.
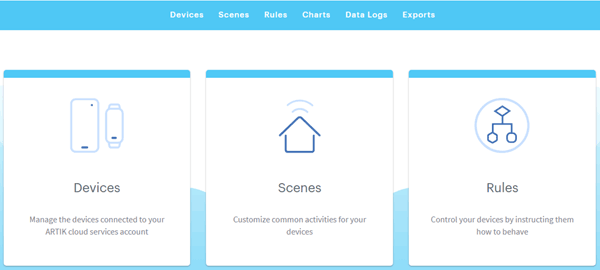
ARTIK Cloud is an integrated Smart Internet of Things platform which can be used to control motors, read sensor data, and more over the internet. To control device in ARTIK Cloud first you have to setup your device.
Step 1 Artik Cloud Account Setup with Raspberry Pi
First, sign up into the ARTIK Cloud developer dashboard. For this navigate to artik cloud’s official site (https://developer.artik.cloud/).
Click on SIGN UP button to sign up.
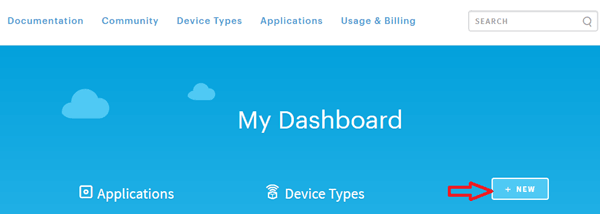
Then, go to dashboard and click on ‘+New’ to add a device. After this enter device display name and unique name. Click on ‘Create Device Type’ to create your device type and this will redirect you to a page listing your device types.
After this click on ‘New Manifest’ to create a ‘Manifest’.

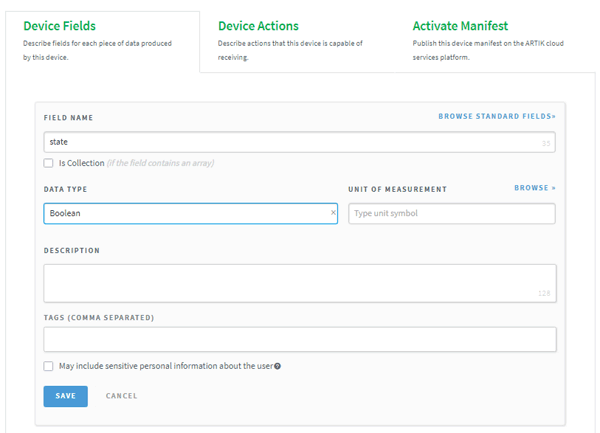
Now, in "Device Fields" tab, choose "STATE" as the Field Name and "Boolean" as Data Type and click on save.
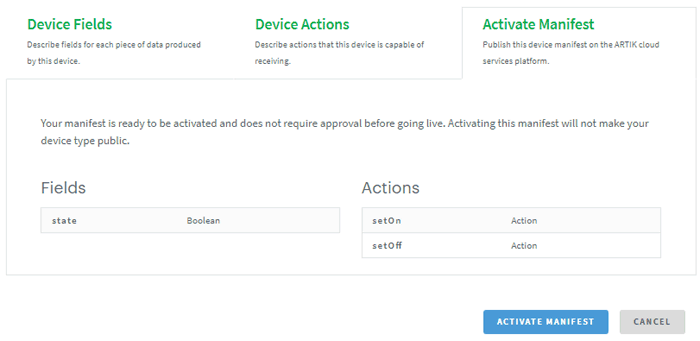
After this in ‘Device Action’ tab click on "NEW ACTION" and then add "setOn" in the ‘ACTION’ menu. Again click on "NEW ACTION" and then add "setOff" in the ‘ACTION’ menu and click on save.
Then click on ‘Activate manifest’ tab to complete your device setup.
After this, click on ‘My Cloud’ on top right corner then a window will open on the dashboard, on which you have to click on ‘Devices’ and give it a name.
Now to generate your Token click on ‘device’. To get a detailed description over how to generate token follow our previous article: Control LED with ARTIK Cloud and Raspberry Pi.
Step 2 Raspberry Pi Setup
First update your Raspberry Pi using
sudo apt-get update
sudo apt-get upgrade
Now if you have not already installed Node.js on your Pi then install it using these commands:
npm install ws
npm install rpi-gpio
Now create a folder and paste your code using:
Sudo nano home lamp.js
Complete python code is given at the end of this tutorial, just copy-paste the code in above created file and run your code using:
sudo node home lamp.js
If your code runs properly then your terminal window will look like this:
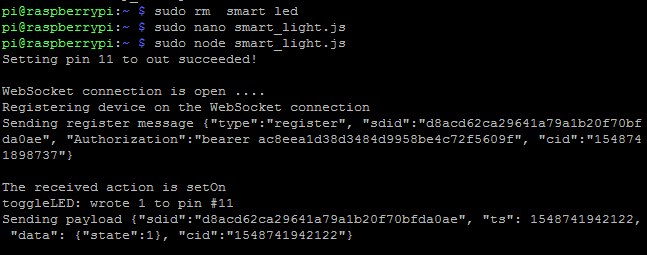
After this navigate to your Artik cloud page and test your Lamp. Click on ‘Energy’ sign to send signals to your device.

So we have successfully demonstrated to control Home Appliances using Artik Cloud with Raspberry Pi, check our previous article for Controlling LED using Artik Cloud and Raspberry Pi.
Python Code:
var webSocketUrl = "wss://api.artik.cloud/v1.1/websocket?ack=true";
var device_id = "<YOUR DEVICE ID>";
var device_token = "<YOUR DEVICE TOKEN>";
var WebSocket = require('ws');
var isWebSocketReady = false;
var ws = null;
var gpio = require('rpi-gpio');
var myPin = 29;
var myLampState = 0;
function getTimeMillis(){
return parseInt(Date.now().toString());
}
function start() {
isWebSocketReady = false;
ws = new WebSocket(webSocketUrl);
ws.on('open', function() {
console.log("WebSocket connection is open ....");
register();
});
ws.on('message', function(data) {
console.log("Received message: " + data + '\n');
handleRcvMsg(data);
});
ws.on('close', function() {
console.log("WebSocket connection is closed ....");
exitClosePins();
});
gpio.setup(myPin, gpio.DIR_OUT, function(err) {
if (err) throw err;
myLampState = false;
console.log('Setting pin ' + myPin + ' to out succeeded! \n');
});
}
function register(){
console.log("Registering device on the WebSocket connection");
try{
var registerMessage = '{"type":"register", "sdid":"'+device_id+'", "Authorization":"bearer '+device_token+'", "cid":"'+getTimeMillis()+'"}';
console.log('Sending register message ' + registerMessage + '\n');
ws.send(registerMessage, {mask: true});
isWebSocketReady = true;
}
catch (e) {
console.error('Failed to register messages. Error in registering message: ' + e.toString());
}
}
function handleRcvMsg(msg){
var msgObj = JSON.parse(msg);
if (msgObj.type != "action") return; //Early return;
var actions = msgObj.data.actions;
var actionName = actions[0].name;
console.log("The received action is " + actionName);
var newState;
if (actionName.toLowerCase() == "seton") {
newState = 1;
}
else if (actionName.toLowerCase() == "setoff") {
newState = 0;
} else {
console.log('Do nothing since receiving unrecognized action ' + actionName);
return;
}
toggleLamp(newState);
}
function toggleLamp(value) {
gpio.write(myPin, value, function(err) {
if (err) throw err;
myLampState = value;
console.log('toggleLamp: wrote ' + value + ' to pin #' + myPin);
sendStateToArtikCloud();
});
}
function sendStateToArtikCloud(){
try{
ts = ', "ts": '+getTimeMillis();
var data = {
"state": myLampState
};
var payload = '{"sdid":"'+device_id+'"'+ts+', "data": '+JSON.stringify(data)+', "cid":"'+getTimeMillis()+'"}';
console.log('Sending payload ' + payload + '\n');
ws.send(payload, {mask: true});
} catch (e) {
console.error('Error in sending a message: ' + e.toString() +'\n');
}
}
function exitClosePins() {
gpio.destroy(function() {
console.log('Exit and destroy all pins!');
process.exit();
});
}
start();
process.on('SIGINT', exitClosePins);


