IoT is one of the most hyped technologies at the moment. A number of IoT platforms like Adafruit IO, Blynk, Particle, IFTTT, Artik, Firebase, Thingspeak and etc. are now available and Cayenne is one of them. But Cayenne is a good choice for a number of reasons liks:
- To setup Cayenne is faster and easy, as it connects with Pi within few minutes.
- In Cayenne, we can add sensors, motors, actuators, GPIO boards, and more to control them remotely.
- Cayenne have customizable dashboards with drag-and-drop widgets for different connected devices.
- We can create triggers and threshold alerts for devices, events, and actions.
- Easy to automate the process for one or multiple devices.
Cayenne platform consists of four key components:
- The first component is the Cayenne agent software that runs on the RaspberryPi, and responsible for communicating with the server.
- The second component is the Cayenne cloud that processes and stores user and sensor data from the device.
- The third component is the online dashboard that provides a graphical environment for working with your IoT project, as well as monitoring and managing the device.
- And finally the fourth component is the Cayenne app for Android and IOS is used to set up and manage Cayenne on the Rasp Pi.
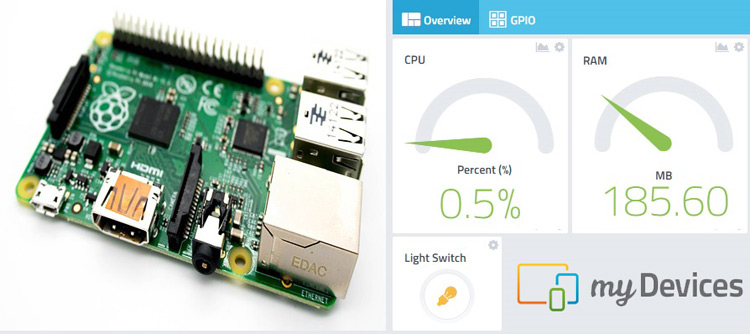
In this project, we are going to set up Raspberry Pi for Cayenne. Below is all the components that will be needed for setting up myDevices Cayenne for Raspberry Pi.
Components Required
Hardware
- Raspberry Pi
Software
- Cayenne Software
Cayenne Setup with Raspberry Pi
Start with creating an account on myDevices Cayenne. Scroll down and click on ‘TRY IT’ to sign up for a free account.
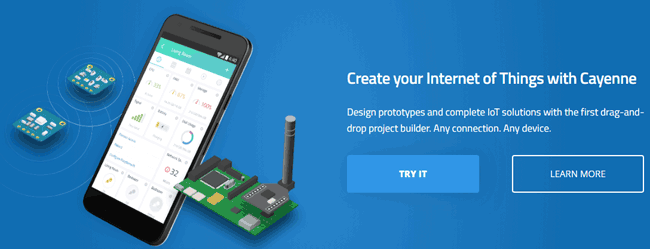
After sign up, it will redirect you to a new window, where you have to choose a device to connect with the Cayenne platform. Choose Raspberry Pi.

In the next window, you will get two options to connect the Pi with your account.
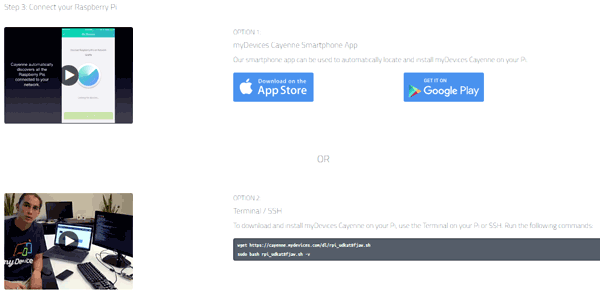
The first option is to connect pi using Cayenne smartphone app and second is using Raspberry Pi Terminal.
Case 1
To connect it with a smartphone, download Cayenne app from play store and log in.
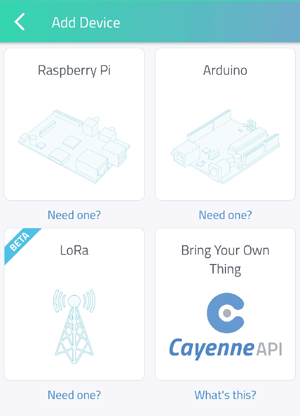
Now to add a device by clicking on ‘Add Device’ and in next window click on Raspberry Pi.
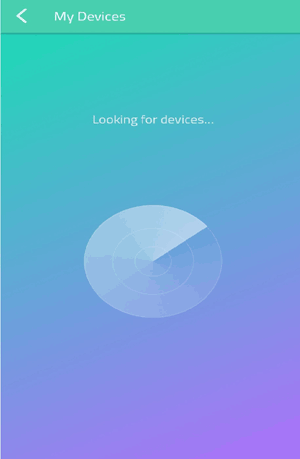
Now it will search for the available device (make sure that your pi is turned on and connected to WiFi ).
Now click on the connected device, it will take you to the dashboard.
Case 2
To connect using your Pi terminal just run these commands on terminal:
wget https://cayenne.mydevices.com/dl/rpi_udkat8fjaw.sh
sudo bash rpi_udkat8fjaw.sh –v
It will connect the Raspberry Pi with the Cayenne platform.
Now click on the device it will take you to the dashboard.

Controlling LED from Cayenne Dashboard
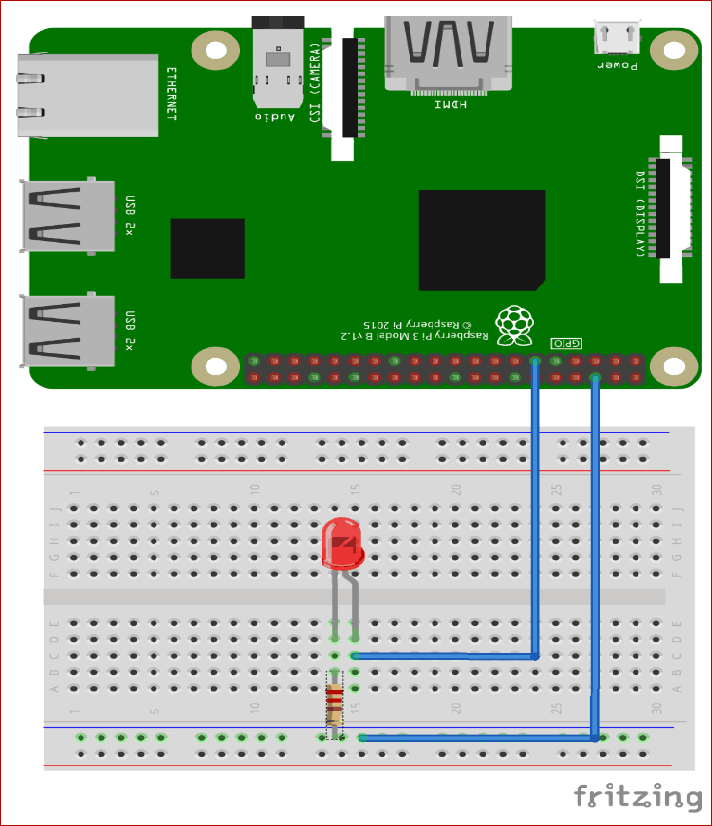
Now we will control led from Cayenne dashboard. Connect the LED as shown in below circuit diagram:
Now go to GPIO menu as shown in below image:
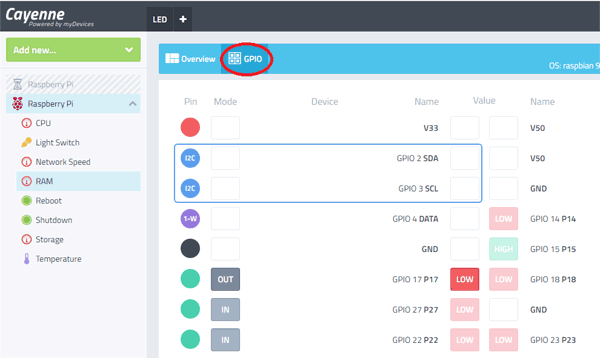
Now go to GPIO 17 pin and click on input, and change it to output. Then to change led state click on ‘LOW’ button, it will change to ‘HIGH’. Now your LED is on.
Adding Button on Cayenne Dashboard
You can also add a button to control your LED.
For this click on ‘Add new’ and then click on ‘Device/Widget’.

After this click on ‘Actuators’ and then light.
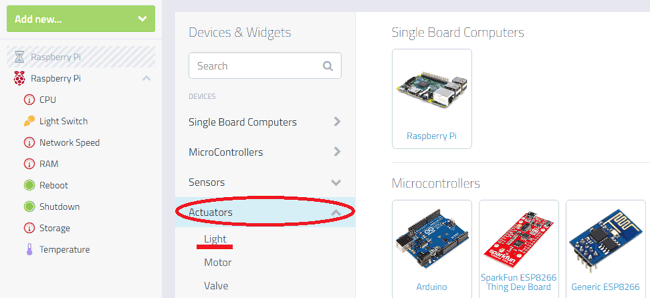
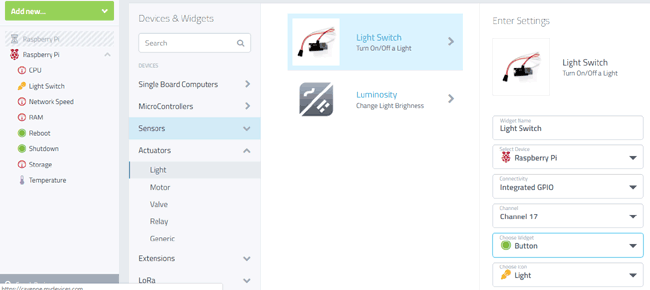
Now click on ‘Light Switch’ and fill the details as shown in below image. Then click on Add Widget.
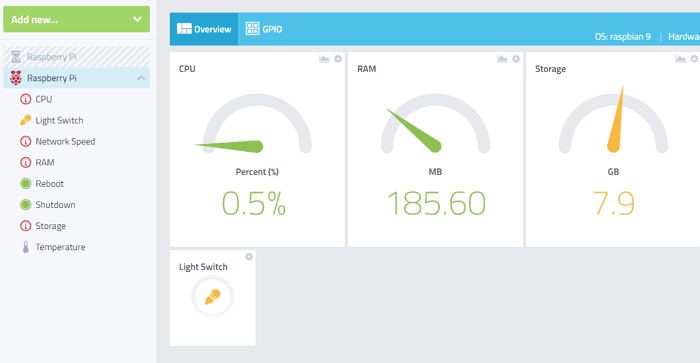
It will redirect you to dashboard. Now you will see a button is added to your dashboard to control the LED.
Hence, we have successfully setup the Cayenne IoT platform with Raspberry Pi. You can also check our various getting started tutorial of different IoT platform with Pi.


