


ESPHome is a simple yet powerful system that allows users to control ESP boards using YAML configuration files. It allows users to quickly and easily build custom firmware for sensors and devices without any programming skills. ESPHome supports a long list of devices, sensors, and protocols that can be configured with just a few lines of YAML. Apart from that, it can also control lights, displays, and even more. It can be integrated with Home Assistant in few clicks.
There are mainly two methods for installing ESPHome. The quickest and easiest way is using the Home Assistant add-on, the second way is to install through python using pip. In this tutorial, we are going to install ESPHome through the Home Assistant add-on. Once the installation is complete, we will test it by controlling an LED and reading DHT11 sensor data. If you are not familiar with Home Assistant, follow our previous tutorial on Getting Started with Home Assistant. You can also check our previous tutorial on Flashing Tasmota on ESP8266-01.
Components Required for Installing ESPHome
- ESP8266-01
- Arduino Uno
- LED
- DHT11
- Jumper Wires
Installing ESPHome
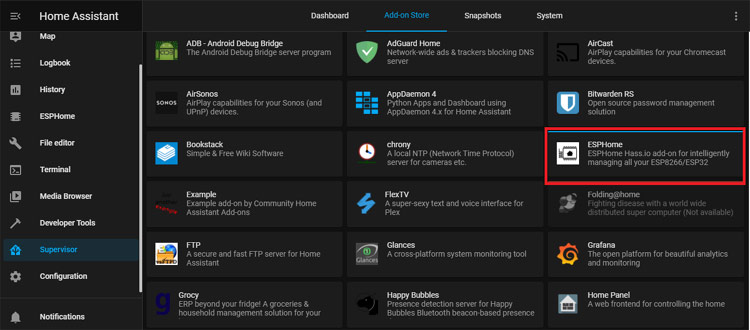
Installing the ESPHome through the ESPHome Home Assistant add-on is very easy. To install ESPHome, first, navigate to Home Assistant Web UI and from there navigate to the Supervisor panel, then search for ESPHome in the “Add-on Store” tab.
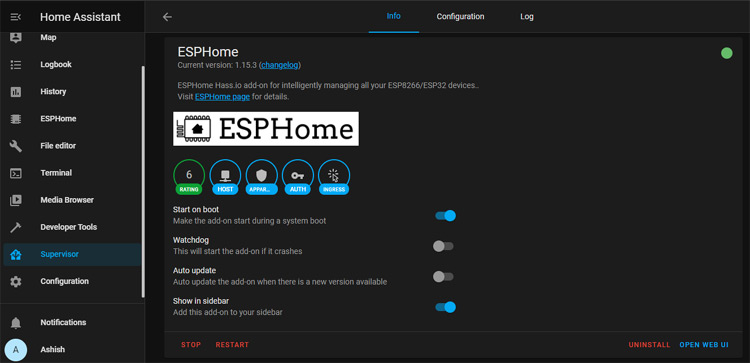
Open the ESPHome and then simply click on the Install button in order to install it. After that, wait until the add-on is installed. Then start the add-on and switch on the ‘Show in Sidebar’ option for ease of access. After that, click “Open Web UI”.
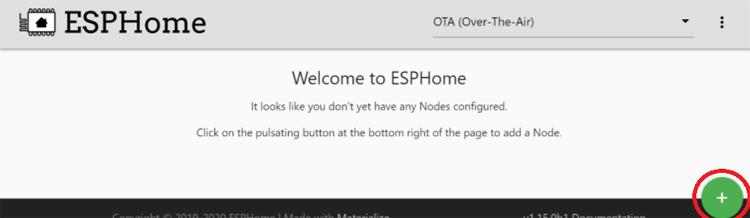
Now you will be redirected to ESPHome Web UI. Click on the “+” icon to add a new device.
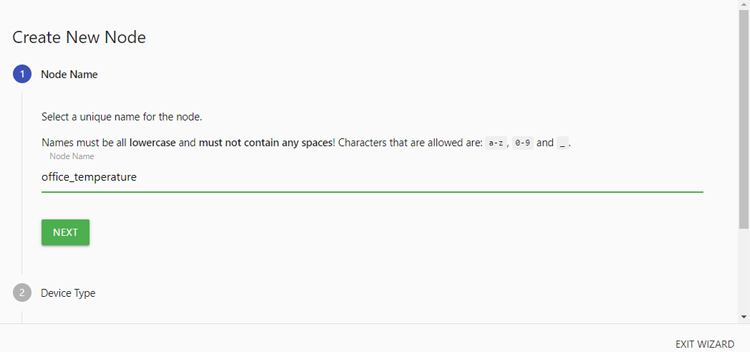
In the first step, enter the device or project name. The device name must be in lowercase and must not contain any spaces. For example, my device name is ‘office_temperature’ but you can choose any name you like.
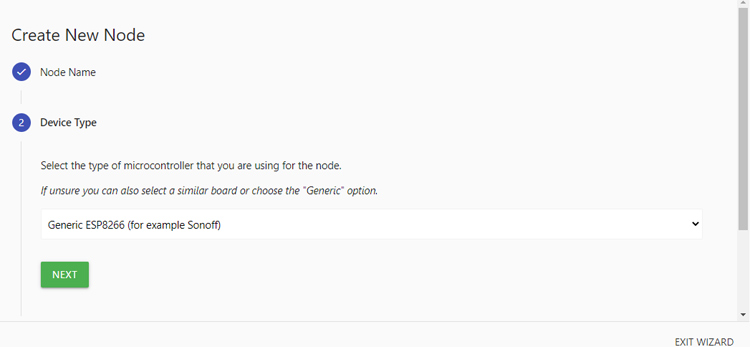
In the second step, select the correct board type. Here, I am using an ESP-01 Wi-Fi board so I selected ‘Generic ESP8266’.
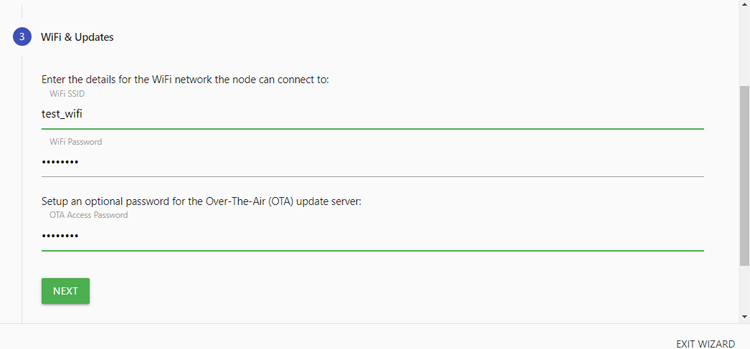
Then in the next step, enter the SSID and password of the Wi-Fi network. You can also set an additional password for future OTA firmware updates.
Once you have entered your credentials, click Next and then click Submit in the next step to finish the process, and the device will be added to the ESPHome UI. It will then ask to select a port. If you are using a Board that has a USB interface, connect it to Laptop and select the port; else ignore it.
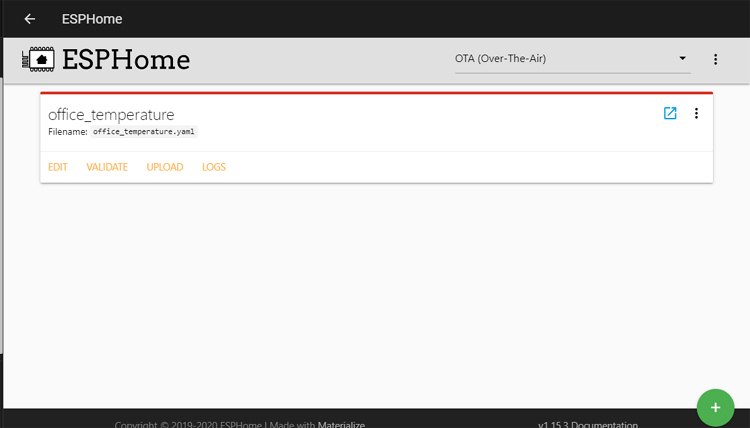
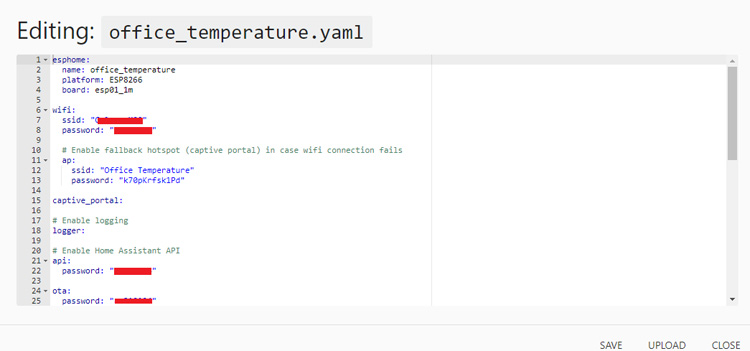
Now to create a configuration for the ESP-01 device, click on ‘Edit’ from the menu of the device. You will be presented with the YAML file. If the YAML page is blank then click on ‘Overview’ or any other tab and then click back to ESPHome and click ‘Edit’ again. You will see a YAML file currently configured for your device.
Now in the next step, we are going to add a light component (LED) and binary sensor (DHT11) in the configuration file. ESPHome has tons of compatible sensors and devices that you can find on their website. Add the below lines of code to the configuration file:
# Web server
web_server:
  port: 80
  auth:
    username: admin
    password: 312124dc
# Sensors config
sensor:
  - platform: dht
    pin: GPIO0
    model: DHT11
    temperature:
      name: "Living Room Temperature"
    humidity:
      name: "Living Room Humidity"
    update_interval: 20s
output:
  - platform: gpio
    pin: GPIO2
    id: main_relay
light:
  - platform: binary
    name: "Lamp 1"
    id: rele1
    output: main_relay
text_sensor:
  - platform: wifi_info
    ip_address:
      name: espname ESP IP Address
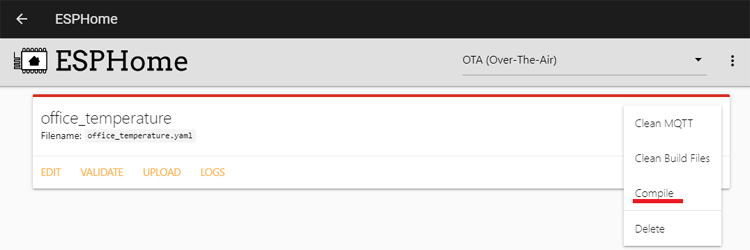
Now go ahead and click save. Then click on three dots in the top right corner and then click 'Compile'.
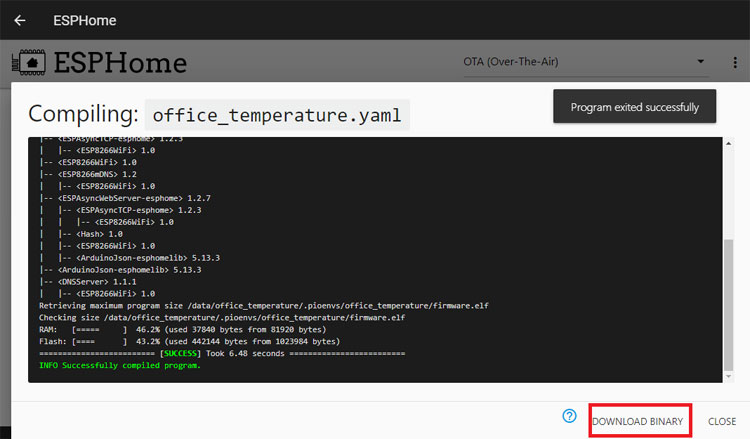
The compilation process may take a while. Once the compilation completes successfully, click on ‘Download Binary.’
Note: If you are using a board with a USB interface, then you can directly upload the code from ESPHome UI by selecting the serial port but as we are using an ESP-01 board, we will use Arduino Uno to upload the firmware.
Flashing ESPHome on ESP-01
There are generally two methods for flashing ESPHome on ESP8266. One is Over the Air (OTA) and the other is using FTDI or Arduino Uno. In this project, we are going to use Arduino Uno.
Step1: Preparing Hardware
To flash a new firmware on ESP-01, connect ESP-01 with Arduino Uno as per the circuit diagram.
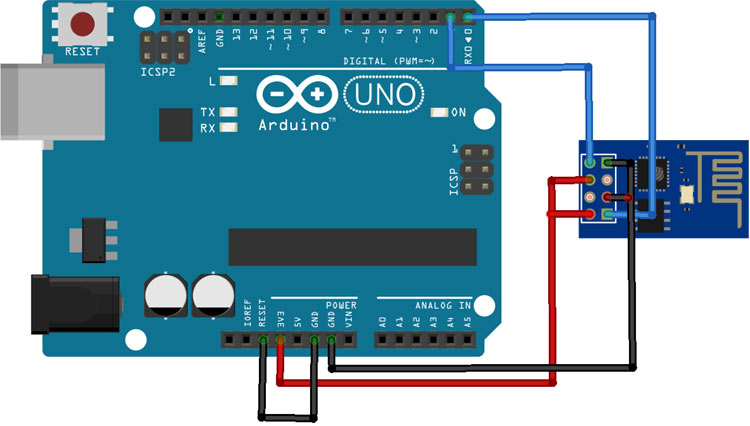
Connect the VCC and GND of ESP-01 to 3.3V and GND of Arduino; also connect CH_PD to 3.3V andGPIO_0 to GND of Arduino. Connect RX and TX of ESP-01 to RX & TX of Arduino Uno respectively. GPIO_0 is grounded to enable the flashing mode of ESP8266-01. After making the circuit as per the diagram, connect the Reset pin of the Arduino to GND to bypass the Arduino. It will disable Arduino and upload the firmware directly to the ESP-01. Connect RST pin of ESP-01 to ground, remove the RST after half a second (the blue LED flashes for some millisecond).
Step 2: Download and install Tasmotizer
Tasmotizer is a specifically designed flashing tool for Tasmota but here we will use it to Flash ESPHome. Download the latest Tasmota version for your platform. After downloading, double click the downloaded file and it'll start, no installation is required.
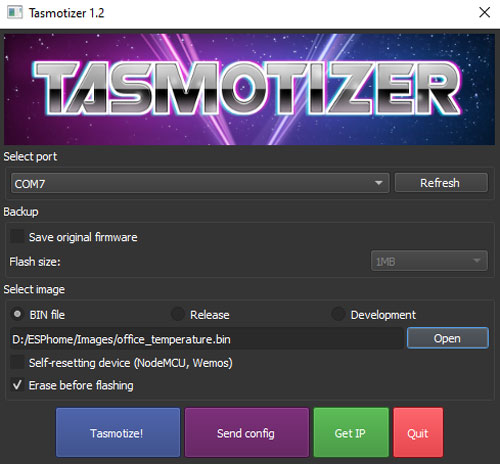
Step3: Flashing the Firmware
Now in the final step, select the port to which Arduino Uno is connected. Then browse to the ESPHome firmware binary you downloaded. You can take a backup of your original firmware by checking in the “Save original firmware” option. Click Tasmotize! and wait until it is done.
Once the Flashing is done, disconnect the RX, TX, CH_EN pins and connect an LED to GPIO2 and DHT11 to GPIO0 of ESP-01 as shown in the image given.
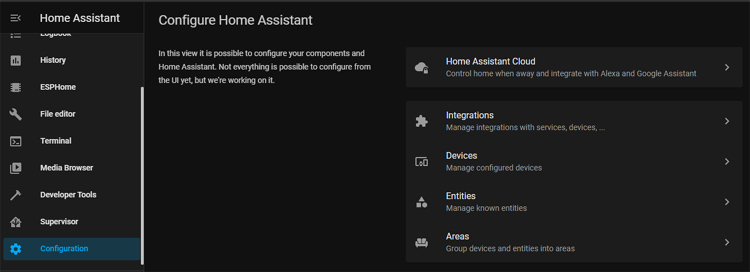
Wait until the ESP-01 connects to Wi-Fi and then click on Configuration to load the configuration page, then go to Integrations.
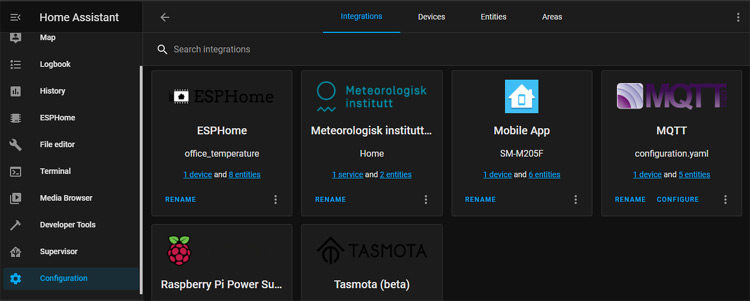
Now on the Integrations page, you will see that Home Assistant has already discovered the ESPHome device.
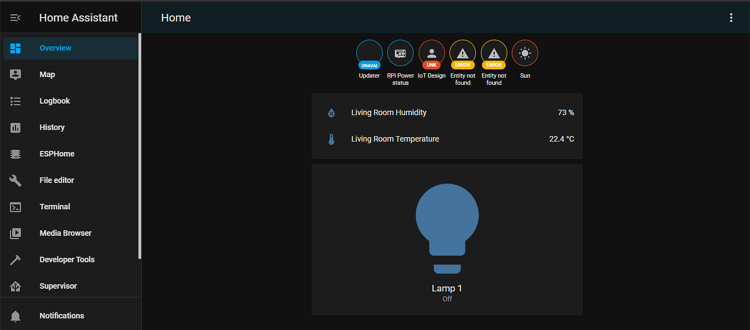
If you didn’t turn on the Edit mode on your Dashboard, ESPHome will already be visible on the overview page, otherwise, add it manually.
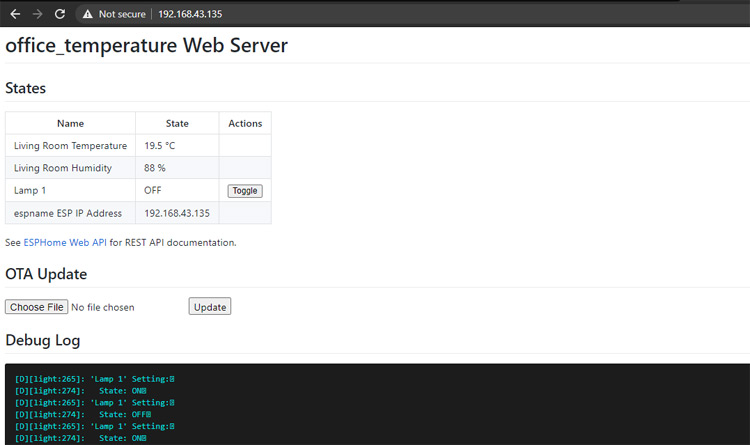
You can even access the ESPHome Web UI without Home Assistant. For that enter the IP address of ESP8266 into the browser URL and click Enter. It will ask you to enter the Username and Password that you provided in the configuration file.
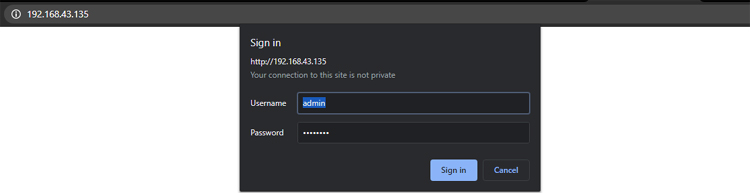
After entering the User name and Password, click on Sign in and you will be redirected to ESPHome Web UI.
This is how you can integrate ESPHome with Home Assistant. It's that easy to add sensors and devices using ESPHome. A complete working video is given below. If you have any questions, please let me know in the comments below.


