


Hello everyone, in this tutorial, we are going to perform a simple LED blinking program on the Raspberry Pi Pico. Raspberry Pi Pico is based on the RP4060 microcontroller chip which is the first ever microcontroller family class by Raspberry Pi foundation. If you are searching for the low cost development board with high-performance features, then the Pico board is the best choice. We can program this Pico board in various methods as it supports basic debugging tools and libraries for C/C++ Development and Micropython Environment. Here I am going to discuss on how to program the Pico board with Micropython framework. As this is going to be the first step to program the Raspberry pi Pico, let me discuss the basic features of the Pico board.
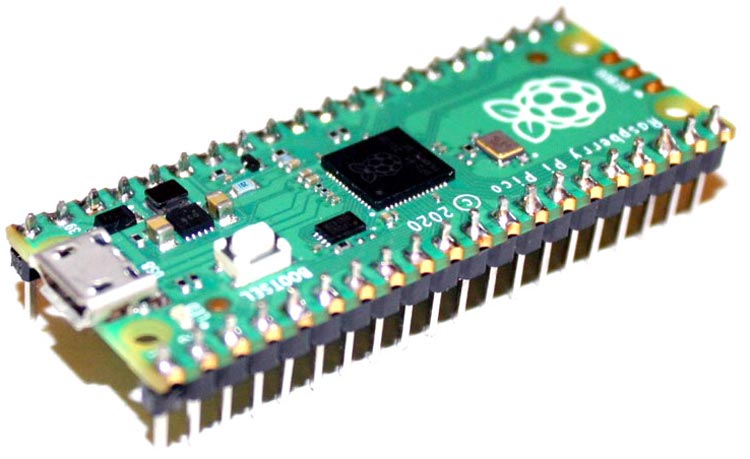
Top View of the Pico Board
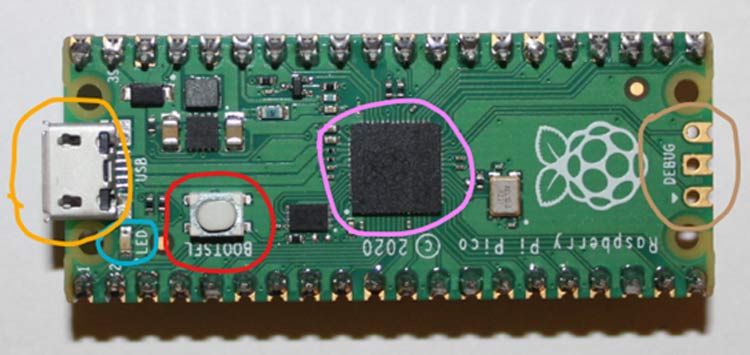
Let’s see what we have on the Raspberry Pi Pico board. Raspberry Pi Pico is a 40 pin 21x51 ‘DIP’ style 1mm thick PCB with 0.1" through-hole pins also with edge castellation. It has 3-pin ARM Serial Wire Debug (SWD) that is marked in light brown circle in the picture above, the yellow circle represents the On-board USB1.1. If you look at the top, you will find the RP2040 microcontroller chip is placed at the center of the board that is marked in pink circle. It has an in-built LED alongside to the USB-Connector. The blue colored circle is representing the built-in Led which is internally connected to the GPIO25 pin. The red circled button is a white push button that can be used as a boot loader button.
Bottom View of the Pico Board
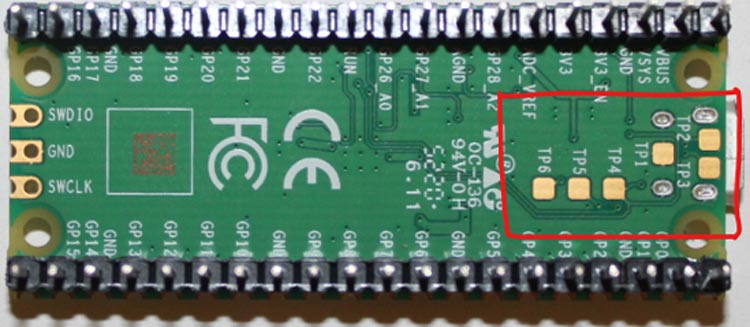
Let’s see what we have at the bottom side of the Pico PCB board in the above image. The square pads are generally used as the Test Points (TP1 – TP6) which can be accessed if required, for example if using as a surface mount module. TP1, TP2 and TP3 can be used to access the USB signals instead of using the micro-USB port. TP6 can be used to drive the system into mass-storage USB programming mode (by shorting it low at power-up). Note that TP4 is not intended to be used externally, and TP5 is not really recommended to be used as it will only swing from 0V to the LED forward voltage.
Features of the Raspberry Pi Pico Development Board
Raspberry Pi Pico is a low-cost, high-performance microcontroller board with multi-function GPIO pins. Following are the key features of the Raspberry Pi Pico board.
- Raspberry Pi Pico has 26 multi-function GPIO pins and 8 Programmable Input/output (PIO) state machines for custom peripheral support.
- Pico board consists of 2 SPI, 2 I2C, 2 UART, 3 12-bit ADC and 16 controllable PWM channels.
- 264KB of SRAM, and 2MB of on-board Flash Memory.
- Low-power sleep and dormant modes.
- Built-in Temperature Sensor, Accurate Clock and Timer on-chip.
- The RP2040 microcontroller has cortex m0+ at up to 133MHz. the presence of the On-chip PLL allows us to vary the core frequency.
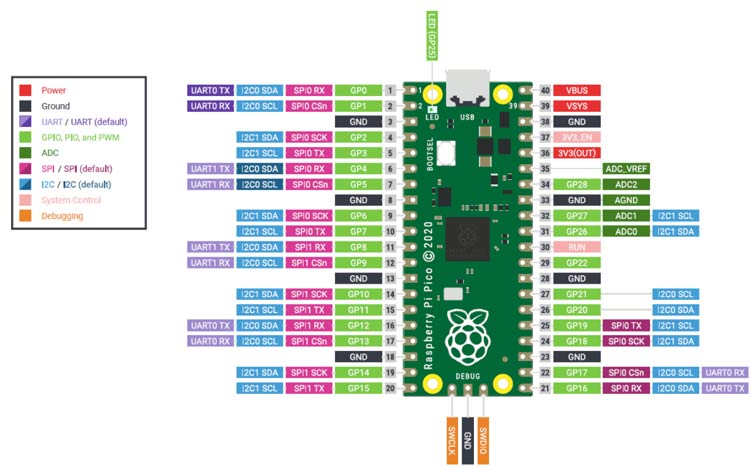
Raspberry Pi Pico Pinout Configuration
The pin description of the Raspberry Pi Pico has been displayed in the below picture. The Pico has 26 GPIO pins which are labeled as Green in the picture below.
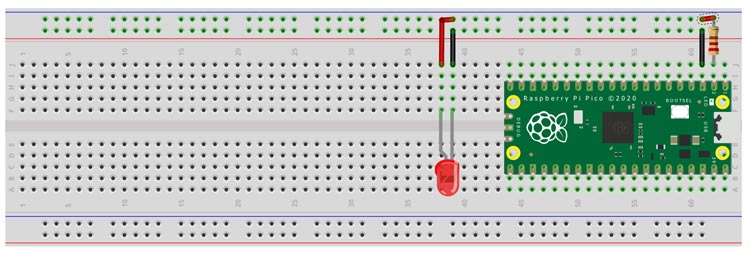
Connecting LED with Raspberry PI Pico
The following schematic diagram can be referring to connect an LED with Raspberry Pi Pico. I connected the LED to the GPIO 1 or Pin number 2 and the GND pin is connected to the Ground.
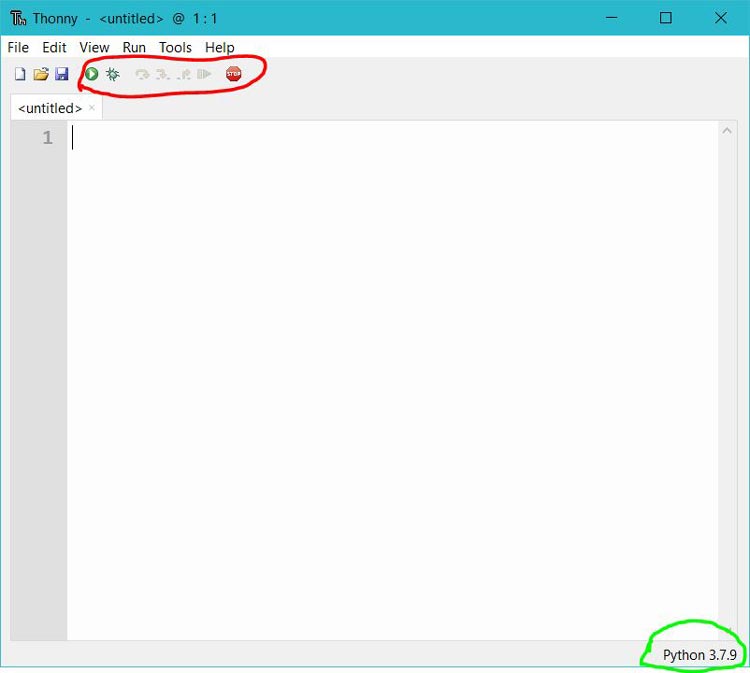
Installation of Thonny IDE and MicroPython Framework On Raspberry Pi Pico
At first, you need to install the Thonny IDE to program the Raspberry Pi Pico. When the installation has been completed we need to perform some basic setup of the Thonny IDE. The following Picture is a snapshot of the Thonny IDE. In the picture you can see the red circled section has the basic debugging tools. The green section is for selecting the device or python version we are using. This can be called as interpreter selection menu.
Now you need to follow the below steps to install the Micropython framework on Raspberry Pi Pico. On the Pico board you can see a White Push Button that is marked as “BOOTSEL”.
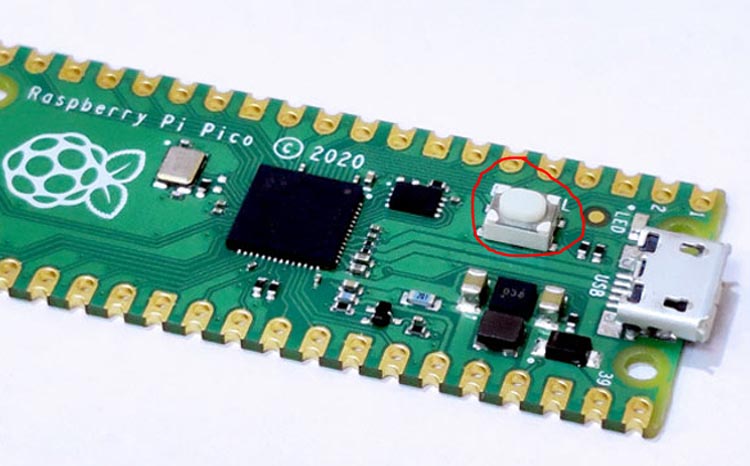
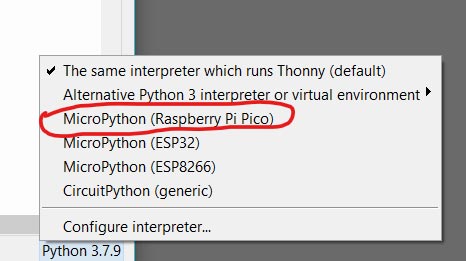
The BOOTSEL button on my board is shown above highlighted red. Press the button and hold it until you connect the Pico board to the PC or Laptop via USB port. When you will connect the Pico board you can see under the Interpreter selection menu “MicroPython (Raspberry Pi Pico)”. Click on this and follow the installation as per instructed on the window.
Now you can refer the following code to blink an LED of the Raspberry Pi Pico. The code is very simple to understand. We have a machine library in MicroPython which includes all the basics built-in libraries. The Pin() function can be called to make an object. In my case I made an object by using “led” in the code below. I passed two parameters into the Pin() function that is Led and Pin.OUT where the Led is representing the GPIO pin and the Pin.OUT is used to set that GPIO pin as an OUTPUT pin respectively. It can be set to IN or OUT. The Timer() function allows us to use the built-in timer on the Raspberry Pi Pico.
from machine import Pin, Timer
Led = 0
led = Pin(Led, Pin.OUT)
timer = Timer()
Now, we need to create a function ledblink() to provide the timer. Actually the Timer() has an in-built method named as init(). In this init() method, we can callback a function with some delay. This delay can be provided as “PERIODIC” by using the “mode” parameter. The “freq” parameter is used to determine the frequency delay of each callback. The led.toggle() is used to change the state of the led from HIGH to LOW or LOW to HIGH.
def ledblink(timer):
    led.toggle()
timer.init(freq=2.5, mode=Timer.PERIODIC, callback=ledblink)
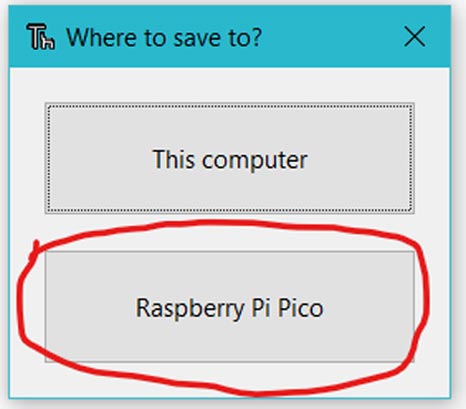
Now, let’s save the code. When you save the code, it will show you a popup as shown below, asking where you want to save the file. You need to select Raspberry Pi Pico and then name the file as “main.py” and click on save. By doing this procedure, the Raspberry Pi Pico will run the program when it is power up.
Running our first Blink Program on Pico
So, we have finished our first Raspberry Pi Pico tutorial. In the following video, you can find more explanation on how to run the code on the raspberry pi pico.
from machine import Pin, Timer
inbuiltLed = 25
led = Pin(inbuiltLed, Pin.OUT)
timer = Timer()
def ledblink(timer):
led.toggle()
timer.init(freq=2.5, mode=Timer.PERIODIC, callback=ledblink)


