


Servos are commonly used motors in Robotics. Interfacing and the controlling Servo motor with microcontrollers like Arduino, Raspberry Pi, and NodeMCU are very easy. Earlier we have controlled Servo Motor from Webpage using Arduino Uno and ESP8266. Here, in this project, we are interfacing servo motor with Raspberry Pi and controlling it through a webpage hosted on Raspberry Pi.
The webpage will be created using Flask Web Framework for Raspberry Pi servo motor control. The webpage will have a slider and a submit button and it will send the slider values to the Raspberry Pi on pressing the submit button.In IoT based applications, Webservers are used to control or monitor any sensor values using web browsers, we previously created many webservers using Arduino, ESP8266, NodeMCU, ESP32, Raspberry Pi, etc.
Flask is a popular Python web framework developed by Armin Ronacher of Pocoo. It is a third-party Python library used for developing web applications. Flask is classified as micro-framework, and it is based on the Pocoo projects Werkzeug and Jinja2. Flask is very commonly used with Raspberry Pi, as RPi has Linux OS which can easily process Python script. Raspberry Pi is also popular for creating webserver and making IoT based projects because of its high processing power and inbuilt Wi-Fi capabilities.
Components Required
- Raspberry Pi
- SG90 Servo motor
- Jumper Wires
Circuit Diagram
Circuit diagram for Servo Motor Control using Raspberry Pi is given below:
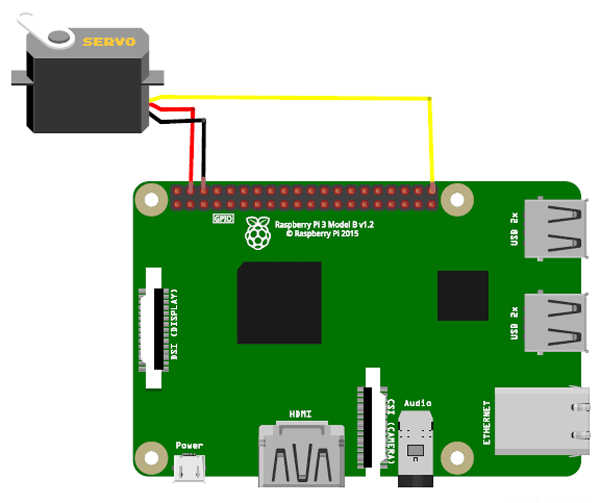
The circuit diagram for this project is very simple; you need to connect your servo motor to Raspberry Pi. Connect the Red wire of servo motor to 5V of Raspberry pi, black wire to GND, and Yellow wore to GPIO 21, i.e. pin no 40 of Raspberry Pi.
Installing Flask Module and Libraries
Here we will install the Flask modules and libraries using the following commands:
First, update your Raspberry Pi by using the following commands
sudo apt-get update
sudo apt-get upgrade
Now, install pip and Rpi.gpio libraries using the following commands:
sudo apt-get install python-pip
sudo pip install RPI.GPIO
Now use the following command to install Flask:
sudo pip install flask
Python Program Explanation
Complete python code for this servo motor interfacing with a raspberry pi project is given at the end of the document.
Start the code by importing the required library files. Import the GPIO, Flask, and sleep libraries. GPIO function enables us to program GPIO pins of PI. Sleep function is used to provide delay and Flask is used to create a Web application.
from flask import Flask, render_template_string, request import RPi.GPIO as GPIO
from time import sleep
Define the Raspberry pi GPIO pin where the servo motor is connected
servo_pin = 19
Declare the servo pin as Output
GPIO.setup(servo_pin, GPIO.OUT)
Setup the servo motor PWM channel frequency at 50 Hz
p = GPIO.PWM(servo_pin, 50) # PWM channel at 50 Hz frequency
Start the PWM signal generation.
p.start(0)
Below commands are used to get the slider values from the web page and to move the servo motor according to the slider movement.
slider = request.form["slider"
p.ChangeDutyCycle(float(slider))
sleep(1)
 p.ChangeDutyCycle(0)
Running the Raspberry Pi Web Server for controlling Servo Motor
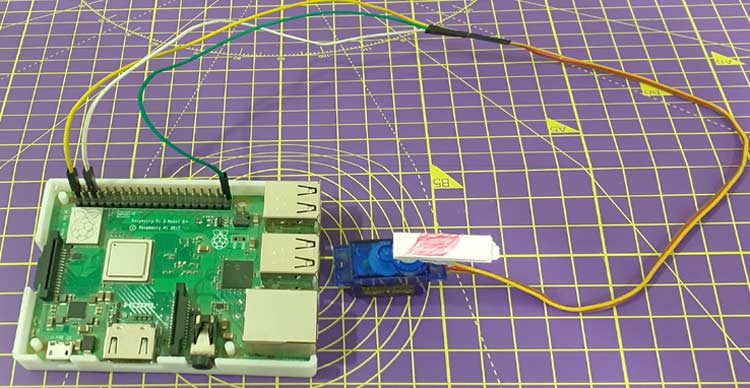
Once your code is ready, and the servo motor is connected as per the circuit diagram, turn ON the PI to write the program.
Create the servo.py file using the following command:
sudo nano servo.py
Now paste the given at the end and run the python code using the following command:
python servo.py
Now navigate to your Raspberry pi Web browser and type https://127.0.0.1:5000 to open the web page, as shown below.
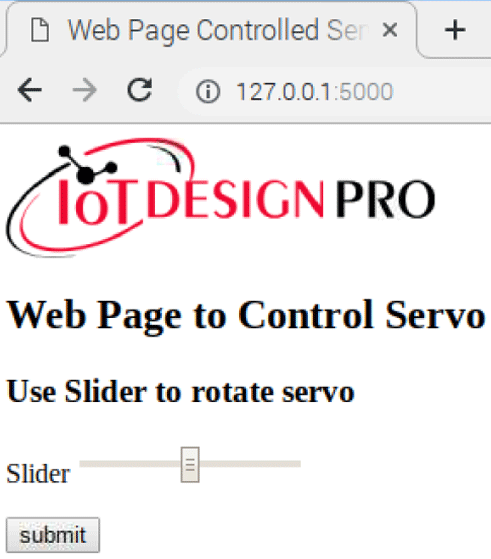
Finally, move the slider and press the submit button to rotate the Servo motor. If you move the slider in the right direction, then the motor will move in the Counter-Clockwise direction, and if you move the slider in the left direction then the motor will move in the clockwise direction
This is how servo stepper motor can be controlled using Python language. And by enabling the port forwarding in your router, you can control the stepper motor from anywhere in the world by typing the static IP provided by your ISP (Internet Service Provider).
Complete servo motor code for Raspberry Pi 3 and working video are given below.
from flask import Flask, render_template_string, request # Importing the Flask modules
import RPi.GPIO as GPIO # Importing the GPIO library
from time import sleep # Import sleep module from time library
servo_pin = 19 # GPIO Pin where sero is connected
GPIO.setmode(GPIO.BCM) # Define the Pin numbering type. Here we are using BCM type
# Defing Servo Pin as output pin
GPIO.setup(servo_pin, GPIO.OUT)
p = GPIO.PWM(servo_pin, 50) # PWM channel at 50 Hz frequency
p.start(0) # Zero duty cycle initially
app = Flask(__name__)
#HTML Code
TPL = '''
<html>
<img src="https://iotdesignpro.com/sites/default/files/Iot%20Design%20Pro%20Logo_0.png" alt="">
<head><title>Web Page Controlled Servo</title></head>
<body>
<h2> Web Page to Control Servo</h2>
<form method="POST" action="test">
<h3> Use the slider to rotate servo </h3>
<p>Slider <input type="range" min="1" max="12.5" name="slider" /> </p>
<input type="submit" value="submit" />
</form>
</body>
</html>
'''
@app.route("/")
def home():
return render_template_string(TPL)
@app.route("/test", methods=["POST"])
def test():
# Get slider Values
slider = request.form["slider"]
# Change duty cycle
p.ChangeDutyCycle(float(slider))
sleep(1)
# Pause the servo
p.ChangeDutyCycle(0)
return render_template_string(TPL)
# Run the app on the local development server
if __name__ == "__main__":
app.run()


