


Nowadays corporate houses and offices are adopting biometric attendance systems where the attendance is recorded by putting your finger on finger print sensor. These records are saved on cloud server to be monitored from anywhere by the authorities.
Here we are building an IoT based Biometric attendance system which can store the attendance records in Google sheet. An ESP8266 NodeMCU module will be interfaced with R305 Fingerprint module and an LCD display, and Google spreadsheet will be used to keep the attendance log for future references. We have also used Pushing box API to send the Biometric data from NodeMCU to the Google sheet. This Project can be very helpful in various corporate sectors, educational institutions, hospitals etc for attendance purpose.
This Biometric Attendance System is more secure and easier to use than a RFID Based Attendance System where you need a RFID tag to register the attendance.
Components Used
- NodeMCU
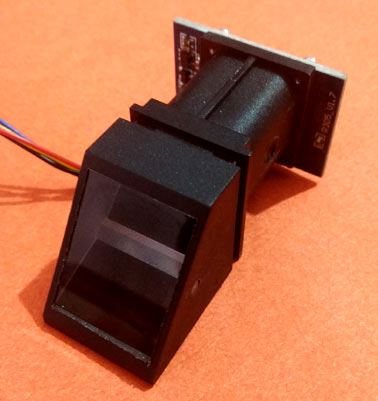
- R305 Fingerprint sensor
- I2C Module for 16x2 (1602) Alphanumeric LCD
- Breadboard
- 16*2 Alphanumeric LCD
- Jumpers
Working with Google Spreadsheet
Before starting with the hardware modules, first we will create the Google sheet to record the attendance. Below are the steps to create and configure the Google sheet for this Biometric Attendance system:
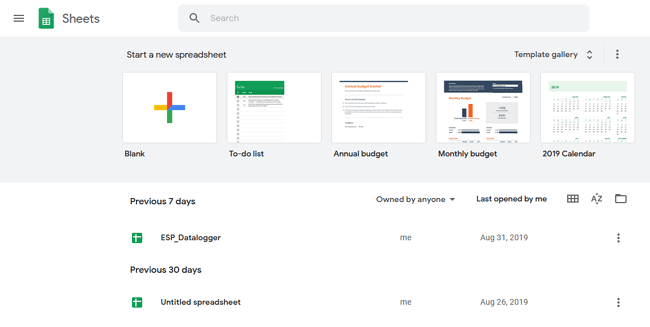
Step 1: Creating a new sheet:
First login to Google docs with your Google account credentials and then select for Google sheet there and opt to “Start a new spreadsheet”.
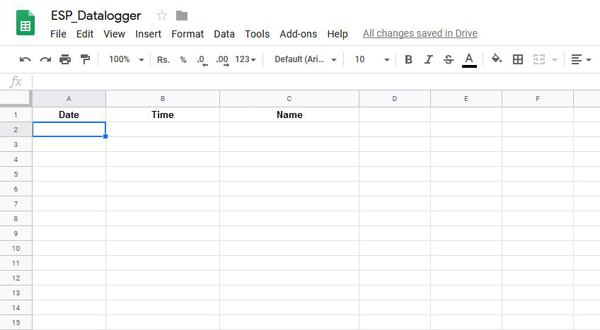
Step 2: Rename the sheet
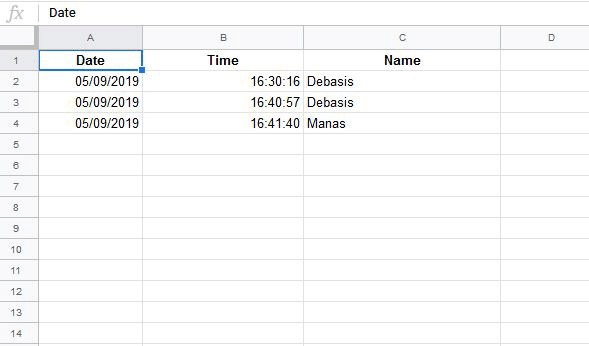
Rename the blank sheet to any name of your choice. In my case, it is ESP_Datalogger. Then create columns in the sheet for Date, Time and Name
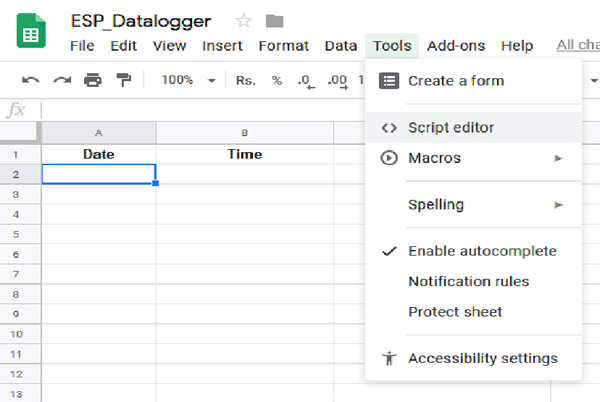
Step 3:
Now go to Tools and click on the option “Script editor” where we will write functions to insert data into the sheet.
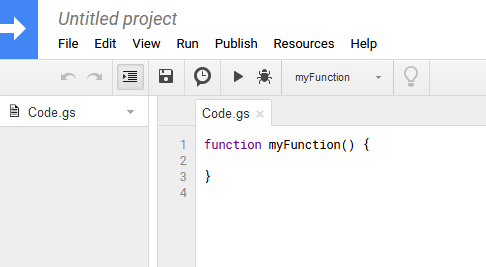
Step 4:
The new Google Script is created with default name “Untitled project”. You can rename this Google Script File to any name of your choice. In my Case, I have renamed it to “esp_datalogger”.
Step 5:
Now download and paste the Google script code given below and replace the Sheet ID in place of the variable sheet_id in the code.
function doGet(e) {
  Logger.log( JSON.stringify(e) );  // view parameters
  var result = 'Ok'; // assume success
  if (e.parameter == 'undefined') {
    result = 'No Parameters';
  }
  else {
    var sheet_id = '1RW12xqc8CSGAc7KOUE-XXXXXXXXX';                      // Spreadsheet ID
    var sheet = SpreadsheetApp.openById(sheet_id).getActiveSheet();
    var newRow = sheet.getLastRow() + 1;
    var rowData = [];
    rowData[0] = new Date();
    var curr_time=Utilities.formatDate(new Date(),'Asia/Kolkata', "HH:mm:ss");
    rowData[1] = curr_time;
    for (var param in e.parameter) {
      Logger.log('In for loop, param=' + param);
      var value = stripQuotes(e.parameter[param]);
      Logger.log(param + ':' + e.parameter[param]);
      switch (param) {
        case 'Name': //Parameter
          rowData[2] = value;
          break;
        default:
          result = "unsupported parameter";
      }
    }
    Logger.log(JSON.stringify(rowData));
    // Write new row below
    var newRange = sheet.getRange(newRow, 1, 1, rowData.length);
    newRange.setValues([rowData]);
  }
  // Return result of operation
  return ContentService.createTextOutput(result);
}
/**
* Remove leading and trailing single or double quotes
*/
function stripQuotes( value ) {
  return value.replace(/^["']|['"]$/g, "");
}
You can get the Sheet ID from the Sheet URL just like shown below:
https://docs.google.com/spreadsheets/d/aaabbbbaaaabbb/edit#gid=0, where “aaabbbbaaaabbb” is your Sheet ID.
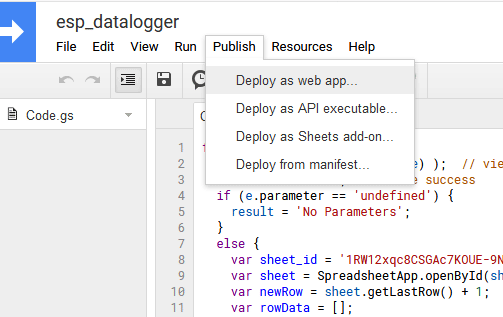
Getting Google Script ID
1. Go to Publish and select “Deploy as web app”.
2. Select the “Project version” as “New”. Select “email id” in the “Execute the app as” field. Choose “Anyone, even anonymous” in the “Who has access to the app” field. And then Click on “Deploy”.
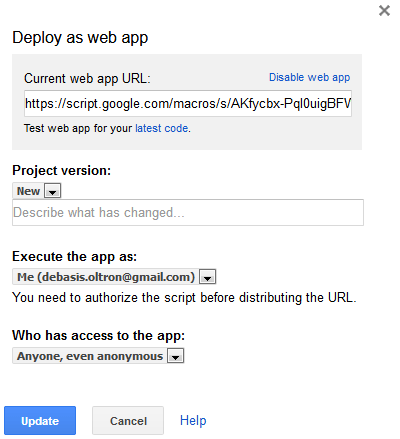
3. In the next step, provide all the required permissions. Now you can see a new screen with a given link and named as “Current web app URL”. This URL contains Google Script ID. Just copy the URL and save it in notepad for future use.
Using Pushing Box API
Step 1:
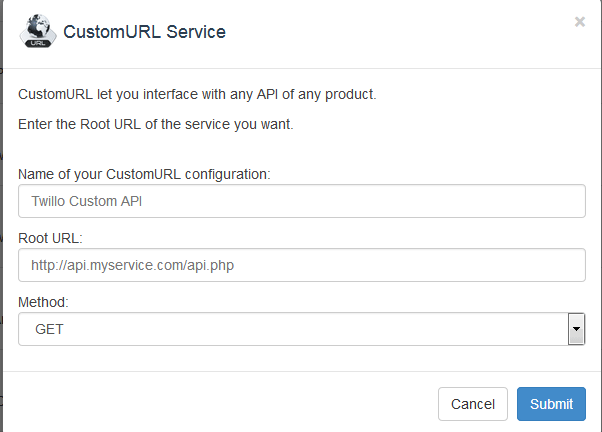
Now go to pushingbox.com and create an account using the same email you used for Google sheet. Click on "My Services" tab and then on "Add a service" button. Select "CustomURL". Fill in the form that popped out. Name the service and then on the Root URL field, paste the Google sheet web app URL which we have already saved in the previous step. Select the GET option in the field method.
Step 2:
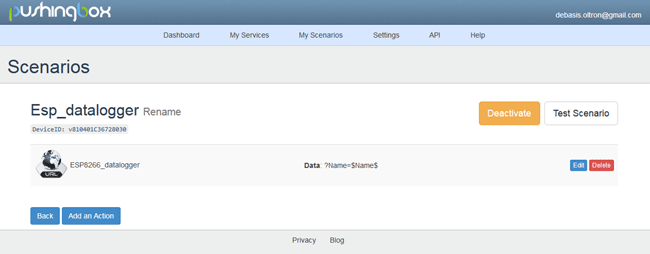
Next, go to "My Scenarios". On the text field, give a name for the scenario and click "Add". Then click on "Add an Action" and select "Add an action with this service" of the service you just created. Then a window will pop out, type the name of the input field in the form with "=$Name$" as shown below. We will get a device ID after it.

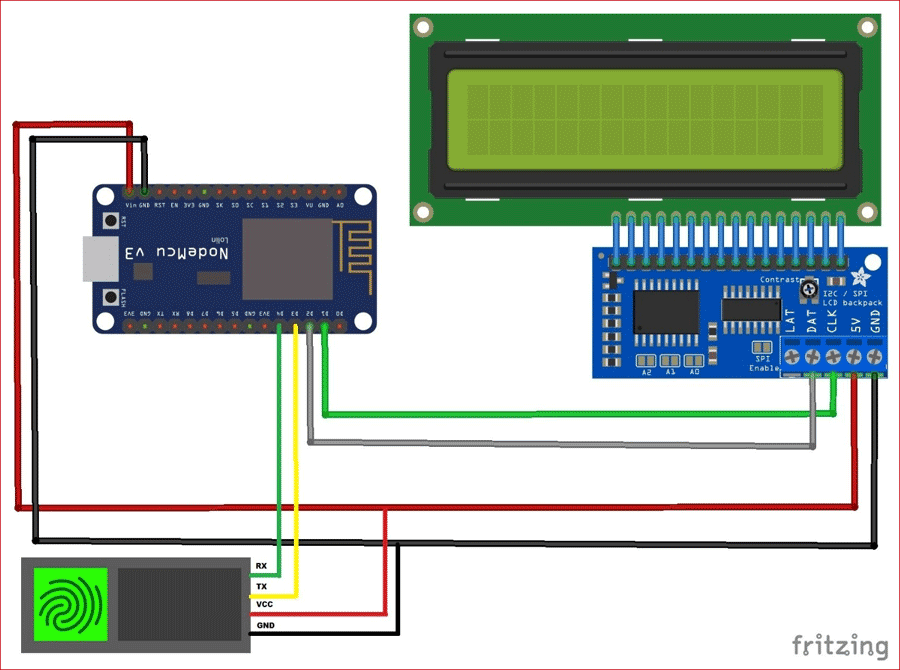
IoT Based Smart Attendance System Circuit Diagram
Circuit diagram for biometric attendance system over IoT is given below:
Programming NodeMCU to send Attendance Data to Google Sheet
Here we will program the NodeMCU to sync with Google sheet using the device ID and send the data to Google sheets using Pushing box API. The complete program for this is given in the bottom of this article and the step wise explanation is given here.
Before proceeding with the program make sure you have already installed the required board details in your Arduino IDE using board manager to program an ESP8266 NodeMCU. After that, install the following libraries using Sketch -> Include Library -> Manage Library. Just search for the required library and click on install.
There are lot of ESP8266 NodeMCU projects here, where we have explained to program NodeMCU using Arduino IDE.
Programming to Enroll a Fingerprint:
1. In the Arduino IDE, go to File > Examples > Adafruit Fingerprint Sensor Library > Enroll.
2. Upload the code to the NodeMCU, and open the Serial monitor at a baud rate of 9600.
Important: Change the Software serial pin in the program to SoftwareSerial mySerial(D3, D4).
3. You should enter an ID for the fingerprint in which you want to store your fingerprint. As this is my first fingerprint, I typed 1 in the top left corner, and then, click the Send button.
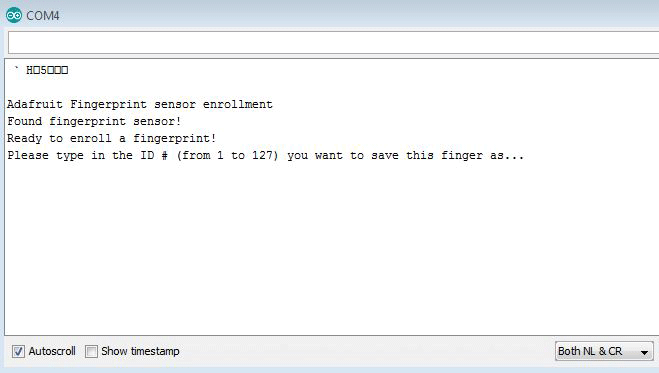
4. Then the light on the fingerprint sensor will blink which indicates that you should place your finger on the sensor and after that, in serial monitor, you can follow the steps till it acknowledge you for successful enroll.
Programming for Fingerprint Attendance System:
So after enrolling the finger, its time to upload the Attendance system program. Complete program for fingerprint based attendance system is given at the end here, we are explaining the working of code.
The first thing is to do in the program is to include all the required libraries. Here in my case, I have included “Adafruit_Fingerprint.h” for using R305 fingerprint sensor and “ESP8266WiFi.h” for using ESP8266 NodeMCU Wi-Fi module. For using the I2C interface of an LCD display we have use LiquidCrystal_I2C.h library. Then we have to configure the serial port in which fingerprint sensor will be connected. In my case, I have declared D3 as RX Pin and D4 as TX pin.
#include <Adafruit_Fingerprint.h>
#include <ESP8266WiFi.h>
#include <LiquidCrystal_I2C.h>
LiquidCrystal_I2C lcd(0x3F, 16, 2);
SoftwareSerial mySerial(D3, D4);
Adafruit_Fingerprint finger = Adafruit_Fingerprint(&mySerial);
Next, set your Wi-Fi router credentials in the program. Replace your network SSID name in place of “xyz” and password in place of “123456789”. As we are going to use Pushing box API for sending the data to Google sheet, so I have assigned it to a variable host which I will use later in the program.
const char* ssid     = "xyz";   //replace with your own SSID
const char* password = "123456789";    //replace with your own password
const char* host = "api.pushingbox.com";
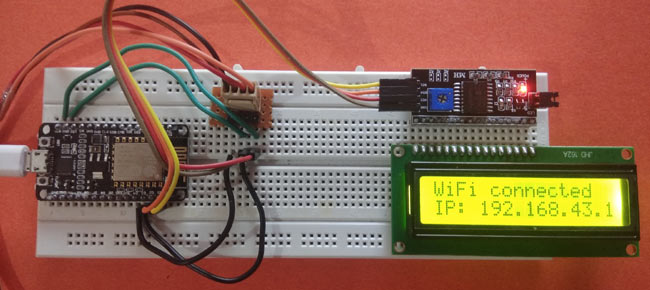
Inside setup function, initialize the LCD and print a welcome message. After that we have connected the nodeMCU to the Wi-Fi network with given credentials and printed the IP address in the LCD.
  lcd.begin(16, 2);
  lcd.init();
  lcd.backlight();
  lcd.setCursor(4, 0);
  lcd.print("WELCOME");
  delay(2000);

  lcd.clear();

  Serial.begin(115200);
  delay(10);
  Serial.println();
  Serial.println();
  lcd.setCursor(0, 0);
  Serial.print("Connecting to WiFi...       ");
  Serial.print("Connecting to ");
  Serial.println(ssid);
  WiFi.mode(WIFI_STA);
  WiFi.begin(ssid, password);

  while (WiFi.status() != WL_CONNECTED)
  {
    delay(500);
    Serial.print(".");
  }

  Serial.println("");
  Serial.println("WiFi connected");
  Serial.println("IP address: ");
  Serial.println(WiFi.localIP());
  lcd.setCursor(0, 0);
  lcd.print("WiFi connected          ");
  lcd.setCursor(0, 1);
  lcd.print("IP:");
  lcd.setCursor(4, 1);
  lcd.print(WiFi.localIP());

  delay(1500);
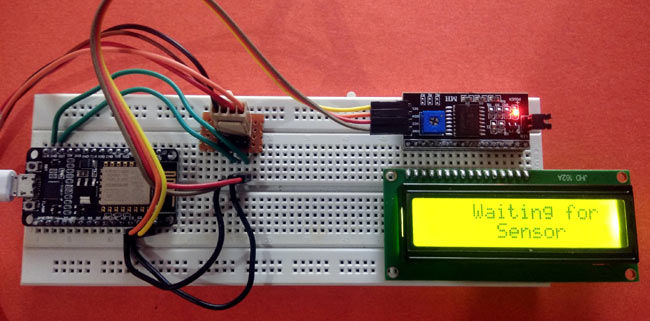
After connection is successfully made, write a program block to check for fingerprint sensor availability. This will confirm us regarding the fingerprint sensor’s successful pairing with the nodeMCU.
while (!Serial);
delay(100);
Serial.println("\n\n Waiting for Fingerprint Sensor");
lcd.setCursor(0, 0);
lcd.print(" Waiting for ");
lcd.setCursor(0, 1);
lcd.print(" Sensor ");
delay(1500);
finger.begin(57600);
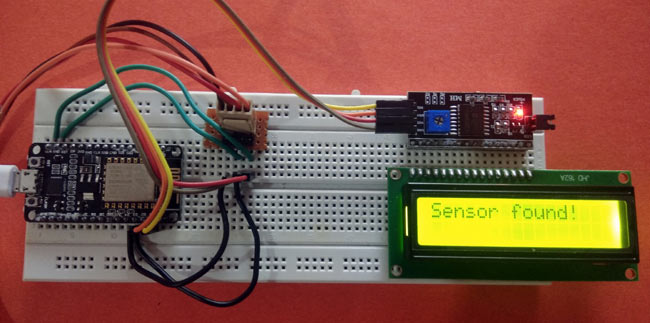
if (finger.verifyPassword())
{
Serial.println("Found Successfully");
lcd.setCursor(0, 0);
lcd.print("Sensor found! ");
lcd.setCursor(0, 1);
lcd.print(" ");
delay(1500);
} else
{
Serial.println("Fingerprint sensor not found!!!");
lcd.setCursor(0, 0);
lcd.print("Sensor Not found! ");
lcd.setCursor(0, 1);
lcd.print(" ");
while (1)
{
delay(1);
}
}
}
In the next step, a function getFingerprintID is written which will return a valid fingerprint ID for an already enrolled fingerprint.
int getFingerprintID()
{
  uint8_t p = finger.getImage();
  if (p != FINGERPRINT_OK)  return -1;

  p = finger.image2Tz();
  if (p != FINGERPRINT_OK)  return -1;

  p = finger.fingerFastSearch();
  if (p != FINGERPRINT_OK)  return -1;

  return finger.fingerID;
}
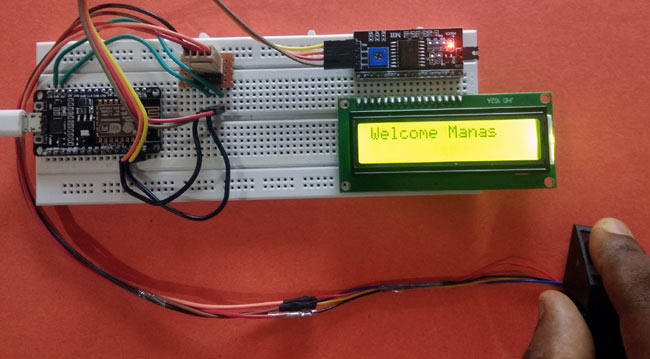
Inside loop function getFingerprintID function is called to get a valid fingerprint ID if it is successfully enrolled. Then it is compared using if-else loop to get the member name and then the name is sent as an argument to a function connecthost which will send this data to Google sheet via pushing box API.
int fingerprintID = getFingerprintID();
  delay(50);
  if (fingerprintID == 1)
  {
    Serial.println("Welcome Debasis");
    lcd.setCursor(0, 0);
    lcd.print("Welcome Debasis         ");
    lcd.setCursor(0, 1);
    lcd.print("                       ");
    connecthost("Debasis");
    flag = 0;
  }
Inside connecthost function the sent data from loop function is assigned to a variable member. A variable flag is set to limit multiple post of data to Google sheet. Then a connection is made to Wi-Fi client with given host and port.
   member = data;
    flag = 1;
    Serial.print("connecting to ");
    Serial.println(host);
    WiFiClient client;
    const int httpPort = 80;
    if (!client.connect(host, httpPort))
    {
      Serial.println("connection failed");
      return;
    }
If the connection to the client is successfully established, then a complete URL is created using the device ID which we have got in pushing box API. If the client doesn’t responds for more than 5 seconds, it will show client timeout. Otherwise, it will send the data to Google sheet using the URL via pushing box API.
Important Note: Replace your device ID in place of v81040XXXXXX.
String url = "/pushingbox?";
    url += "devid=";
    url += "v81040XXXXXX";
    url += "&Name=" + String(member);

    Serial.print("Requesting URL: ");
    Serial.println(url);

    client.print(String("GET ") + url + " HTTP/1.1\r\n" +
                 "Host: " + host + "\r\n" +
                 "Connection: close\r\n\r\n");

    unsigned long timeout = millis();
    while (client.available() == 0) {
      if (millis() - timeout > 5000) {
        Serial.println(">>> Client Timeout !");
        client.stop();
        return;
      }
    }
while (client.available()) {
      String line = client.readStringUntil('\r');
      Serial.print(line);
      Serial.print("Data Sent!");
    }
Below images show how the biometric attendance is recorded in the google sheet.
This is how a IoT based Biometric system can be built using NodeMCU.
All the codes with a working video are given below.
Code for Attendance System:
#include <Adafruit_Fingerprint.h>
#include <ESP8266WiFi.h>
#include <LiquidCrystal_I2C.h>
LiquidCrystal_I2C lcd(0x3F, 16, 2);
SoftwareSerial mySerial(D3, D4);
Adafruit_Fingerprint finger = Adafruit_Fingerprint(&mySerial);
const char* ssid = "admin"; //replace with your own SSID
const char* password = "12345678"; //replace with your own password
const char* host = "api.pushingbox.com";
String member = "";
int flag = 0;
void setup()
{
lcd.begin(16, 2);
lcd.init();
lcd.backlight();
lcd.setCursor(4, 0);
lcd.print("WELCOME");
delay(2000);
lcd.clear();
Serial.begin(115200);
delay(10);
Serial.println();
Serial.println();
lcd.setCursor(0, 0);
Serial.print("Connecting to WiFi... ");
Serial.print("Connecting to ");
Serial.println(ssid);
WiFi.mode(WIFI_STA);
WiFi.begin(ssid, password);
while (WiFi.status() != WL_CONNECTED)
{
delay(500);
Serial.print(".");
}
Serial.println("");
Serial.println("WiFi connected");
Serial.println("IP address: ");
Serial.println(WiFi.localIP());
lcd.setCursor(0, 0);
lcd.print("WiFi connected ");
lcd.setCursor(0, 1);
lcd.print("IP:");
lcd.setCursor(4, 1);
lcd.print(WiFi.localIP());
delay(1500);
while (!Serial);
delay(100);
Serial.println("\n\n Waiting for Fingerprint Sensor");
lcd.setCursor(0, 0);
lcd.print(" Waiting for ");
lcd.setCursor(0, 1);
lcd.print(" Sensor ");
delay(1500);
finger.begin(57600);
if (finger.verifyPassword())
{
Serial.println("Found Successfully");
lcd.setCursor(0, 0);
lcd.print("Sensor found! ");
lcd.setCursor(0, 1);
lcd.print(" ");
delay(1500);
} else
{
Serial.println("Fingerprint sensor not found!!!");
lcd.setCursor(0, 0);
lcd.print("Sensor Not found! ");
lcd.setCursor(0, 1);
lcd.print(" ");
while (1)
{
delay(1);
}
}
}
void loop()
{
int fingerprintID = getFingerprintID();
delay(50);
if (fingerprintID == 1)
{
Serial.println("Welcome Debasis");
lcd.setCursor(0, 0);
lcd.print("Welcome Debasis ");
lcd.setCursor(0, 1);
lcd.print(" ");
connecthost("Debasis");
flag = 0;
}
else if (fingerprintID == 2)
{
Serial.println("Welcome Manas");
lcd.setCursor(0, 0);
lcd.print("Welcome Manas ");
lcd.setCursor(0, 1);
lcd.print(" ");
connecthost("Manas");
flag = 0;
}
else if (fingerprintID == 3)
{
Serial.println("Welcome Tara");
lcd.setCursor(0, 0);
lcd.print("Welcome Tara ");
lcd.setCursor(0, 1);
lcd.print(" ");
connecthost("Tara");
flag = 0;
}
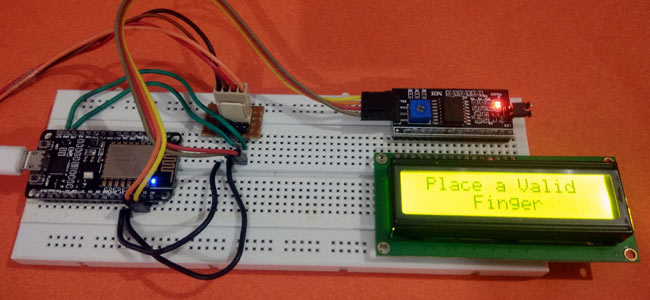
else
{
Serial.println("Waiting for valid finger!!!");
lcd.setCursor(0, 0);
lcd.print(" Place a Valid ");
lcd.setCursor(0, 1);
lcd.print(" Finger ");
}
}
int getFingerprintID()
{
uint8_t p = finger.getImage();
if (p != FINGERPRINT_OK) return -1;
p = finger.image2Tz();
if (p != FINGERPRINT_OK) return -1;
p = finger.fingerFastSearch();
if (p != FINGERPRINT_OK) return -1;
return finger.fingerID;
}
void connecthost(String data)
{
if (flag == 0)
{
member = data;
flag = 1;
Serial.print("connecting to ");
Serial.println(host);
WiFiClient client;
const int httpPort = 80;
if (!client.connect(host, httpPort))
{
Serial.println("connection failed");
return;
}
// We now create a URL for the request
String url = "/pushingbox?";
url += "devid=";
url += "v810401C3XXXXX";
url += "&Name=" + String(member);
Serial.print("Requesting URL: ");
Serial.println(url);
client.print(String("GET ") + url + " HTTP/1.1\r\n" +
"Host: " + host + "\r\n" +
"Connection: close\r\n\r\n");
unsigned long timeout = millis();
while (client.available() == 0) {
if (millis() - timeout > 5000) {
Serial.println(">>> Client Timeout !");
client.stop();
return;
}
}
while (client.available()) {
String line = client.readStringUntil('\r');
Serial.print(line);
Serial.print("Data Sent!");
}
Serial.println();
Serial.println("closing connection");
}
}
Code for Enrollment:
#include <Adafruit_Fingerprint.h>
SoftwareSerial mySerial(D3,D4);
Adafruit_Fingerprint finger = Adafruit_Fingerprint(&mySerial);
uint8_t id;
void setup()
{
Serial.begin(9600);
while (!Serial); // For Yun/Leo/Micro/Zero/...
delay(100);
Serial.println("\n\nAdafruit Fingerprint sensor enrollment");
// set the data rate for the sensor serial port
finger.begin(57600);
if (finger.verifyPassword()) {
Serial.println("Found fingerprint sensor!");
} else {
Serial.println("Did not find fingerprint sensor :(");
while (1) { delay(1); }
}
}
uint8_t readnumber(void) {
uint8_t num = 0;
while (num == 0) {
while (! Serial.available());
num = Serial.parseInt();
}
return num;
}
void loop() // run over and over again
{
Serial.println("Ready to enroll a fingerprint!");
Serial.println("Please type in the ID # (from 1 to 127) you want to save this finger as...");
id = readnumber();
if (id == 0) {// ID #0 not allowed, try again!
return;
}
Serial.print("Enrolling ID #");
Serial.println(id);
while (! getFingerprintEnroll() );
}
uint8_t getFingerprintEnroll() {
int p = -1;
Serial.print("Waiting for valid finger to enroll as #"); Serial.println(id);
while (p != FINGERPRINT_OK) {
p = finger.getImage();
switch (p) {
case FINGERPRINT_OK:
Serial.println("Image taken");
break;
case FINGERPRINT_NOFINGER:
Serial.println(".");
break;
case FINGERPRINT_PACKETRECIEVEERR:
Serial.println("Communication error");
break;
case FINGERPRINT_IMAGEFAIL:
Serial.println("Imaging error");
break;
default:
Serial.println("Unknown error");
break;
}
}
// OK success!
p = finger.image2Tz(1);
switch (p) {
case FINGERPRINT_OK:
Serial.println("Image converted");
break;
case FINGERPRINT_IMAGEMESS:
Serial.println("Image too messy");
return p;
case FINGERPRINT_PACKETRECIEVEERR:
Serial.println("Communication error");
return p;
case FINGERPRINT_FEATUREFAIL:
Serial.println("Could not find fingerprint features");
return p;
case FINGERPRINT_INVALIDIMAGE:
Serial.println("Could not find fingerprint features");
return p;
default:
Serial.println("Unknown error");
return p;
}
Serial.println("Remove finger");
delay(2000);
p = 0;
while (p != FINGERPRINT_NOFINGER) {
p = finger.getImage();
}
Serial.print("ID "); Serial.println(id);
p = -1;
Serial.println("Place same finger again");
while (p != FINGERPRINT_OK) {
p = finger.getImage();
switch (p) {
case FINGERPRINT_OK:
Serial.println("Image taken");
break;
case FINGERPRINT_NOFINGER:
Serial.print(".");
break;
case FINGERPRINT_PACKETRECIEVEERR:
Serial.println("Communication error");
break;
case FINGERPRINT_IMAGEFAIL:
Serial.println("Imaging error");
break;
default:
Serial.println("Unknown error");
break;
}
}
// OK success!
p = finger.image2Tz(2);
switch (p) {
case FINGERPRINT_OK:
Serial.println("Image converted");
break;
case FINGERPRINT_IMAGEMESS:
Serial.println("Image too messy");
return p;
case FINGERPRINT_PACKETRECIEVEERR:
Serial.println("Communication error");
return p;
case FINGERPRINT_FEATUREFAIL:
Serial.println("Could not find fingerprint features");
return p;
case FINGERPRINT_INVALIDIMAGE:
Serial.println("Could not find fingerprint features");
return p;
default:
Serial.println("Unknown error");
return p;
}
// OK converted!
Serial.print("Creating model for #"); Serial.println(id);
p = finger.createModel();
if (p == FINGERPRINT_OK) {
Serial.println("Prints matched!");
} else if (p == FINGERPRINT_PACKETRECIEVEERR) {
Serial.println("Communication error");
return p;
} else if (p == FINGERPRINT_ENROLLMISMATCH) {
Serial.println("Fingerprints did not match");
return p;
} else {
Serial.println("Unknown error");
return p;
}
Serial.print("ID "); Serial.println(id);
p = finger.storeModel(id);
if (p == FINGERPRINT_OK) {
Serial.println("Stored!");
} else if (p == FINGERPRINT_PACKETRECIEVEERR) {
Serial.println("Communication error");
return p;
} else if (p == FINGERPRINT_BADLOCATION) {
Serial.println("Could not store in that location");
return p;
} else if (p == FINGERPRINT_FLASHERR) {
Serial.println("Error writing to flash");
return p;
} else {
Serial.println("Unknown error");
return p;
}
}


