


Air Quality is deteriorating day by day and the inevitable increase in industries and urbanization would add up to make it worse. In a recent study conducted by AirVisual and Greenpeace it is demeaning to see that the cities in India occupy 22 positions in a list of top 30 polluted cities in the world. At this point, it is already made clear that we have to act fast on this problem. Since air pollution is not visible to naked eyes it is important to regulate monitoring systems to actually aware the people of a city by measuring the pollutant parameters in real time and sending a notification whenever the air quality goes down beyond a certain level.
In this tutorial, we are going to make an IOT based Air Quality Monitoring System. This system measures the air quality in real time using MQ135 Gas Sensor with NodeMCU to send the data to ThingSpeak platform. The ThingSpeak platform is connected with Twitter, so whenever the air quality goes below a certain level, it will send the twitter notification to an authorized twitter account and thus warning people in that particular area. We previously used ThingSpeak with ESP8266 to build weather station and Smart Street light. Also check all the ThingSpeak and ESP2866 related projects by following the links.
Materials Required
The following hardware and software will be required to build this IoT based Air Quality Monitoring System.
Hardware
- NodeMCU
- MQ135 Gas Sensor
- Jumper Wires
Software
- ThingSpeak
- Arduino IDE
Circuit Diagram
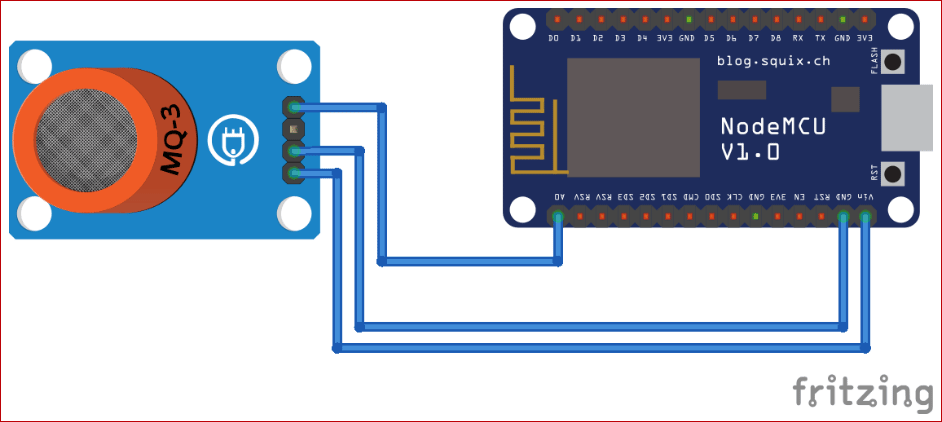
The complete circuit diagram for NodeMCU Air quality meter is shown below. It is pretty simple as we only need to connect only the MQ135 sensor with our ESP NodeMCU board.
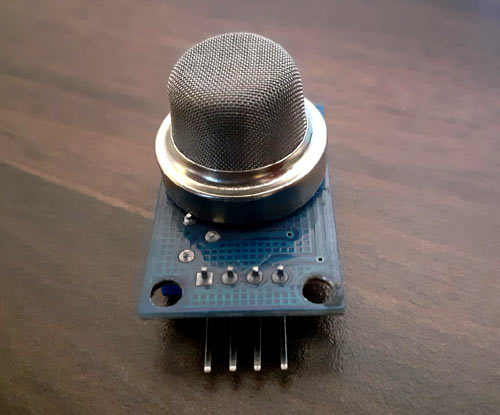
MQ 135 sensor is 4-pin multi-use sensor. It can be used to sense gas like benzene, alcohol, smoke. MQ135 sensor has an electrochemical sensor inside it, and this sensor is sensitive to a range of gasses are used at room temperature. You can also read about the other IoT sensors if you want to measure a particular gas.
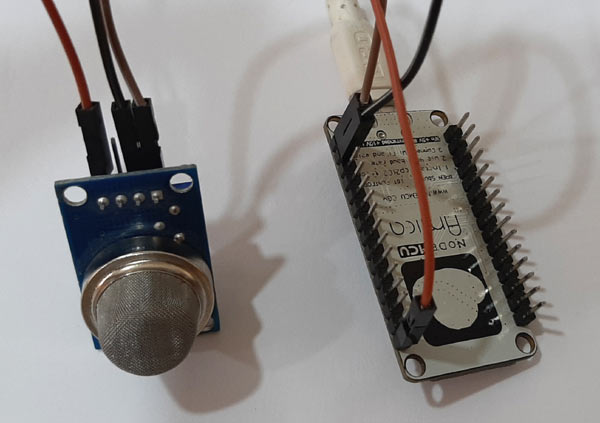
The Vcc pin of MQ135 sensor is connected with Vin pin of NodeMCU, and GND pin is connected with NodeMCU’s GND pin. While the A0 pin is connected with A0 pin of NodeMCU as shown in the circuit diagram above. The complete set-up will be powered by the micro-usb port of Node-MCU through a USB cable. I made the connections using connector wires and it looked like something below
ThingSpeak Setup
ThingSpeak is an open source IoT platform that allows you to aggregate, visualize, and analyze live data in the cloud. You can control your devices using ThingSpeak, can send data to ThingSpeak from your devices, and even you can create instant visualizations of live data, and send alerts using web services like Twitter and Twilio. ThingSpeak has integrated support from the numerical computing software MATLAB. MATLAB allows ThingSpeak users to write and execute MATLAB code to perform preprocessing, visualizations, and analyses. ThingSpeak takes a minimum of 15 seconds to update your readings. In this project we will be using ThingSpeak to get the value from MQ135 sensor through NodeMCU and plot a graph with the obtained value against time. We will also tweet from ThingSpeak if the value from MQ135 reads critical.
It is also possible to use ThingSpeak with Raspberry Pi and ESP32 making it suitable for a wide range of IoT Projects. Follow the below steps to set-up your ThingSpeak
Step 1: Sign up only bold
To send data to Thingspeak, a Thingspeak account is required. To do so navigate to Thingspeak website www.thinspeak.com.

Click on the ‘Sign up’ option in the top right corner and fill out the required details
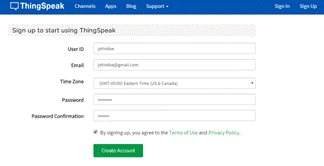
After this verify your E-mail id and click on continue.
Step 2: Create a Channel for Your Data only bold
Now as you are logged in your account, Create a new channel by clicking “New Channel” button.
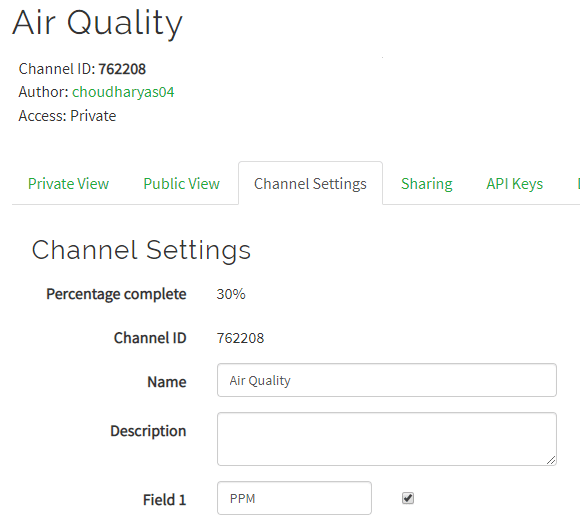
After clicking on “New Channel,” enter the Name and Description of the data you want to upload on this channel. For example, I am sending MQ135 sensor data, so I named it as “Air Quality.”
Enter the name of your data in Field1. If you want to use more than one Field, you can check the box next to Field option and enter the name and description of your data.
After this click on save channel button to save your details.
Step 3: API Key only bold
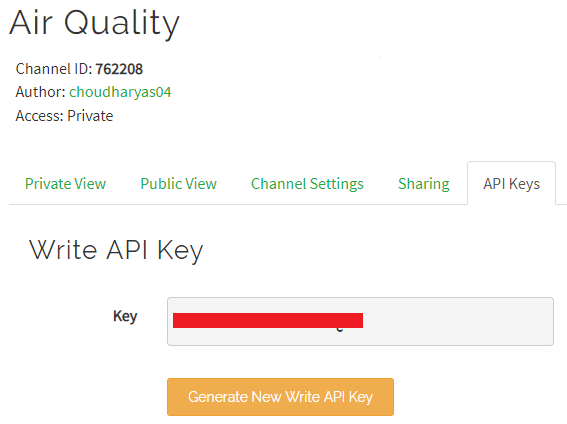
To send data to ThingSpeak, we need a unique API key, which we will use later in our code to upload the Temperature and Humidity to ThingSpeak Website.
Click on “API Keys” button to get your unique API key for uploading sensor data. Now copy your “Write API Key.” We will use this API key in our code.
Configuring Arduino IDE to program NodeMCU ESP8266
Here NodeMCU is programmed using Arduino IDE, to do this you have to add NodeMCU board to Arduino IDE first.
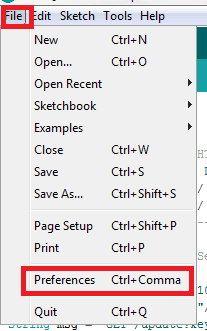
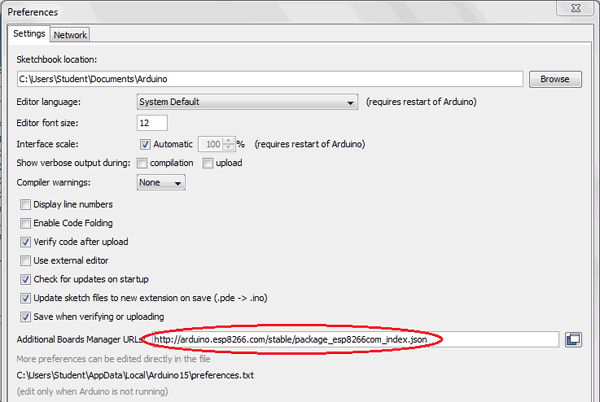
So to do this, open Arduino IDE and go to File>>Preferences
Then a new window will pop-up in which add the below link in “Additional Board Manager URL’s” and click “OK”
http://arduino.esp8266.com/stable/package_esp8266com_index.json
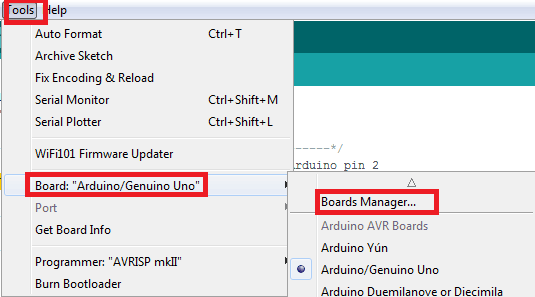
Now in your Arduino IDE go to Tools>>Board>>Boards Manager
And search for “ESP8266”, then install “ESP8266 by ESP8266 community” package by clicking on ‘Install’ button (I already installed the board that is why the install button in disabled)
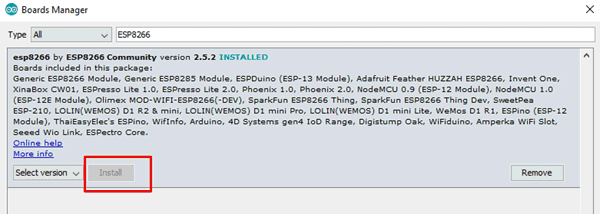
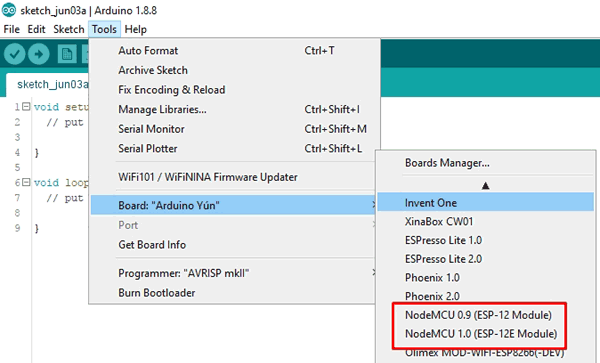
It will take a couple of minutes to complete the installation. Once the installation is complete you will be able to see NodeMCU in your boards list
Code Explanation
Before starting the code, add the MQ135 sensor library to your Arduino IDE. To do that, download the MQ135 sensor library zip file from below link.
After that in Arduino IDE click on Sketch> Include Library > Add Zip file. Select the file and then click Open.
Complete code with a working video is given at the end of this tutorial, here we are explaining the complete program to understand the working of the project.
The code starts by including the MQ135 sensor library and ESP8266 wifi library. MQ135 sensor library is used to read data from MQ135 sensor. After that, enter the ThingSpeak API key and server address and define the variables that will be used in the code.
#include "MQ135.h"
#include <ESP8266WiFi.h>
const char* server = "api.thingspeak.com";
const int sensorPin= 0;
int air_quality;
Inside the void loop, function air quality will be measured, and using the .getPPM() function values will be changed into PPM. After that, these values will be published to several ThingSpeak channel.
void loop()
{
     MQ135 gasSensor = MQ135(A0);
     air_quality = gasSensor.getPPM();
                         if (client.connect(server,80))
                      {
                             String postStr = apiKey;
                             postStr +="&field1=";
                             postStr += String(air_quality);
                             postStr += "\r\n\r\n";

                             client.print("POST /update HTTP/1.1\n");
                             client.print("Host: api.thingspeak.com\n");
                             client.print("Connection: close\n");
                             client.print("X-THINGSPEAKAPIKEY: "+apiKey+"\n");
                             client.print("Content-Type: application/x-www-form-urlencoded\n");
                             client.print("Content-Length: ");
                             client.print(postStr.length());
                             client.print("\n\n");
                             client.print(postStr);
                             Serial.print("Air Quality: ");
                             Serial.print(air_quality);
                             Serial.println(" PPM.Send to Thingspeak.");
                        }
          client.stop();
           Serial.println("Waiting...");
    delay(10000);
}
Programming the NodeMCU for Air Quality Monitoring
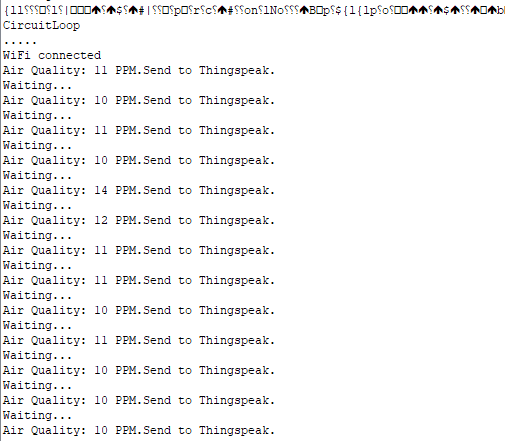
Now as our code is ready to upload, connect the NodeMCU with the laptop and choose the board and port correctly, and then click the Upload button. After uploading the code, open the serial monitor. Make the baud rate of serial monitor as 115200. You will see your Wi-Fi Id, password, and PPM values on the serial monitor.
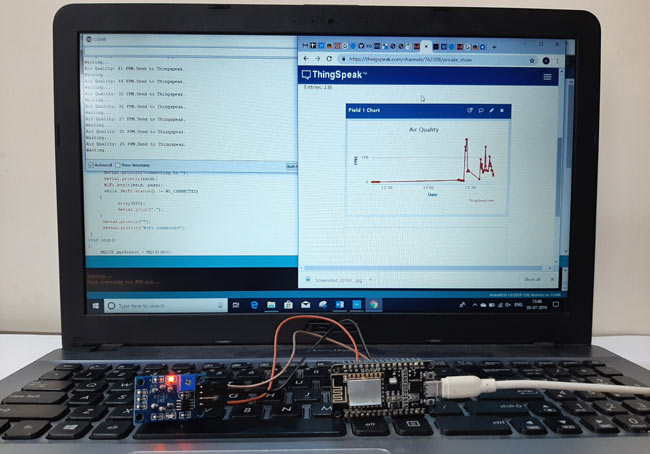
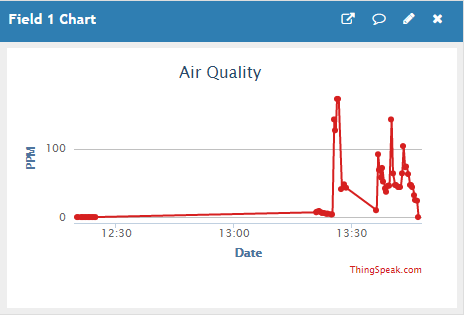
Now go to the ThingSpeak website and check your channel, you will see the current air quality values in PPM like shown in the below graphs.
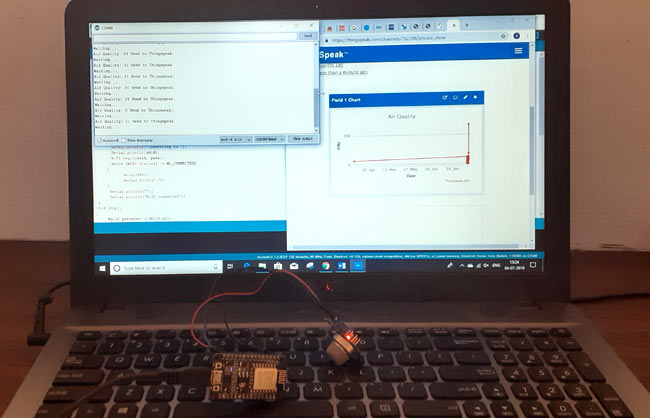
The complete hardware set-up along with the graph and serial monitor opened on my laptop is shown below.
Sending Twitter notification from ThingSpeak
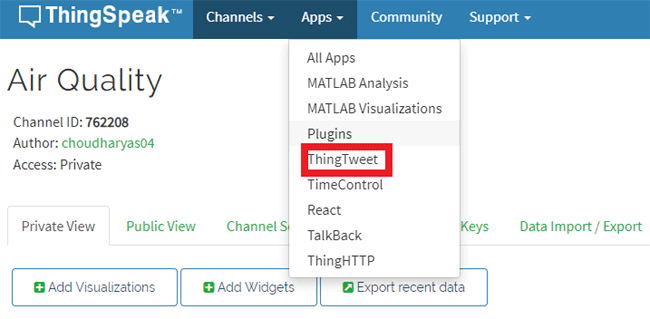
Now our next task is to send a twitter notification whenever the air quality goes down beyond a certain level. For that, you have to connect your twitter account with ThingSpeak. To do so, go to your ThingSpeak channel and click on Apps > ThingTweet > Link Account.
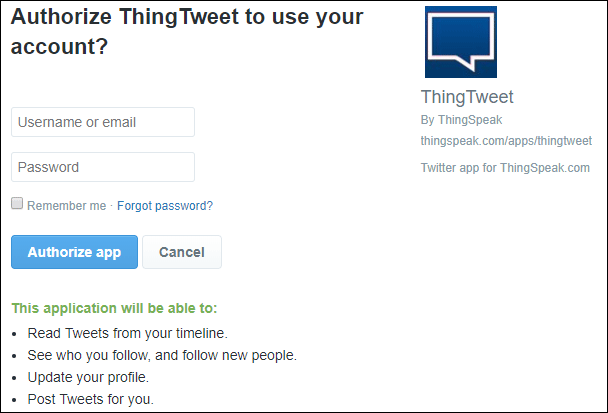
In next window enter your twitter username and password and click on ‘Authorize app.’ Now, as you authorized the ThingTweet, it can read and post tweets on your timeline.
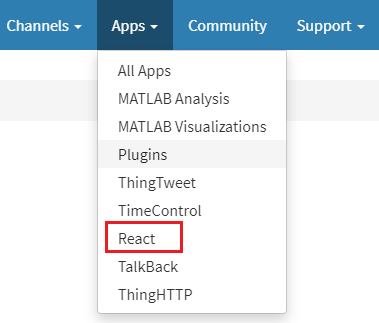
Go back to ThingSpeak channel and then click on Apps > React > New React.
In React window fill the details. In condition, tab choose Numeric because we want to send a tweet for a specific numeric value, in condition tab choose the channel name, field and select when you want to run the React.
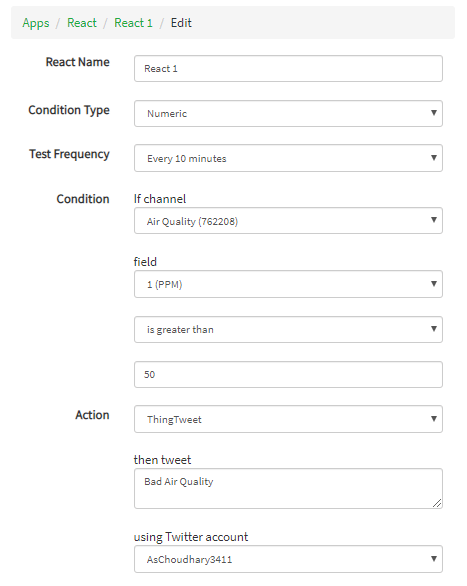
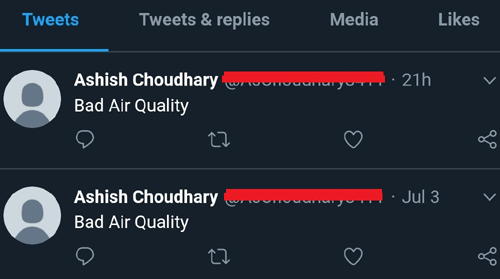
Save the React and run the code. Now, whenever the PPM value goes past 50, it will send a notification to your twitter account. You can change the notification frequency by changing the Test Frequency.
By using Twitter, you can send notification to everyone. This system can alert the entire population in a particular locality about their air quality.
So this is how a true IoT based Air quality alert system can be made easily. Check the complete code and demonstration video.
#include "MQ135.h"
#include <ESP8266WiFi.h>
String apiKey = "API Key"; // Enter your Write API key here
const char *ssid = "WiFI Name"; // Enter your WiFi Name
const char *pass = "Password"; // Enter your WiFi Password
const char* server = "api.thingspeak.com";
const int sensorPin= 0;
int air_quality;
WiFiClient client;
void setup()
{
Serial.begin(115200);
delay(10);
Serial.println("Connecting to ");
Serial.println(ssid);
WiFi.begin(ssid, pass);
while (WiFi.status() != WL_CONNECTED)
{
delay(550);
Serial.print(".");
}
Serial.println("");
Serial.println("WiFi connected");
}
void loop()
{
MQ135 gasSensor = MQ135(A0);
air_quality = gasSensor.getPPM();
if (client.connect(server,80))
{
String postStr = apiKey;
postStr +="&field1=";
postStr += String(air_quality);
postStr += "\r\n\r\n";
client.print("POST /update HTTP/1.1\n");
client.print("Host: api.thingspeak.com\n");
client.print("Connection: close\n");
client.print("X-THINGSPEAKAPIKEY: "+apiKey+"\n");
client.print("Content-Type: application/x-www-form-urlencoded\n");
client.print("Content-Length: ");
client.print(postStr.length());
client.print("\n\n");
client.print(postStr);
Serial.print("Air Quality: ");
Serial.print(air_quality);
Serial.println(" PPM.Send to Thingspeak.");
}
client.stop();
Serial.println("Waiting...");
delay(10000);
}


