


Fire alarm systems are very common nowadays and commonly installed in Banks, shops, offices, home etc. They detect the fire and trigger a loud alarm to aware everybody. But what if nobody is there to hear that alarm, like in night time or when nobody is at home. So to inform the authority about any fire incident today we are building a IoT based Fire Alarm system which not only trigger an alarm but also sends a Email alert to concern persons. This method can also be used to inform fire department automatically in case of fire. Here we will use Infrared Flame Sensor to detect the fire and ESP8266 NodeMCU to trigger the alarm and send email with the help of SMTP server. This project can be further extended to make a phone call or send an SMS with the help of GSM module in case of fire.
Components Required
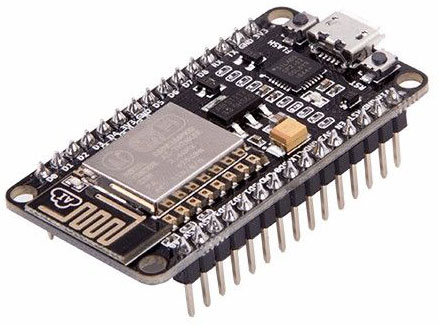
NodeMCU ESP8266
ESP8266 NodeMCU is an open source IoT platform. It includes firmware which runs on the low cost Wi-Fi enabled ESP8266 Wi-Fi SoC from Espressif Systems, and hardware which is based on the ESP-12 module. It has GPIO, SPI, I2C, ADC, PWM AND UART pins for communication and controlling other peripherals attached to it. On board NodeMCU has CP2102 IC which provides USB to TTL functionality.
In this IoT Fire Alarm, we are using one GPIO pin to get the digital data from the flame sensor.
Flame Sensor
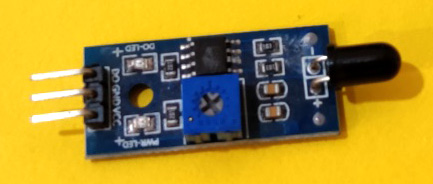
Flame sensor is a device which is used to detect the presence of fire in its surrounding. There are many types of flame sensors available such as Infrared Flame sensor, Ultraviolet flame sensor etc. In this project we will be using Infrared Flame Sensor to detect the fire.
Infrared Flame Sensor consists of a photodiode coated with black epoxy which makes it sensitive to the infrared radiations having wavelength between 700nm to 1mm and can detect fire up to distance of 100cm within 60 degrees of angle of detection. This photodiode is based on a three terminal YG1006 NPN Photo transistor.
Every object including the “fire” emits some amount of Infrared rays which are detected by the photodiode. An operation amplifier is attached across the photodiode to detect the change in voltage. If the voltage detected is zero it gives digital output “1” and if it detects some voltage in case of fire then it gives digital output as “0”.
Configure SMTP2GO to send Email on Fire Detection
SMTP (Simple Mail Transfer Protocol) is a platform used to send and receive large number of emails from remote locations automatically. Due to its fast and reliable service it is mostly used by developers and marketers to save their time in sending emails in a secured way. Its servers and data centers are all around the world which helps it to select the nearest server and hence provides fastest connection in sending and receiving emails. It can be used in IOT projects to send emails automatically when a particular task is occurred. In this project we will be using SMTP2GO to send emails alerts when fire is detected by the flame sensor.
Setting up SMTP2Go:
Go to https://www.smtp2go.com/ and click on Try SMTP2GO Free.

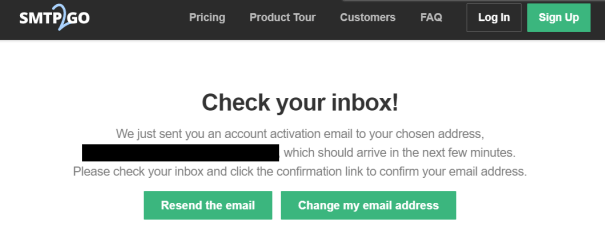
Fill the details with your name, email id and password and click on Submit. Then it will redirect to a page where it will ask you to activate SMTP2GO.
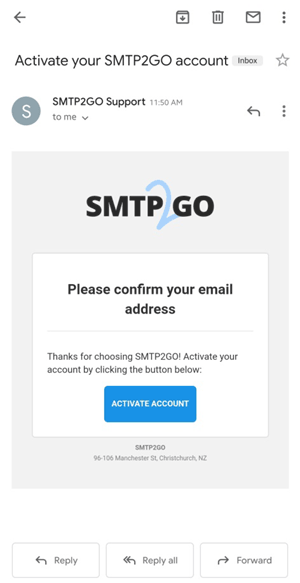
Go to your mail box and click on the mail received by SMTP2GO. Click on Activate Account.
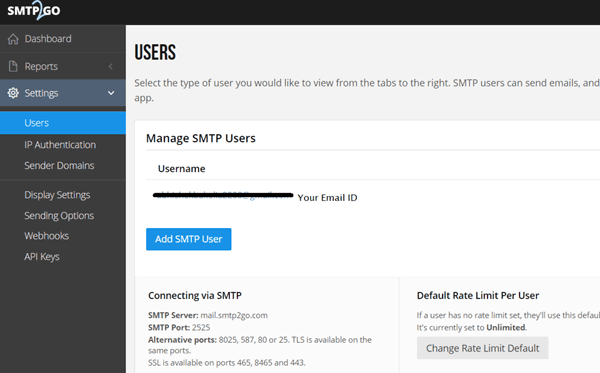
Now enter the username which is your email id and password. A new page will open with your username. Save these username and password in a notepad file which will be needed later in Arduino IDE code. Now click on Settings and then Click on Users. A new page will open with your user name and SMTP server details. Save the SMTP server and SMTP Port as these will be used in Arduino code to connect with SMTP server.
Encoding to Base64 Value
Before sending username and password to SMTPTOGO server, we need to encode them into Base64. To encode them we will used the https://www.base64encode.org/.
Here just enter the username and password you want to encode into base64 and Click on Encode to generate the encoded values. Copy and save the encoded values.
For instance, is your user name is “[email protected]” then enter this username in the given text area and then click on encode. The encoded base64 value is “cGFzc3dvcmQ=”. Similarly do it for password.

Circuit Diagram
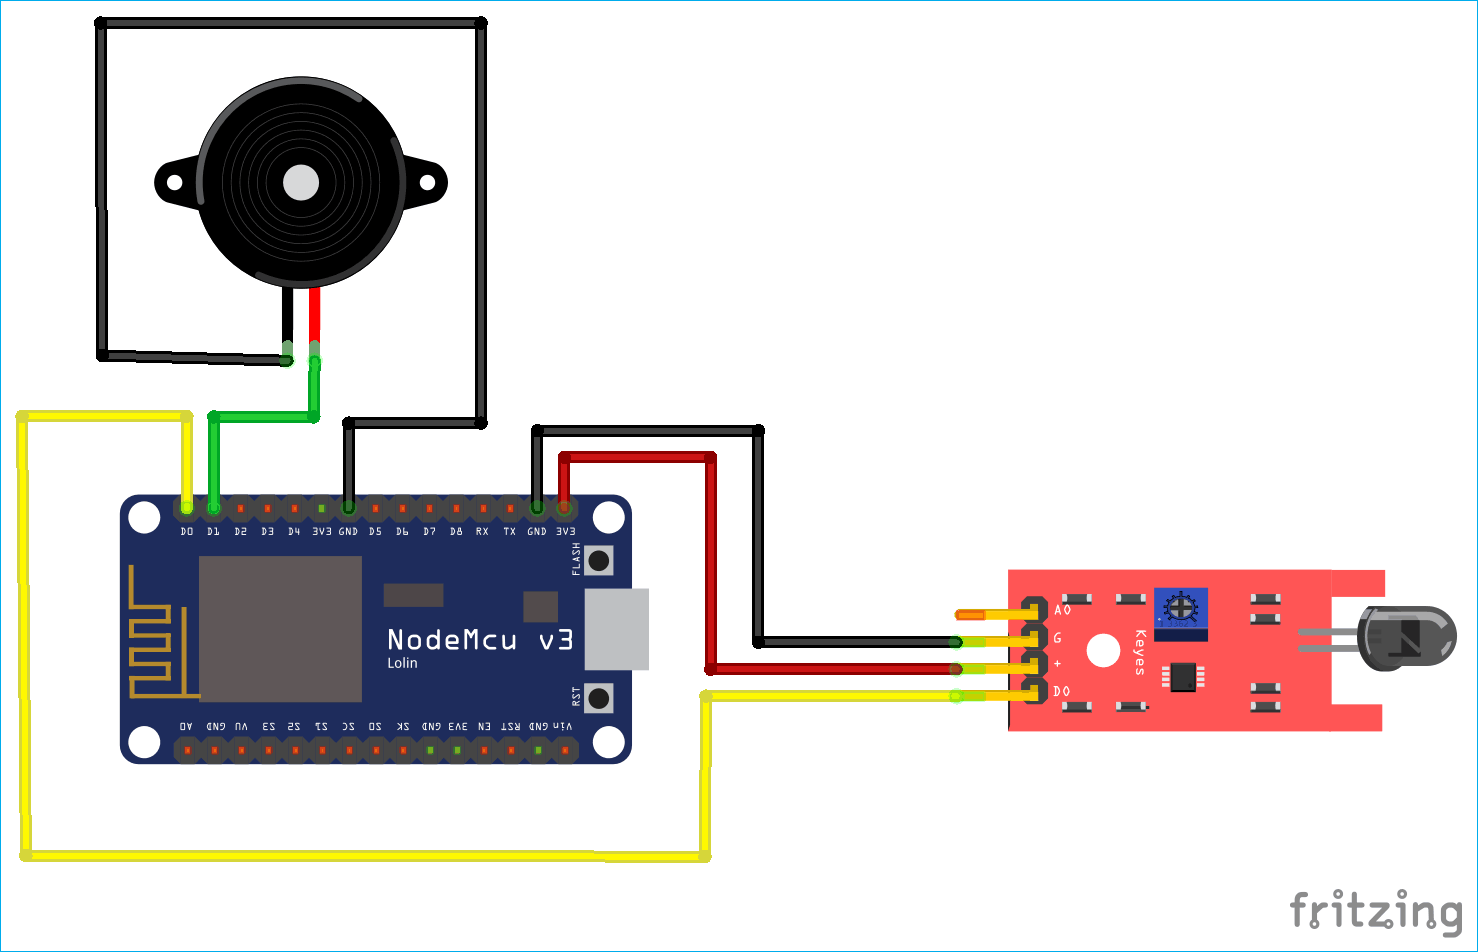
Circuit diagram for this IoT based fire alarm only includes three components – NodeMCU, Fire sensor and a buzzer.
Working and Code Explanation
Make the connections as given in the circuit diagram and copy the complete code given at the end of this tutorial. Then upload the code in NodeMCU using Arduino IDE. The flame sensor is connected at D0 pin to give the digital input to the NodeMCU and Buzzer is connected at D1 pin to get digital output from the NodeMCU. If fire is detected by the flame sensor then it gives “0” and NodeMCU turns on the buzzer and send the alert email to the person using SMTP2GO automatically.
As told earlier complete code is given at the end of this tutorial. Here we are explaining the working of code.
First include the required libraries and define variables for Wi-Fi SSID and password to initialize the Wi-Fi connection. Since we need to connect to SMTP server a variable is declared with address of the server. D0 is the pin on NodeMCU for digital input from flame sensor.
#include <ESP8266WiFi.h>
const char* ssid = "Enter your ssid";
const char* password = "enter your password";
char server[] = "mail.smtp2go.com";
const int flame = D0;
WiFiClient Client;              //define wifi client as client
Following code is used to connect to Wi-Fi network and displaying the status messages on Serial Monitor.
Serial.print("Connecting To: ");
  Serial.println(ssid);
  WiFi.begin(ssid, password);
  while (WiFi.status() != WL_CONNECTED)
  {
    delay(500);
    Serial.print(".");
  }
  Serial.println("");
  Serial.println("WiFi Connected.");
  Serial.print("IP address: ");
  Serial.println(WiFi.localIP());
Here we are storing the digital input from the flame sensor in a variable. If the input is “0” (low) means the flame sensor has detected the fire and it sends the email using function sendEmail().
  int t = digitalRead(flame);
  Serial.println(t);
   if (t==0) {
  digitalWrite(buzz,HIGH);
    sendEmail();
    Serial.print("Mail sent to:");
    Serial.println(" The recipient");
    Serial.println("");
  }
Client.connect() is the function which takes SMTP Server and SMTP Port to connect to SMTP server. It gives “1” if connection establishes successfully and acknowledge the server with EHLO command.
  if (Client.connect(server, 2525) == 1)        // connect to smtp server with port address 2525
  {
    Serial.println(F("connected to server"));
  }
  else
  {
    Serial.println(F("connection failed"));
    return 0;
  }
Client.println("EHLO www.example.com");
Now send the encoded user name and password to the server .The user name and the password from the SMTP2GO which have saved in a notepad file are encoded to base64 value. The procedure to encode into base64 value is already explained above.
Client.println("AUTH LOGIN");
 Serial.println(F("Sending User"));
  Client.println("c2VuZGVyQHh5ei5jb20= "); //base64, ASCII encoded SMTP Username
  Serial.println(F("Sending Password"));
  Client.println("cGFzc3dvcmQ=");   //base64, ASCII encoded SMTP Password
After successful authentication, here the complete email is formed with fields like “To”, “From”, “Subject”, “Body”.
Client.println(F("To:  [email protected] "));
  Client.println(F("From: [email protected] "));
  Client.println(F("Subject: Fire Alarm\r\n"));
  Client.println(F("Attention: Fire Detected.\n"));
After sending the data, QUIT command is sent to complete the email.
  Serial.println(F("Sending QUIT"));
  Client.println(F("QUIT"));
  if (!emailResp())
    return 0;
  Client.stop();
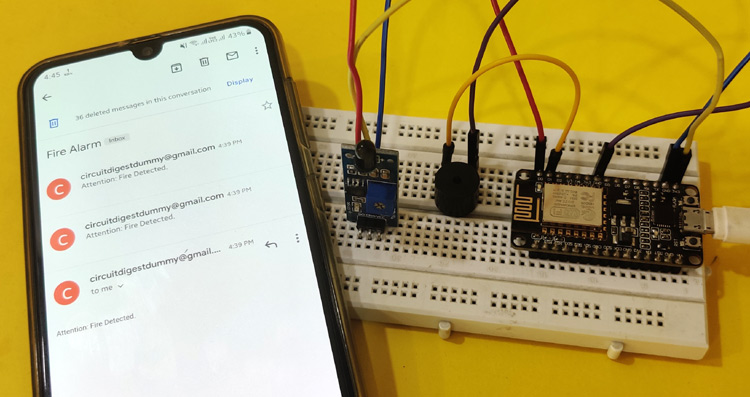
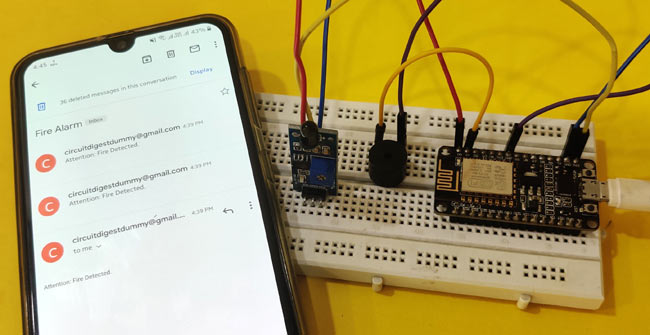
This is how a Low cost IoT Fire Alarm system can be made easily just by using three components.
Check the Demonstration video below.
#include <ESP8266WiFi.h>
const char* ssid = "Enter your ssid";
const char* password = "enter your password";
char server[] = "mail.smtp2go.com";
const int flame = D0;
const int buzz = D1;
WiFiClient Client; //define wifi client as client
void setup() {
pinMode(flame,INPUT);
pinMode(buzz,OUTPUT);
Serial.begin(115200);
Serial.println("");
Serial.print("Connecting To: ");
Serial.println(ssid);
WiFi.begin(ssid, password);
while (WiFi.status() != WL_CONNECTED)
{
delay(500);
Serial.print(".");
}
Serial.println("");
Serial.println("WiFi Connected.");
Serial.print("IP address: ");
Serial.println(WiFi.localIP());
}
void loop() {
int t = digitalRead(flame);
Serial.println(t);
if (t==0) {
digitalWrite(buzz,HIGH);
sendEmail();
Serial.print("Mail sent to:");
Serial.println(" The recipient");
Serial.println("");
}
digitalWrite(buzz,LOW);
}
byte sendEmail()
{
if (Client.connect(server, 2525) == 1) // connect to smtp server with port address 2525
{
Serial.println(F("connected to server"));
}
else
{
Serial.println(F("connection failed"));
return 0;
}
if (!emailResp()) // if connection failed return now
return 0;
//
Serial.println(F("Sending EHLO"));
Client.println("EHLO www.example.com");
if (!emailResp())
return 0;
Serial.println(F("Sending auth login"));
Client.println("AUTH LOGIN");
if (!emailResp())
return 0;
Serial.println(F("Sending User"));
Client.println("c2VuZGVyQHh5ei5jb20="); //base64, ASCII encoded SMTP Username
if (!emailResp())
return 0;
Serial.println(F("Sending Password"));
Client.println("cGFzc3dvcmQ="); //base64, ASCII encoded SMTP Password
if (!emailResp())
return 0;
Serial.println(F("Sending From"));
Client.println(F("MAIL From: [email protected]"));
if (!emailResp())
return 0;
// change to recipient address
Serial.println(F("Sending To"));
Client.println(F("RCPT To: [email protected]"));
if (!emailResp())
return 0;
Serial.println(F("Sending DATA"));
Client.println(F("DATA"));
if (!emailResp())
return 0;
Serial.println(F("Sending email"));
Client.println(F("To: [email protected] "));
Client.println(F("From: [email protected] "));
Client.println(F("Subject: Fire Alarm\r\n"));
Client.println(F("Attention: Fire Detected.\n"));
Client.println(F("."));
if (!emailResp())
return 0;
Serial.println(F("Sending QUIT"));
Client.println(F("QUIT"));
if (!emailResp())
return 0;
Client.stop();
Serial.println(F("disconnected"));
return 1;
}
byte emailResp()
{
byte responseCode;
byte readByte;
int loopCount = 0;
while (!Client.available())
{
delay(1);
loopCount++;
// Wait for 20 seconds and if nothing is received, stop.
if (loopCount > 20000)
{
Client.stop();
Serial.println(F("\r\nTimeout"));
return 0;
}
}
responseCode = Client.peek();
while (Client.available())
{
readByte = Client.read();
Serial.write(readByte);
}
if (responseCode >= '4')
{
// efail();
return 0;
}
return 1;
}


