


Raspberry Pi is a powerful pocket sized computer having many connectivity options to connect different peripheral devices. It has USB ports, LAN port, HDMI port, 3.5mm audio jack, camera slot and several GPIO pins. To start using Raspberry pi, either you should have a display monitor which can be connected using HDMI cable or you can access it using SSH terminal or VNC server. With monitor its very easy to connect and install OS in raspberry pi, but if you don’t have monitor then you have to connect your Raspberry Pi to some local network and get its IP to access it using SSH or virtual desktop. This type of setup is called as headless start of Raspberry Pi. In this tutorial we will learn how to setup Raspberry pi for headless start. It only requires a computer with working internet connection for headless start of Raspberry Pi.
Raspberry Pi Board for IoT Projects
Raspberry Pi is a small sized computer which is developed by Raspberry Pi Foundation in United Kingdom. The first generation Raspberry Pi 1 Model B was released in 2012 followed by Raspberry Pi 1 Model A and the latest generation Raspberry Pi 3 Model B+ was released in 2018. This low power device is very popular for building IoT projects as it has inbuilt Wi-Fi connectivity to connect it to internet. We previously used Raspberry Pi with many IoT clouds to control it GPIO pin remotely anywhere from the world. It can be used to build IoT Home automation, sending & monitoring weather data on Cloud, automatic controlling of devices based on sensor reading and much more.
- IoT Controlled LED using Thingsboard and Raspberry Pi
- Temperature and Humidity Monitoring over Cloud using Raspberry Pi and Cayenne
- Particle Cloud and Raspberry Pi- Temperature Warning with IFTTT to send an alert after getting data from Particle cloud
- IoT based Raspberry Pi Cloud Camera: Stream Video from the Raspberry Pi Camera to Cloud
Here in this tutorial we will use Raspberry Pi 3 and will learn how to setup it heedlessly. Below are the specifications of Raspberry Pi 3 Model B+:
- Broadcom BCM2837B0, Cortex-A53 (ARMv8) 64-bit SoC
- 1.4GHz 64-bit quad-core ARM Cortex-A53 CPU
- 1GB LPDDR2 SDRAM
- Bluetooth 4.2
- Dual-band 802.11ac wireless LAN (2.4GHz and 5GHz )
- Gigabit Ethernet over USB 2.0
- 3.5mm Audio Jack
- 4 USB 2.0 ports
- 40 GPIO pins
- HDMI port
Components Required
- Raspberry Pi 3 Model B+
- LAN cable
- 5V power supply
- SD card reader
- SD Card(minimum 8GB)
Setting up Raspberry Pi for Headless Start without a Monitor
We start from scratch by installing operating system on Raspberry pi. Follow the steps below to start using Raspberry Pi without any monitor:
- Formatting of SD card (minimum 8 GB)
- Writing Raspbian Operating System to SD card
- SSH connection with Raspberry Pi
- Booting of Raspberry Pi
Step 1: Formatting of SD card
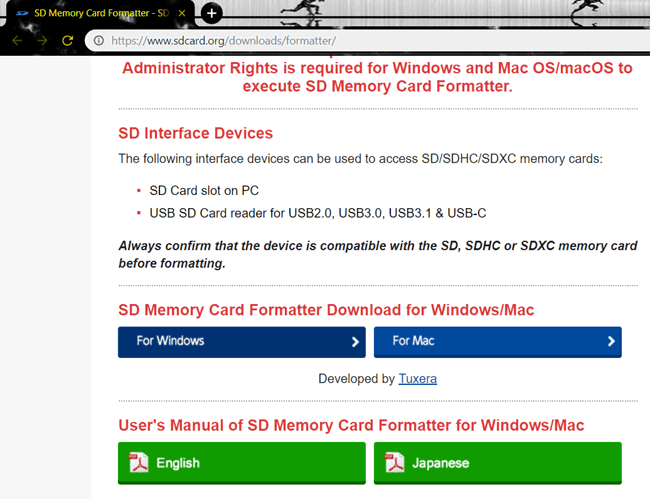
First of all we need to format the SD card in the Raspberry Pi completely to write the operating system for Raspberry Pi. Here I am using SD Card Formatter from https://www.sdcard.org/downloads/formatter/ to format the SD card. It is available for both Windows and Mac.
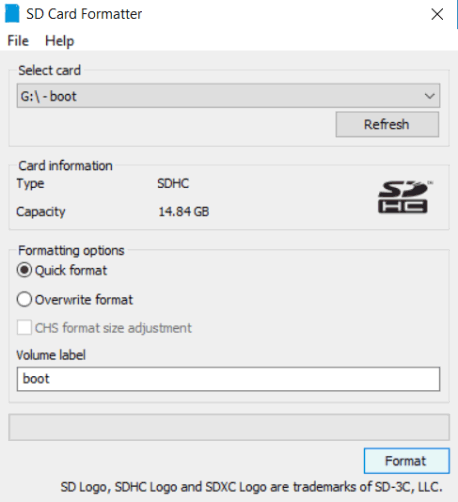
Now inert the SD card using SD card reader in your PC and open the recent downloaded software SD Card Formatter. Select the drive of the SD card. Select Quick Format and Click on Format. After formatting SD card is ready to write the operating software Raspbian.
Step 2: Writing Raspbian OS to SD Card
There are many operating systems available for Raspberry Pi but we are using Raspbian which is the Foundation’s official supported operating software because it is most widely used and its easy to find guides and troubleshooting tips for it. You can download Raspbian from the link https://www.raspberrypi.org/downloads/raspbian/ .
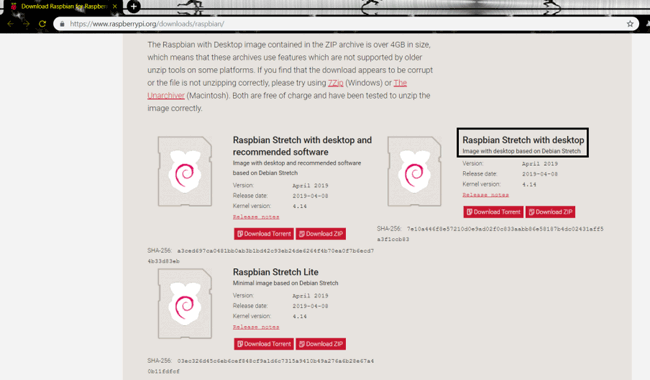
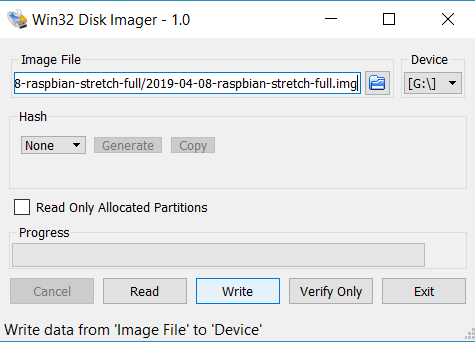
There are three variants of Raspbian, her we are using Raspbian Stretch with desktop. Download the Zip file and extract to a folder. Open the folder and you will see a image file which contains the operating system. We have to write this file to the SD card. For that we need software which can write OS to the SD card. Here we have used WIN32DiskImager to write OS to the SD card..
Download and run this software and then Select the image file of the OS and select the drive of SD card and then Click on Write. Wait for some time till it gets complete.
Step 3: SSH Connection with Raspberry Pi
Secure Shell (SSH) is a feature of Linux that allows you to effectively open a terminal session on Raspberry Pi from the command line of the host computer. SSH is by default disabled in Raspberry Pi 3.
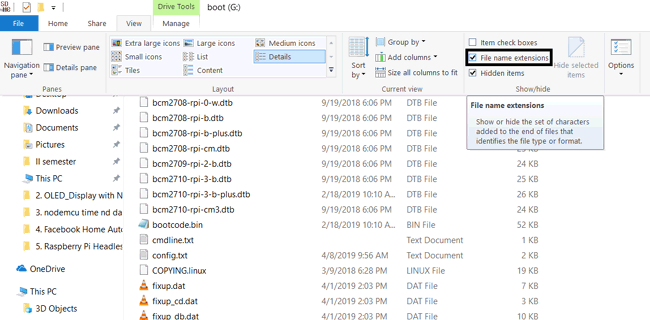
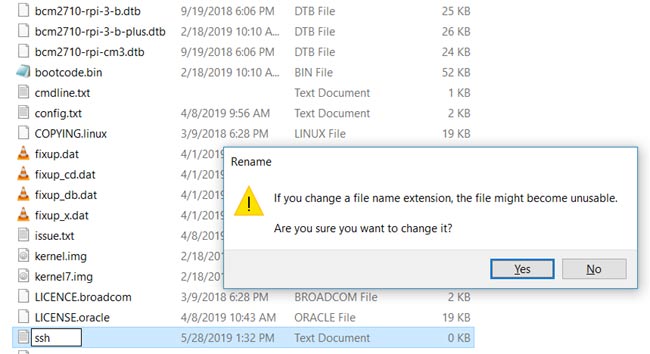
SSH can be easily enabled in Raspberry Pi configuration settings if we have a monitor or keyboard but since we don’t have any monitor we have to enable it manually. After writing OS in the SD card, Open the boot partition of SD card and create an empty ssh file without any extension. Open a notepad and save it as “ssh” name in the SD card drive. This file will have a .txt extension but we want a file without any extension, so remove the extension by renaming it. In windows 10, make sure that you have ticked the check box of “File name extensions”. This will help to remove .txt extension while renaming.
A warning will be display when you remove .txt. Click on “Yes” and the SSH file is created.
Now SSH is enabled in Raspberry to access it from command line using any SSH client like Putty.
Step 4: Booting of Raspberry Pi
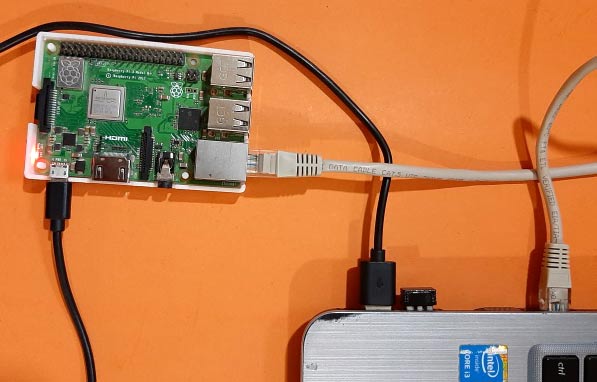
This step is important step in order to access Raspberry Pi without a Monitor. Remove the SD card reader from PC and insert SD card into the Raspberry Pi. Power the Raspberry Pi with a 5V adapter and connect it with PC to Ethernet port using a LAN cable.
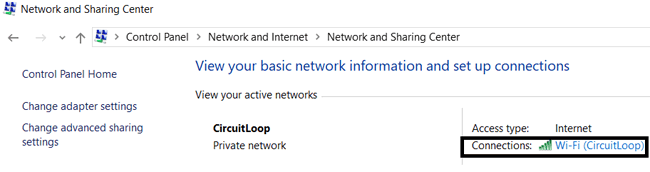
Before scanning for IP address, the make sure that your Internet Protocol Version 4 is checked. Go to Control Panel -> Network and Internet -> Network and Sharing Centre. Click on the connections of Wi-Fi to which your PC is connected.
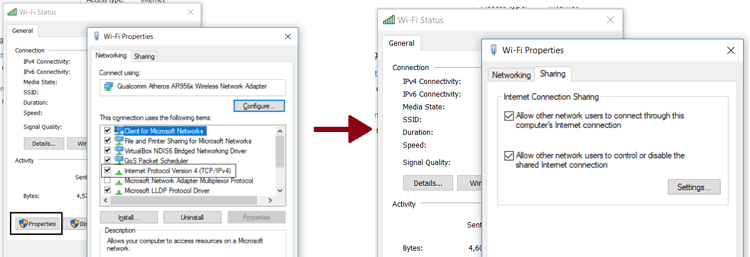
Wi-Fi status will open. Click on Properties and tick Internet Protocol Version 4 as shown below. Then click on the Sharing Tab in the Properties and tick both the check box.
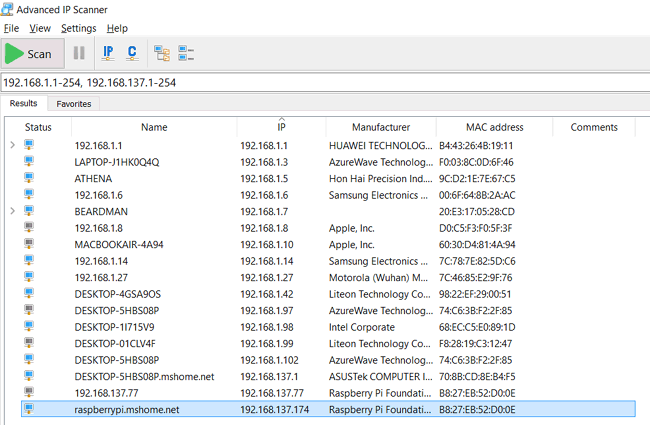
We need to find the local IP address of Raspberry Pi to communicate it with SSH client. Download IP scanner software from http://www.advanced-ip-scanner.com/ which will help to get the IP address of PI. Open the downloaded software and click on scan. It will show you the IP address of the devices connected to Wi-Fi, IP address of your PC, raspberry pi any other devices connected to that Network. Copy the IP address of the raspberry pi in the blue box and save it somewhere.
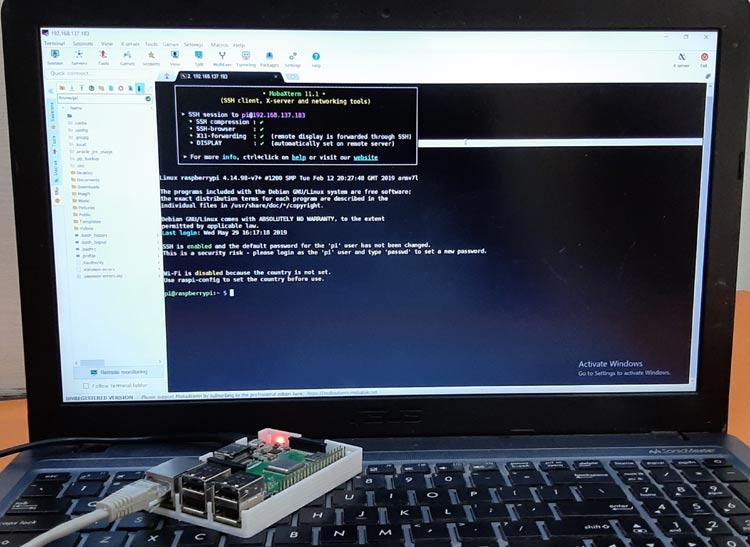
To access the terminal of Raspberry Pi for command line, there are many SSH clients available. Two of the most popular softwares are MobXterm and Putty. We can access command prompt of Raspberry Pi easily using both the software. Here I am using MobXterm software, it can be downloaded from the link below:
https://mobaxterm.mobatek.net/
Or if you want to use light weight, simple SSH client then download putty using this link https://www.chiark.greenend.org.uk/~sgtatham/putty/latest.html .
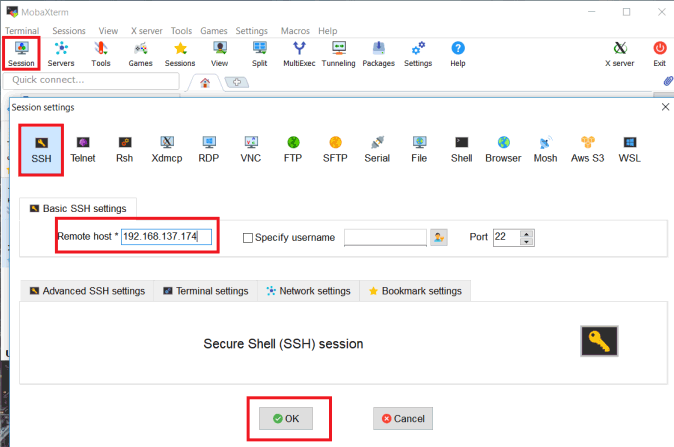
Download and install MobXterm. Open the software. Click on SESSION and then click on SSH. Now enter the IP address of the raspberry pi obtained from IP Scanner in the Remote Host box and Click on OK.
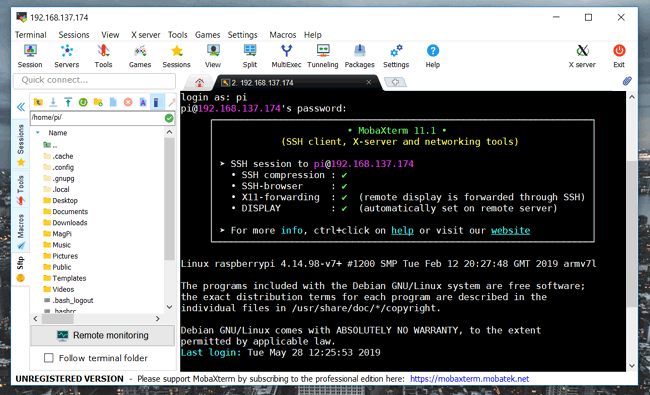
A command prompt will open and it will take very few seconds to establish the connection between Raspberry Pi and MobXterm. On successful connection it will ask for login id and password. By default login ID/username and password for Raspberry Pi “pi” and “raspberry” respectively. Enter the login id and password.

After entering login id and password, raspberry pi will give access to MobXterm to use command prompt using remote SSH server.
This is how you can headless start using your raspberry pi without using any monitor hardware.


