


SMS is widely used as a part of communication, whether official or personal. SMS technology is fast, convenient, cost-effective, and environmentally friendly. SMS communication can be used by getting paid service from Telecom Service Providers. To build an SMS-sending project, a GPRS module, a SIM card, and a microcontroller such as the ESP32 are necessary components. These components work together to establish a connection with the Telecom Service Providers, enabling the transmission of SMS
But what if I told you that we can able to do it by only using microcontrollers and Twilio cloud API Service?
Yes, using IoT-capable microcontroller boards and IoT Cloud Services makes it very easy to deploy such a Mechanism.
In this project, we are going to send SMS using the ESP32 board. The ESP32's built-in Wi-Fi connectivity enables it to communicate with the internet to Access Twilio cloud API for sending SMS. This project has various benefits for various applications, such as delivering notifications, alarms, and alerts.
In the previous project, we have already learned how to send an email alert using ESP32.
Introduction to Twilio
Twilio is a cloud communication platform that provides a set of APIs for the integration of SMS, voice calls, video messages, WhatsApp, email, and authentication. While there is a cost associated with owning this API, but a free trial is also available. IoT development microcontroller boards can access the internet and utilize the Twilio web service to send SMS messages to registered numbers.
Twilio is a cloud platform service that allows programmatically sending SMS for a wide range of projects. It provides an API that seamlessly integrates with mobile apps and software. Also, libraries and modules are available to integrate the API with microcontrollers and embedded platforms.
Components Required
For this project, we need very few requirements including Software and Hardware
- ESP32 Microcontroller Module
- Twilio Account
- Arduino IDE
Configuring Twilio Trial Account
Since Twilio is not a free service, it is a paid one but the trial account is free for use. We are going to create a trial account for testing the SMS API feature offered by the platform.
Let’s see some of the basic steps involved in creating the account:
- Go to the Twilio to start creating a trial Account. Enter the required basic details necessary for opening the account.
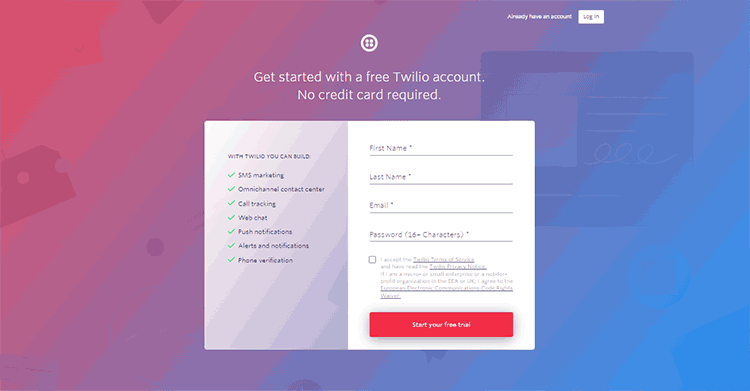
- Please verify your email account by clicking on the verification link sent to the provided email address. Additionally, verify your mobile number by confirming the OTP (One-Time Password) sent to your mobile number.
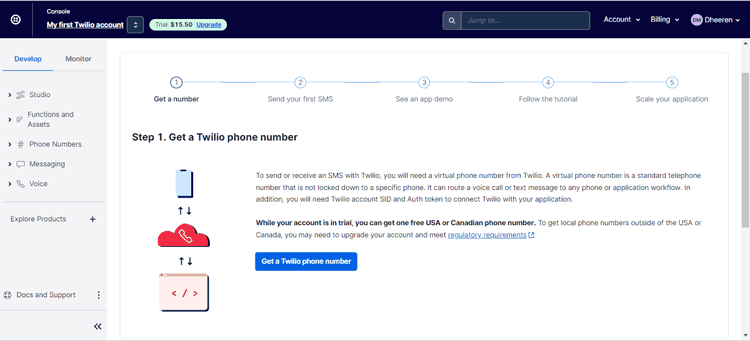
- Once you complete the verification process, Twilio will redirect you to a page where you can fill in personalized setting details. After submitting this information, you will be directed to the main Twilio console page.
Adding Caller IDs
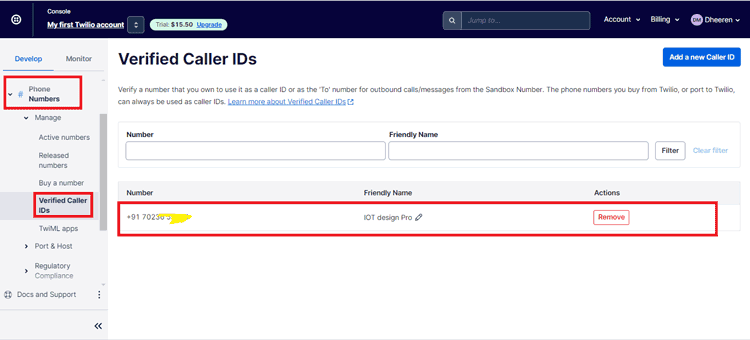
Adding caller IDs to Twilio means we are permitting Twilio to Send Messages to the given Caller IDs. Every Caller ID must be verified first to send the messages using Twilio Cloud API in a free trial Account.
- Go to the Phone Numbers section, expand it, and click on Verified Caller IDs. Here you will see your verified number is already listed.
- If you wish to add another caller ID, simply click on the "Add a new Caller ID" button located at the top right corner. Fill in the required details and verify the additional number to successfully add it as another Caller ID.
Purchasing a Twilio Number
An active number of a country is needed to send an SMS to Caller IDs. Twilio offers different active Phone numbers from different countries but these are not for free. You have to pay some bucks for using an Active Number. But don’t worry we can use it for free for our testing purposes.
We are using a free trial account on Twilio, we get some amount credited to our account for free. We can use the same money to purchase an active number.
- Now Go to the Phone Numbers section then Manage > Buy a number.
- Select any desired country and especially don’t forget to select capabilities as SMS, because it will filter out the numbers which are active for Sending Messages.
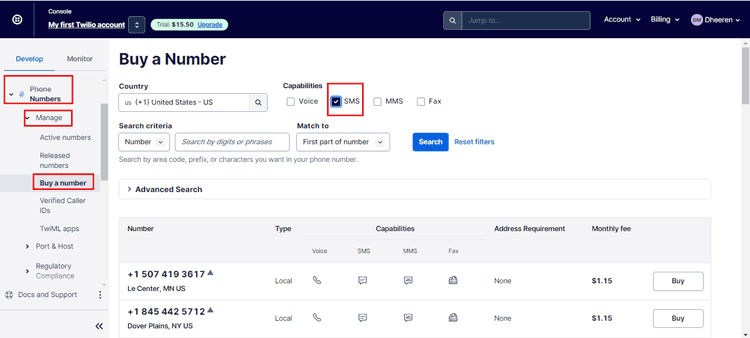
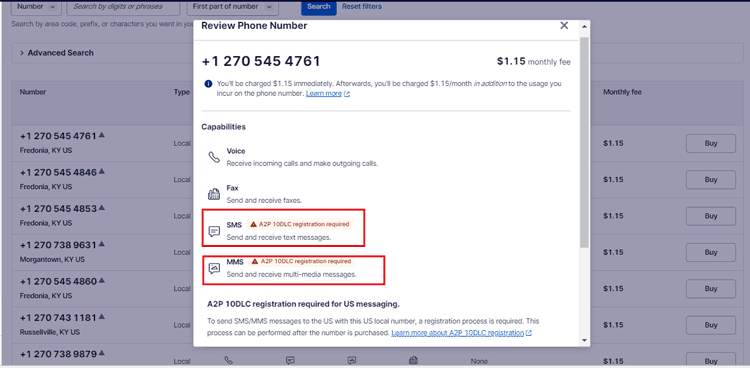
- Upon clicking on the "Buy" button, a prompt will appear displaying the number and requesting acceptance of the Terms & Conditions. If you notice any red marks, that indicates additional document requirements for using the SMS services on that particular number. In such cases, it is advisable not to purchase that number solely for testing purposes.
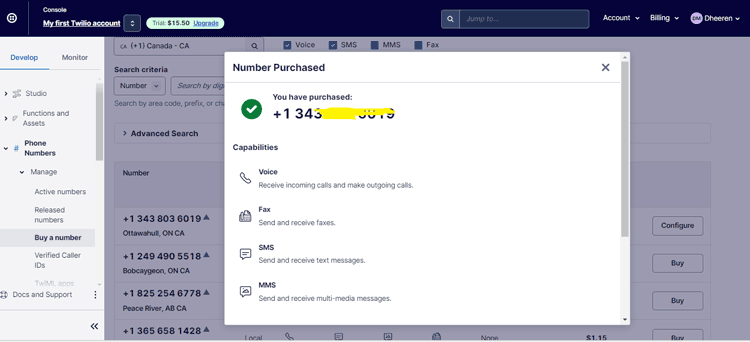
- Finally, after searching for different countries, successfully found a number that offers SMS capabilities without any registration requirements or restrictions.
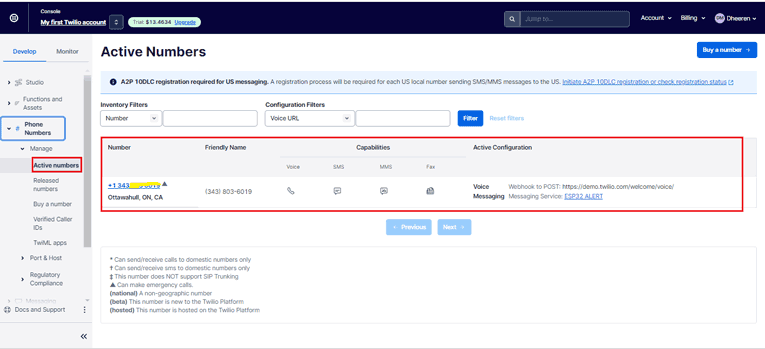
- Now head over to Phone Numbers > Active Numbers. You will see the number listed there which you have just brought.
Creating a Messaging Service
Till now we have added caller ID and brought a Twilio Number to send SMS. Now will see how to set up the programmable messaging service.
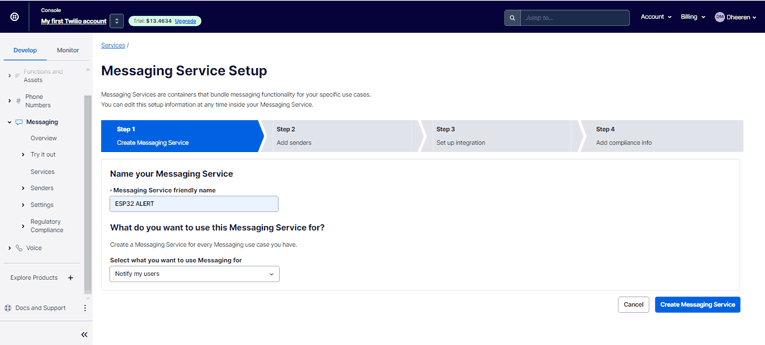
- Go to the Messaging section then Services. Click on Create Messaging Service.
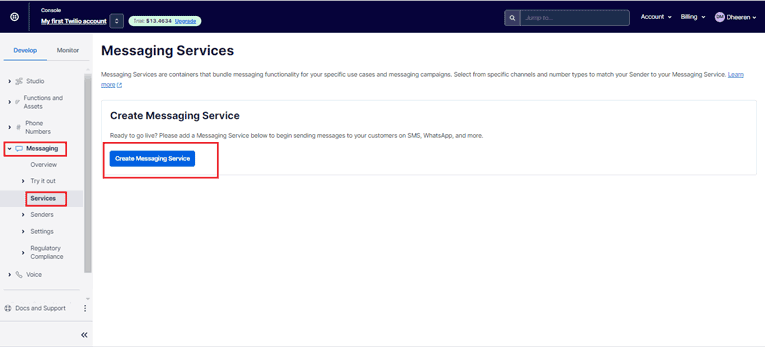
- Give a name to your messaging Service then click Create Messaging Service.
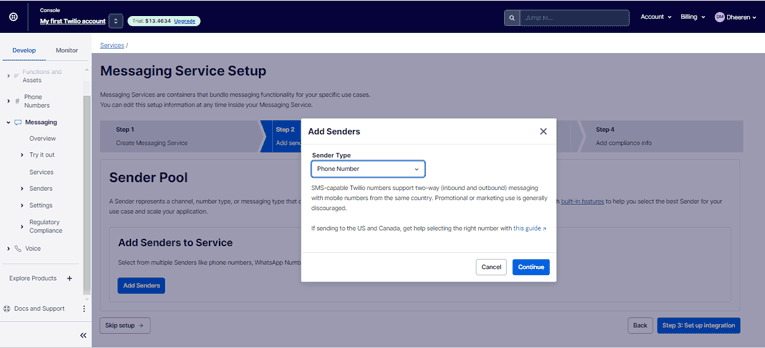
- To add a sender, click “Add Senders” and select the sender type as "Phone number". Afterward, click on "Continue" to proceed.
- Select the Phone Number that you purchased earlier. This Twilio Number will work as a sender number. Click on ‘Add Phone Numbers’.
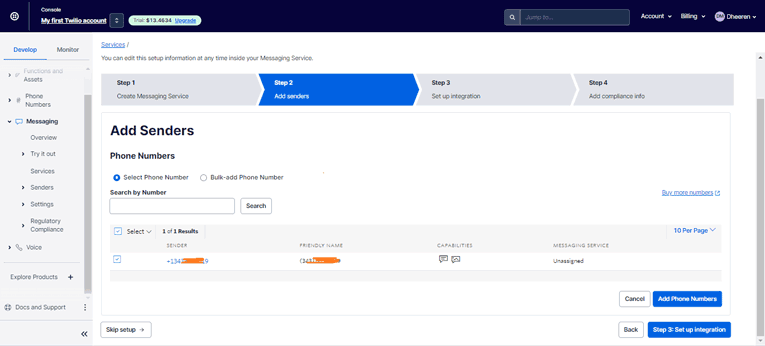
- Finally, Inside the services you can see your recently created Messaging Service.
Sending Test Messages
Now, let’s see how can we initiate Message send.
- Head over to Messaging > Try it out > Send an SMS. Then there you notice that your Caller ID number is already written whereas choose Messaging Service in the “From” Section.
- Then select a messaging service that you have previously created.
- Give the proper message body as per your choice. Then click on Send Message.
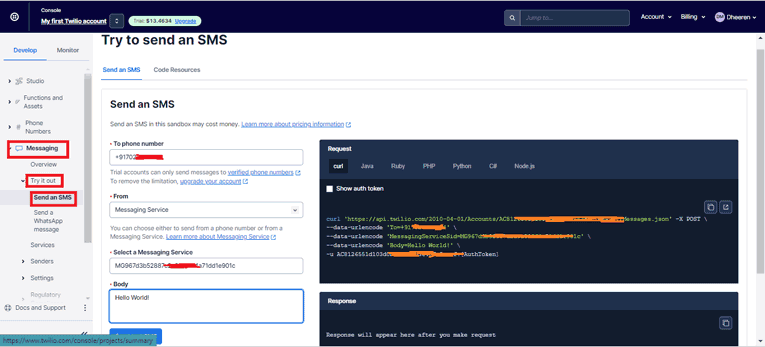
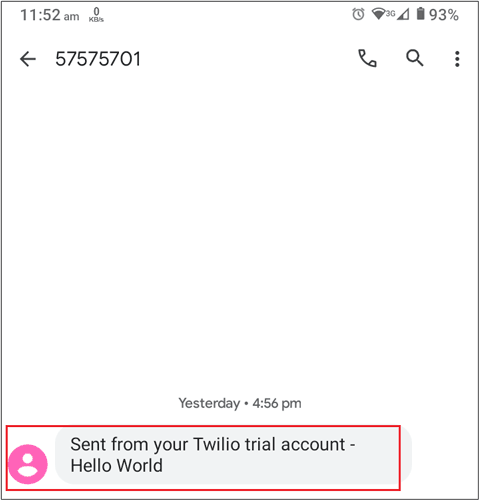
You can see the real SMSs we are receiving.
Programming ESP32 using Arduino IDE
Programming the ESP32 for accessing the Twilio account is a relatively straightforward task. First, we must include the Twilio built-in library in our code. By connecting the ESP32 to the internet through its WiFi capabilities, we can access the Twilio cloud API. The program allows customization of the message content and enables us to specify the recipient's mobile number to whom we want to send the message.
We are using Arduino IDE to Program our ESP32, it has inbuilt WIFI and other necessary Libraries.
Twilio ESP32 Client Library
Installing the Twilio ESP32 library is necessary to use the Twilio programmable messaging service by accessing the Twilio cloud API. So, let’s see how to install it in Arduino IDE.
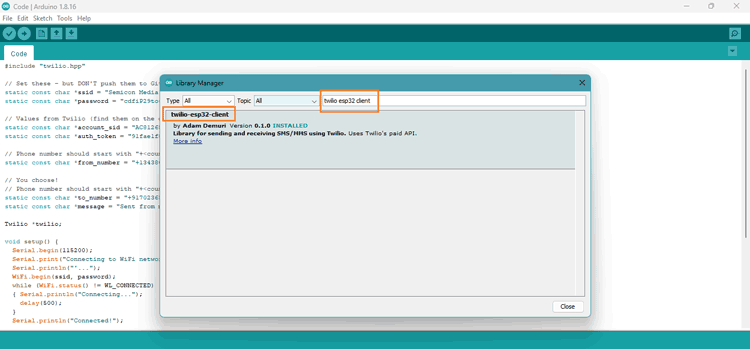
- Go to the library manager of your Arduino by Sketch> include libraries> manage libraries.
- Search for “Twilio esp32 client” and you will find the first library named “twilio-esp32-client” by Adam Demuri.
- Install it and that’s how easy Library Installation is.
Program explanation to send SMS with ESP 32
We have included all the basic necessary libraries to connect to Twilio cloud API. We have also included some variables and objects to store data for further programming.
#include "twilio.hpp"
// Set these - but DON'T push them to GitHub!
static const char *ssid = "Semicon Media 2.4";
static const char *password = "cdfiP29to665";
// Values from Twilio (find them on the dashboard)
static const char *account_sid = "AC8476551d242d0bd512f453c48fe8accf";
static const char *auth_token = "91fae1f82af10dad0c7918461bhg97bb";
// Phone number should start with "+<countrycode>"
static const char *from_number = "+1343_____19";
// You choose!
// Phone number should start with "+<countrycode>"
static const char *to_number = "+9170______24";
static const char *message = "Sent from my ESP32";
Twilio *twilio;
In the Above lines of code, we used the pointers SSID & Password to store the character value of WIFI Network credentials through which our IoT board connects to the Internet.
Accessing API keys
For accessing the Twilio cloud API programmable messaging service, we need to get the correct API keys to securely connect to our Twilio account. API keys including Account SID and Auth Token should be taken by login into Twilio Account. Account SID & Auth Token need to be replaced with your credentials inside the code for successful sending Messages.
- Login to your Twilio Account. Head over to the top right corner then Account > API keys & token.
- There you can see the required details of your API keys.

Also, we have defined pointers to store the sender and receiver numbers. You need to replace the sender number with the number that you have purchased on your Twilio account. And the receiver’s mobile number should be the number Added to the list of verified caller IDs if you are using a Free trial Twilio Account. The pointer message stores the characters of your messages, you can directly put your message inside double quotes.
Finally, we initialize an object of the class of the library Twilio.
void setup() {
  Serial.begin(115200);
  Serial.print("Connecting to WiFi network..");
  WiFi.begin(ssid, password);
  while (WiFi.status() != WL_CONNECTED){
    Serial.print("..");
    delay(500);
  }
  Serial.println("Connected!");
Inside Setup() function, we initialize the serial port on baud rate 115200. Then we start to command WiFi.begin() to initialize the WIFI to connect to a network by providing the correct SSID and password.
Then we monitor the connection by command WL_CONNECTED and, we print periods to the serial monitor as a progress indicator by a delay of 500 milliseconds. Finally, the Connected will print on the serial monitor after a successful connection.
  twilio = new Twilio(account_sid, auth_token);
  delay(1000);
The following above Lines initiate a new Twilio instance with parameters passing as Account SID and Auth Token.
  String response;
  bool success = twilio->send_message(to_number, from_number, message, response);
  if (success)
    {Serial.println("Sent message successfully!");}
  else
    {Serial.println(response);}
}
To send an SMS using the Twilio API, you can call the send_message() function, providing the recipient number, sender number, message content, and a variable to store the response. This function handles the HTTP request in the background, sending all the required parameters to the Twilio API to successfully send the SMS.
The function returns True if the message successfully sends else it will print the response getting from HTTP.
void loop() {
}
Since sending SMSs is not free due that we put our code in Setup() which sends only one SMS when the board starts and makes the loop empty.
Working Explanation of Sending an SMS with ESP32
Now, you have to simply load the sketch inside the Arduino IDE. Fill in the required necessary details inside the code like correctly providing API keys and WiFi network credentials to connect it to the internet. Also, don’t forget to replace the sender and recipient mobile numbers.
Further working steps:
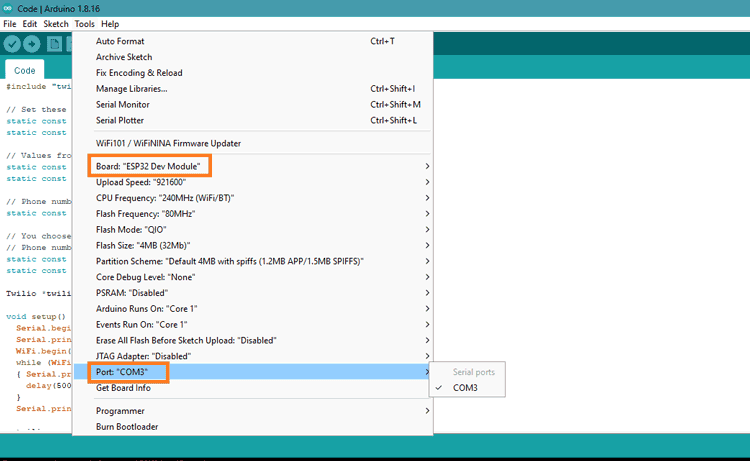
- Open the code sketch in Arduino IDE, and connect the ESP32 module via a micro-USB cable.
- Select the board as ESP32 Dev Module (only work if you installed ESP32 board manager already)
- Select a COM port
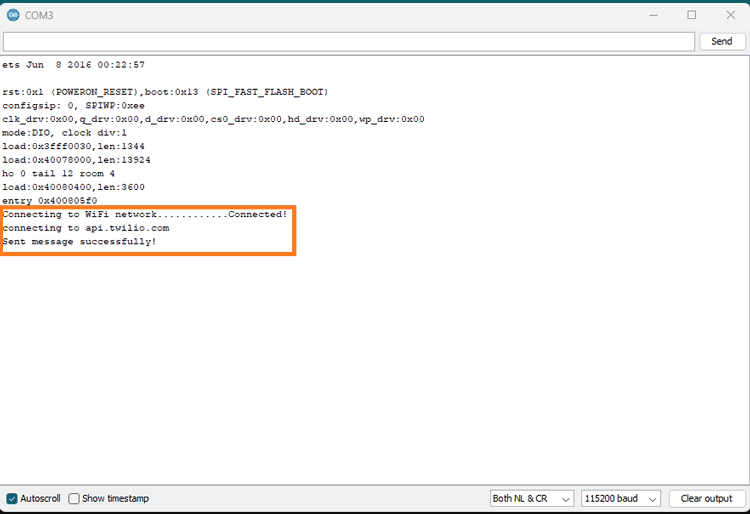
- Upload the code by following the steps already discussed above and give it a try. Open the serial monitor set the correct baud rate and wait until it shows Connected.
- On the serial monitor, you will get a successful message if it is successfully done
- Finally, to ensure that the recipient successfully receives the SMS, you can check the recipient's mobile number for the presence of the SMS.
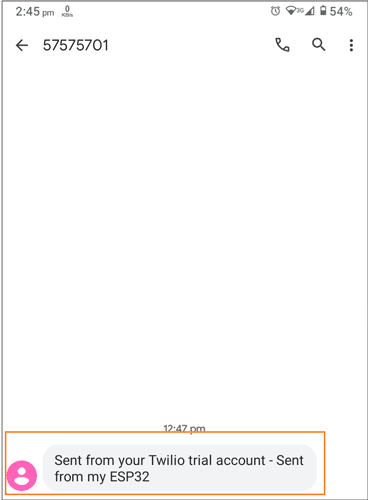
Hope you liked and enjoyed the project and learned something useful from it. If you have any questions, you can leave them in the comment section below.
#include "twilio.hpp"
// Set these - but DON'T push them to GitHub!
static const char *ssid = "Semicon Media 2.4";
static const char *password = "cdfiP29to665";
// Values from Twilio (find them on the dashboard)
static const char *account_sid = " AC8476551d242d0bd512f453c48fe8accf ";
static const char *auth_token = "91fae1f82af10dad0c7918461bhg97bb";
// Phone number should start with "+<countrycode>"
static const char *from_number = "+1343_____19";
// You choose!
// Phone number should start with "+<countrycode>"
static const char *to_number = "+9170______24";
static const char *message = "Sent from my ESP32";
Twilio *twilio;
void setup() {
Serial.begin(115200);
Serial.print("Connecting to WiFi network..");
WiFi.begin(ssid, password);
while (WiFi.status() != WL_CONNECTED)
{ Serial.print("..");
delay(500);
}
Serial.println("Connected!");
twilio = new Twilio(account_sid, auth_token);
delay(1000);
String response;
bool success = twilio->send_message(to_number, from_number, message, response);
if (success)
{Serial.println("Sent message successfully!");}
else
{Serial.println(response);}
}
void loop() {
}


