


ESP8266 Wi-Fi transceiver is one of the most popular Wi-Fi module for IoT-based applications. In this DIY project, we will use it to connect with the ThingSpeak IoT Cloud Platform.
In this project, we are going to send Temperature and Humidity sensor data to Thingspeak using DHT11. By this method, we can monitor our DHT11 sensor’s temperature and humidity data over the internet using the ThingSpeak IoT server, and we can view the logged data and graph over time on the ThingSpeak dashboard. NodeMCU reads the current temperature and humidity from DHT11 and sends it to the ThingSpeak server for live monitoring from anywhere in the world. We previously used ThingSpeak with Raspberry Pi and ESP32 to upload the data on cloud.
ThingSpeak is a data platform for monitoring your data online, targeted to be used for IoT applications. In the Thingspeak channel, you can set the data as private or public according to your choice. ThingSpeak takes a minimum of 15 seconds to update your readings. It's a great and very easy-to-use platform for building IoT projects.
Components Required
- NodeMCU
- DHT11 Temperature and Humidity Sensor
- Jumper Wires
Circuit Diagram
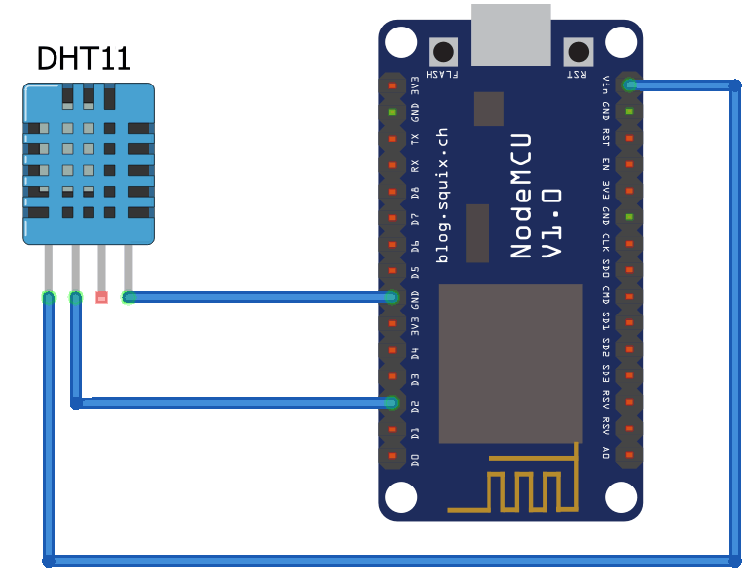
The circuit diagram above shows the ESP8266 and DHT11 connections. Follow the connections suggested in the below table:
|
S.NO. |
NodeMCU |
DHT11 |
|
1 |
Vin |
VCC |
|
2 |
Data |
D2 |
|
3 |
GND |
GND |
Step 1: ThingSpeak Setup for Temperature and Humidity Monitoring
For creating your channel on ThingSpeak, you first need to sign up on ThingSpeak. In case if you already have an account on ThingSpeak, just sign in using your id and password.
For creating your account, go to www.thinspeak.com

Click on sign-up if you don’t have an account and if you already have an account, click on sign in.
After clicking on sign-up, fill in your details.
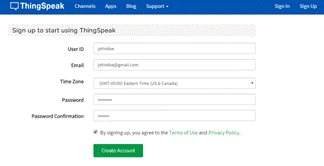
After this verify your E-mail id and click on continue.
Step 2: Create a Channel for Your Data
Once you Sign in after your account verification, create a new channel by clicking the “New Channel” button
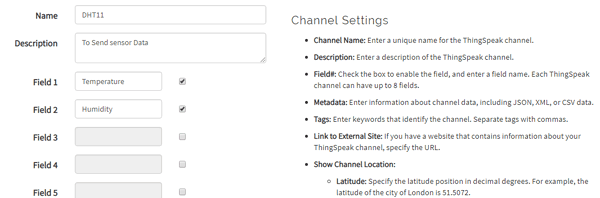
After clicking on “New Channel”, enter the Name and Description of the data you want to upload on this channel. For example, I am sending DHT11 sensor data (temperature and humidity), so I named it as “DHT11”.
Enter the name of your data ‘Temperature’ in Field1 and ‘Humidity’ in Field2. If you want to use more than one Field, you can check the box next to Field option and enter the name and description of your data.
After this, click on save channel button to save your details.
Step 3: API Key
To send data to ThingSpeak, we need a unique API key, which we will use later in our code to upload the Temperature and Humidity to ThingSpeak Website.
Click on the “API Keys” button to get your unique API key for uploading DHT11 sensor data.

Now copy your “Write API Key”. We will use this API key in our code.
Programing NodeMCU with Arduino IDE
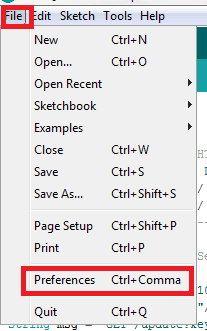
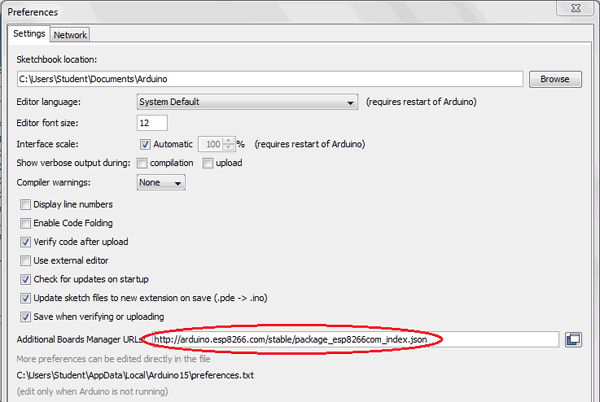
To program NodeMCU with Arduino IDE, go to File–>Perferences–>Settings.
Enter http:// arduino.esp8266.com/stable/package_esp8266com_index.json into the ‘Additional Board Manager URL’ field and click ‘Ok’.
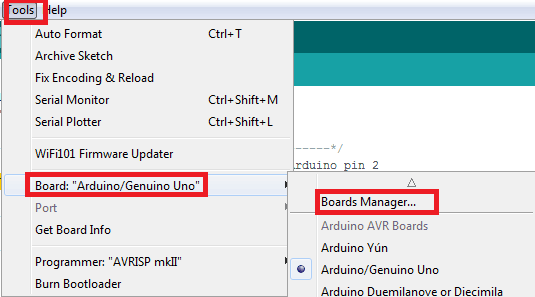
Now go to Tools > Board > Boards Manager.
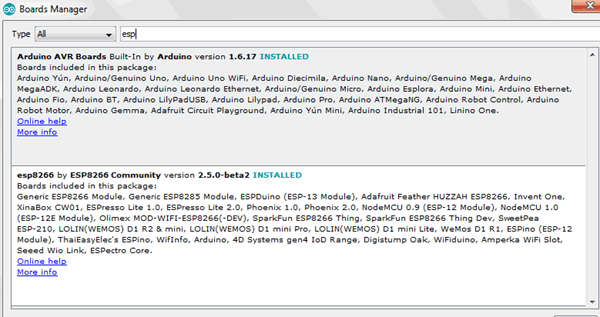
In the Boards Manager window, Type esp in the search box, esp8266 will be listed there below. Now select the latest version of the board and click on install.
After installation is complete, go to Tools >Board >and select NodeMCU 1.0(ESP-12E Module). Now you can program NodeMCU with Arduino IDE.
Programming ESP8266 for uploading data to ThingSpeak
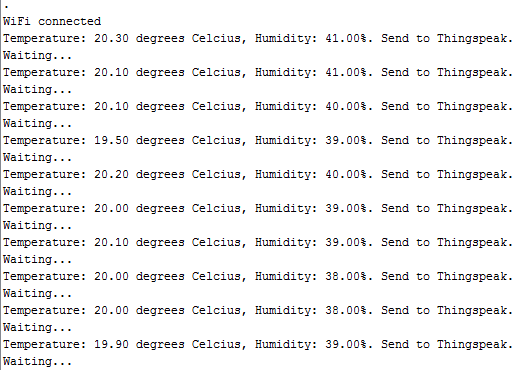
Complete code is given at the end of this tutorial. Upload it in ESP8266 NodeMCU. If you successfully upload your program, the Serial monitor will look like this:
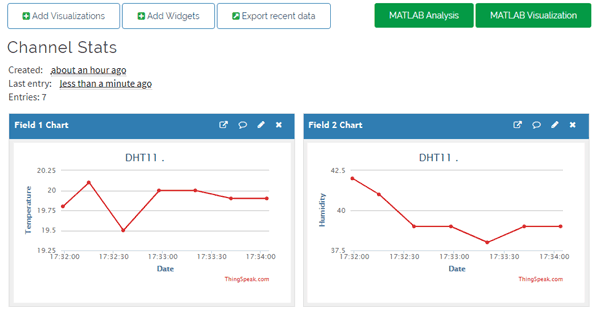
After this, navigate to your Thingspeak page and open your channel in ThingSpeak and the output will be shown as below.
I hope you liked the article, if you have any questions related to this article, please leave them in the comment section below.
#include <DHT.h>
#include <ESP8266WiFi.h>
String apiKey = "Your API KEY"; // Enter your Write API key here
const char *ssid = "WiFi Name"; // Enter your WiFi Name
const char *pass = "WiFi Password"; // Enter your WiFi Password
const char* server = "api.thingspeak.com";
#define DHTPIN 4 // GPIO Pin where the dht11 is connected
DHT dht(DHTPIN, DHT11);
WiFiClient client;
void setup()
{
Serial.begin(115200);
delay(10);
dht.begin();
Serial.println("Connecting to ");
Serial.println(ssid);
WiFi.begin(ssid, pass);
while (WiFi.status() != WL_CONNECTED)
{
delay(550);
Serial.print(".");
}
Serial.println("");
Serial.println("WiFi connected");
}
void loop()
{
float h = dht.readHumidity();
float t = dht.readTemperature();
if (isnan(h) || isnan(t))
{
Serial.println("Failed to read from DHT sensor!");
return;
}
if (client.connect(server,80))
{
String postStr = apiKey;
postStr +="&field1=";
postStr += String(t);
postStr +="&field2=";
postStr += String(h);
postStr += "\r\n\r\n";
client.print("POST /update HTTP/1.1\n");
client.print("Host: api.thingspeak.com\n");
client.print("Connection: close\n");
client.print("X-THINGSPEAKAPIKEY: "+apiKey+"\n");
client.print("Content-Type: application/x-www-form-urlencoded\n");
client.print("Content-Length: ");
client.print(postStr.length());
client.print("\n\n");
client.print(postStr);
Serial.print("Temperature: ");
Serial.print(t);
Serial.print(" degrees Celcius, Humidity: ");
Serial.print(h);
Serial.println("%. Send to Thingspeak.");
}
client.stop();
Serial.println("Waiting...");
delay(10000);
}


