Personal assistants are very popular nowadays. They help users to give information and control appliances using voice control. There are many voice assistants available in the market like Amazon Alexa, Google assistant, Siri, etc. They all are very advance and use Artificial Intelligence (AI) to detect user query and give appropriate feedback to them. IBM Watson is also one of the industry-grade IoT and AI platform which offers Voice Assistant service. We have previously used IBM Watson IoT Platform with Raspberry Pi and with ESP32 to send temperature and humidity data to the cloud.
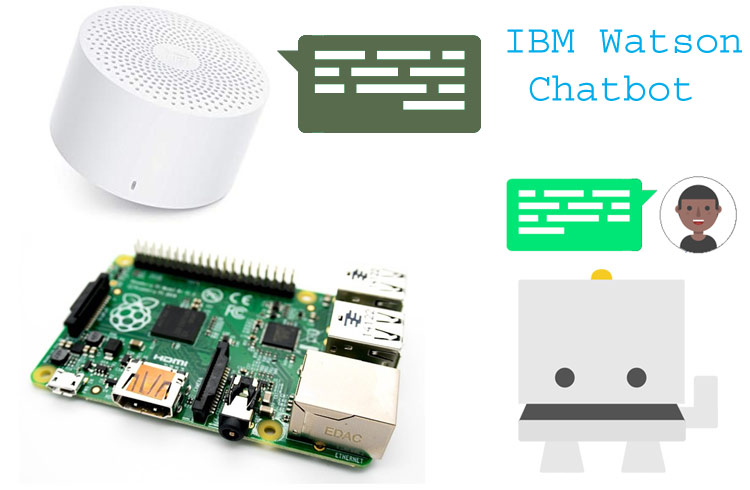
IBM Watson is one of the powerful platform which offers services like speech to text, text to speech, visual recognition, natural language processing and cognitive computing functionalities to your product. IBM Watson also has open-source bot which is known as TJBot. This IBM Watson AI bot can be easily implemented using Raspberry Pi. All the components of this bot are open source and you can 3D print its body and can make your own TJBot using Raspberry Pi. TJBot also supports the camera to detect and give appropriate feedback.
So, in this tutorial, we will make a personalized IBM Watson AI chatbot which can give you voice based feedback. Here we will demonstrate it by creating a skill to Tell a Joke, but you can create any interacting and useful skill with this AI chatbot.
Hardware Requirements
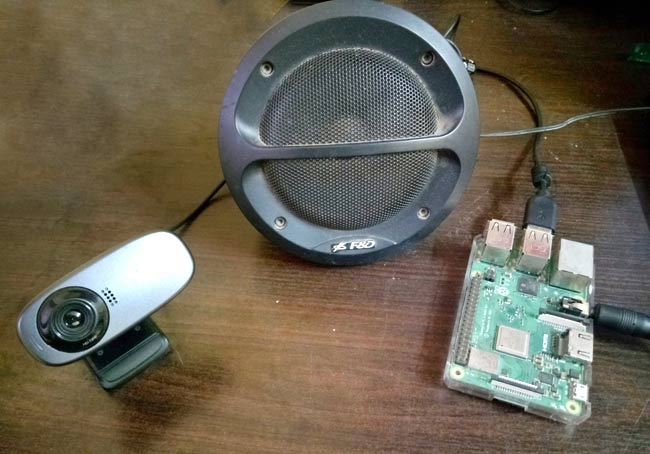
- Raspberry Pi 3 [Recommended] or Raspberry Pi 2 Model B [Supported] and SD Card (8GB or more)
- External Speaker with 3.5mm AUX cable
- Any Webcam or USB 2.0 Microphone
To start using Raspberry pi, either you should have a display monitor which can be connected using HDMI cable or you can access it using SSH terminal or VNC server.
Note: Webcam has inbuilt microphone so, we will use this in place of USB 2.0 microphone.
The whole Watson chatbot tutorial is mainly divided into 4 parts, which are as follows:
- Setting up SSH or VNC server to access pi and checking audio input and output.
- Getting Watson services from IBM cloud
- Add a skill to interact with the IBM Watson bot.
- Installing Tjbot libraries in Raspberry pi.
Part 1: Setting up the Raspberry Pi with SSH and VNC
First, we have to setup SSH or VNC using any remote access software like Putty, MobaXterm, TeamViewer. If you have HDMI monitor then you can directly connect Raspberry pi with it and can access its functionalities.
Checking Webcam Mic with Raspberry Pi:
1. Open Raspberry Pi terminal and type arecord -l command. This will display the hardware devices which are connected to Raspberry Pi as shown below:
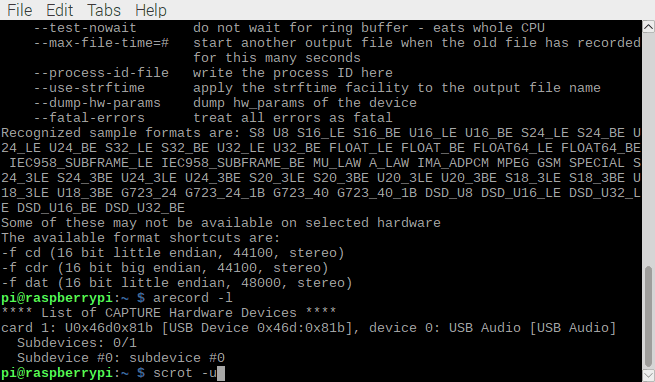
Card 1 is your webcam’s MIC that we are going to use. If it is not displayed, means webcam may be defective.
2. Now, check if MIC is working by running the record audio command as:
arecord /home/pi/Desktop/test.wav -D sysdefault:CARD=1
3. To play the recorded audio type this command:
omxplayer -p -o local /home/pi/Desktop/test.wav
If Raspberry Pi is connected with the monitor using HDMI cable then by default audio output will come through monitor’s speaker (if there is inbuilt speaker in it). So, to change the output to 3.5mm audio jack, type the following command:
sudo raspi-config and go to Advance option

Select Audio from the list -> select Force 3.5mm -> select Ok and Restart Raspberry Pi.
Now, you should hear the sound from 3.5mm jack.
NOTE: To increase or decrease the input voice loudness for microphone, type alsamixer in the terminal and select sound card from the terminal by pressing F6.
Press F4 to change the MIC dB gain and set it as you want.
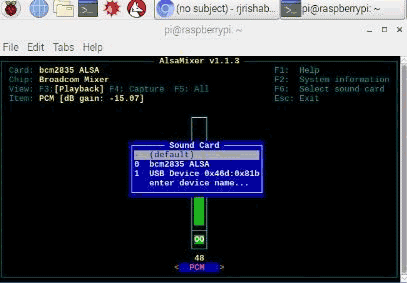
Here we have used Webcam for USB microphone, but above steps remains the same for setting up USB 2.0 microphone for IBM Watson conversation.
Part 2: Setting up Watson Account and Services
1. First, to create an account on IBM cloud website, go to the website and click on create account. If you have already have account then you can simply login by entering your credentials.

2. Click on Catalog which is given at the right of the search bar. Now, Click on AI option. To chat with the Bot we need three services on this platform. These services are Speech to text, Text to speech and Watson Assistant. So, add these services, and also note the API keys which we will get while adding these API keys. Note the keys for each of the services.
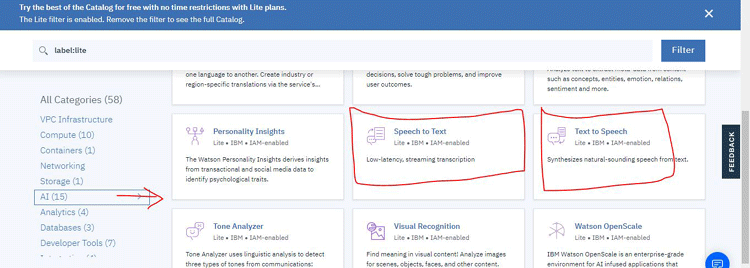
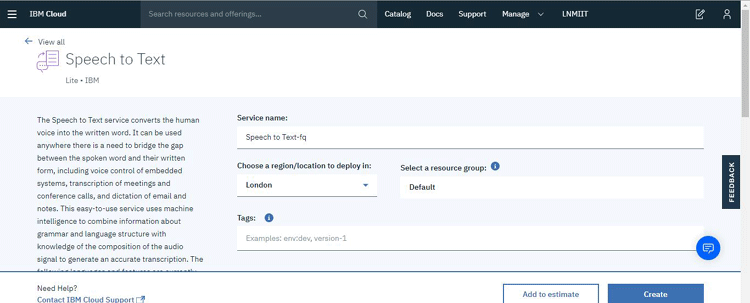
3. We will start with adding Speech to text and steps for adding other services will be same as described below. So, click on Speech to Text service and then Click on Create.
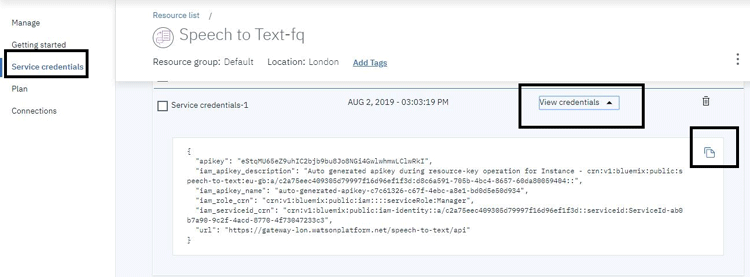
4. Click on Service Credentials and then click on View Credentials. Copy the whole content by clicking on copy icon as shown below.
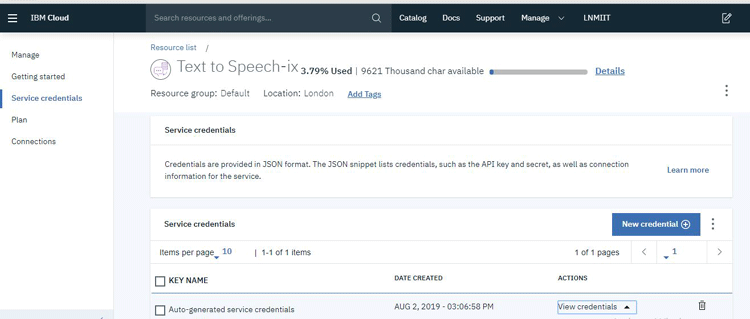
5. Now, add Text to speech and Watson Assistant from the same AI catalog and copy the credentials of each service. If Credentials not appeared in Service Credentials then just click on New credentials and it will be appear.
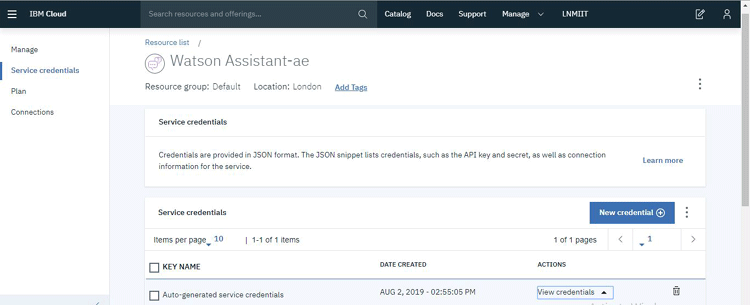
We have done with setting up services for IBM chatbot. Now, we need to Create skills and train it with the possible answers.
Part 3: Creating and training a Skill
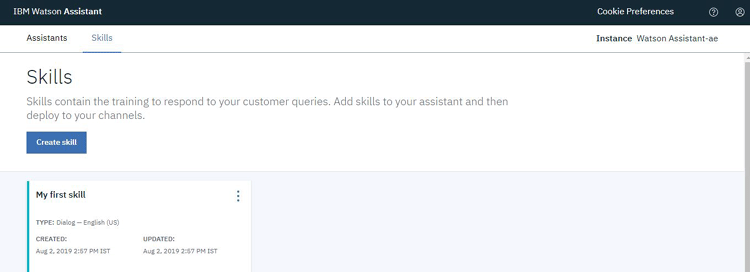
1. Go to Watson assistant services that you have created previously and add skill in Watson assistant service. So, click on Launch Watson Assistant as shown below.

2. A template of skill is already given in the Watson assistant, we will use this and put our skill contents. So, click on Skills and then click on My first skill. You can create other skill also by clicking Create Skill.
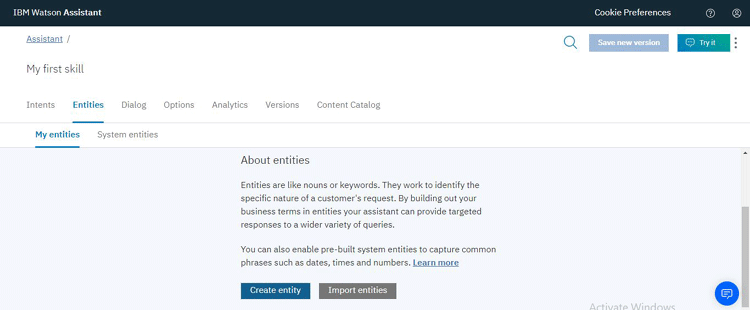
3. Here we are making a skill for telling a joke, so create an entity to detect the word “joke” by clicking on Entity and then Create Entity.
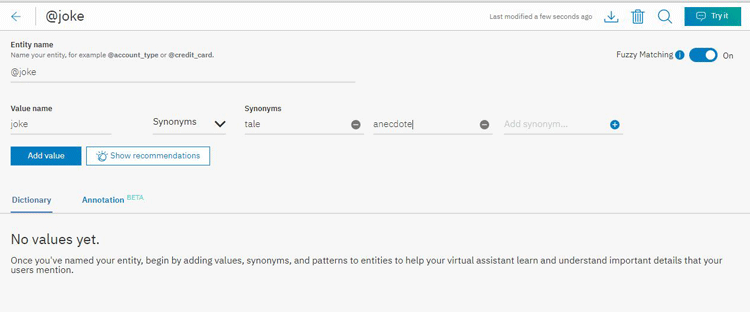
4. Now, type “joke” as entity name and value name. Enter synonyms of word joke and click on Add value as shown below. If you want to do other activity like giving introduction then make separate entity for it.
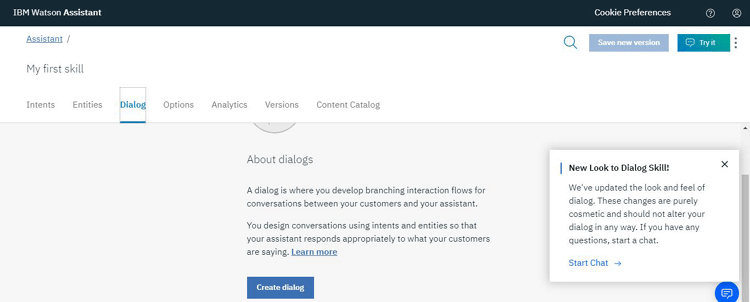
5. Now, create dialog to give feedback for asked question. Click on Dialog and then click on Create Dialog.
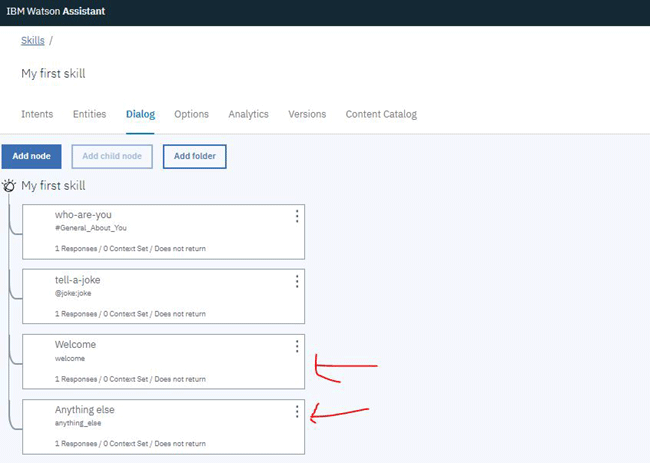
6. In Dialog, write the response with respect to the question asked. Then create a node with possible question and write possible answers for it. By default, there are already two nodes with Welcome note and other for Anything else which is not in the nodes.
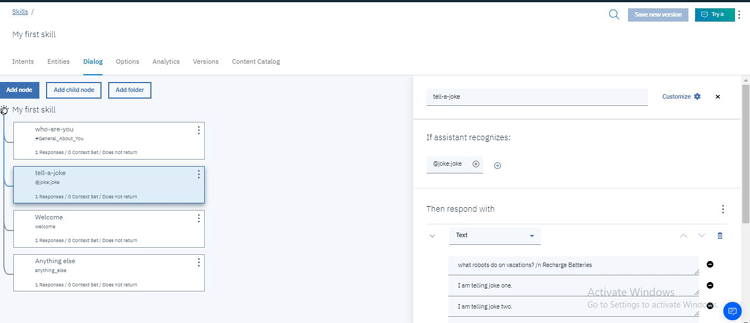
7. Click on Add node and give it a name and then recognization word as @joke:joke. Write possible answers as shown below.
8. Now, we need to train our bot to recognize the question and respond accordingly. So, click on Try it in right corner of the window an you will see a welcome note which is generated by Welcome node.

9. Write a question in the try it out window to get the response. Like we will ask “tell me a joke”, write this sentence and hit Enter, you will see a response as shown. In case the answer is not matching with the question asked, just select mark irrelevant from drop down menu. This way the model can be trained for watson chatbot.
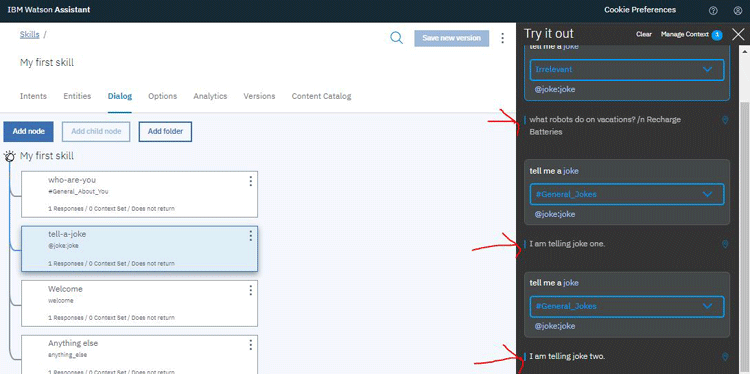
10. Similarly, make node for other questions like who are you? , what can you do? And just fill your response and train it. And you are ready to test your skills on Raspberry pi.
Part 4: Installing TJBot libraries in Raspberry pi
1. First, we have to update Raspberry pi packages, to do that open terminal and run the following command
sudo apt-get update
2. Now, install bootstrap packages for TJBot using below command
curl -sL https://raw.githubusercontent.com/ibmtjbot/tjbot/master/bootstrap/bootstrap.sh | sudo sh -
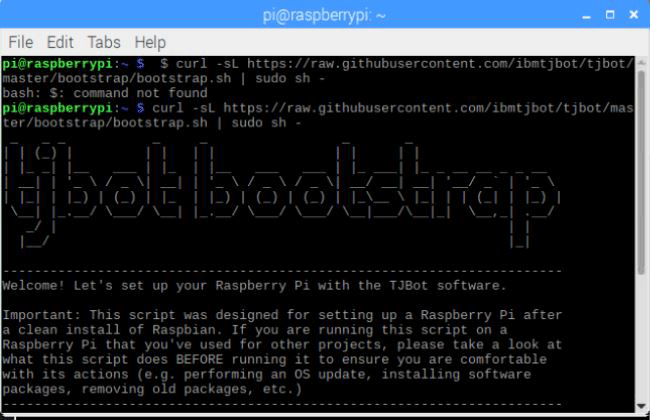
It will take time to install so, go and grab a coffee for you.
3. After installation, you will see a message like this
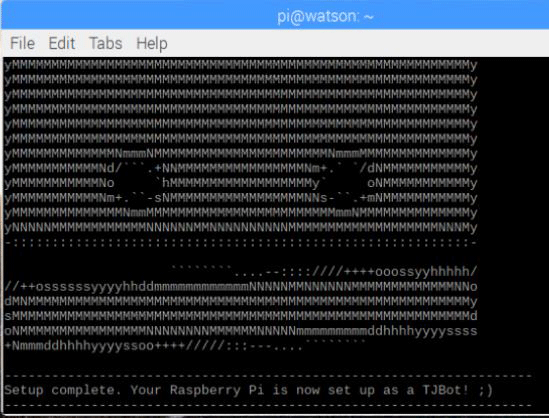
Some setup questions will be asked like Would you like to install TJBot libraries, hit Y for it and would you like to install nodejs, hit 9 for it because the TJBot packages runs on NodeJS 9 version and similarly for other questions.
After full setup, a TJBot folder will be created on Desktop.
4. In case you didn’t install NodeJS 9 then run following commands to install nodejs9.
curl -sL https://deb.nodesource.com/setup_9.x | sudo -E bash -sudo apt-get install -y nodejs
Now, reboot the Raspberry pi.
5. Now, compile TJBot modules using npm. Install npm using below command
sudo apt-get install npm
6. Go to tjbot/recipes/conversation using cd command and run the following command to compile the modules.
npm install
7. After compilation, enter the credentials for the services that we are using. For this, go to conversation folder and run the below command
cp config.default.js config.js
This command will copy the content of config.default.js file in to config.js. Now, we can edit and enter the credentials in config.js file.
8. Open config.js file using nano text editor using below command:
nano config.js
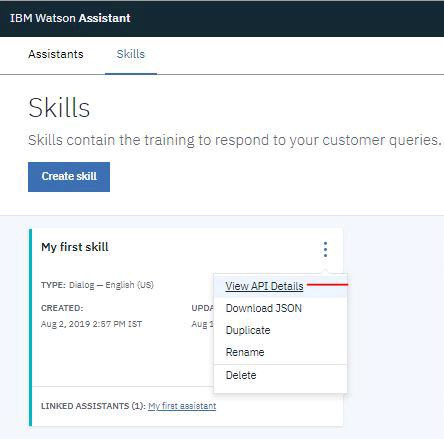
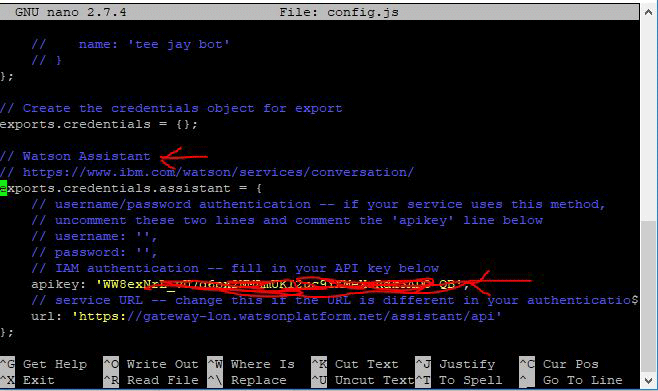
And enter Workspace ID, credentials (api key and url only) for Watson assistant, Speech to text and text to speech. Workspace ID can be found in skill console of IBM platform as shown below.
Enter credentials for all the three services as shown below and save it using ctrl+x and hit the Enter.

IBM Chatbot Demo
Now, we are ready to run our IBM Watson assistant. So, go ahead and run the below command in tjbot/recipes/conversation folder to start the assistant.
sudo node conversation.js
If all the modules working fine then you will see a output on the terminal as shown
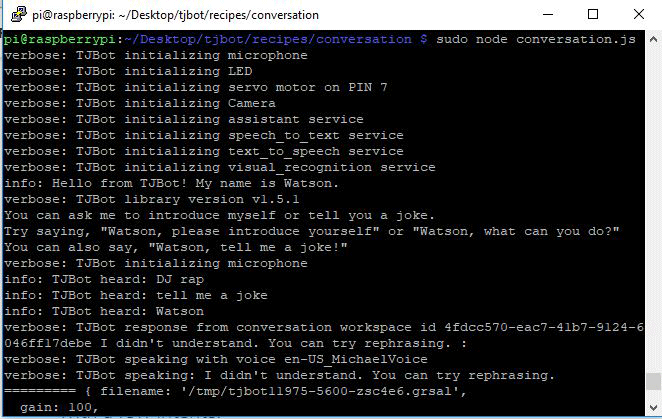
Now, ask a question “Watson, tell me a joke” You will get a response something like this and you can hear the response on the speakers also.
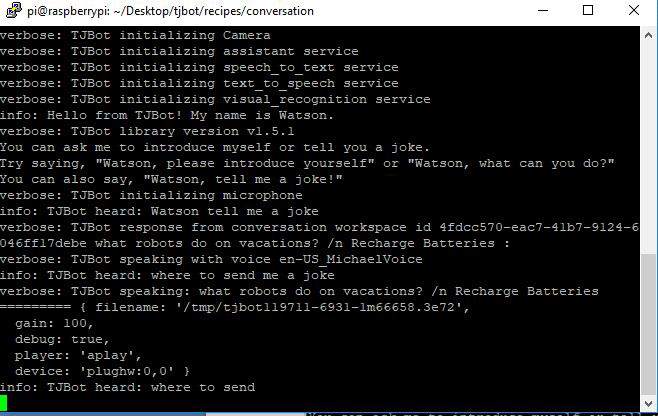
You can change the name of the bot by editing the TJBot's configuration in config.js file as shown below.
// set up TJBot's configuration
exports.tjConfig = {
log: {   level: 'verbose'    },
robot: {   name: 'any_name'  }
};
Now, enjoy with your personalized IBM Watson Assistant by creating interesting skills. Check the demonstration video below.


