Node-RED is a visual tool for non-programmers to work with the IoT, it can be used to build applications faster and reduce the “go-to-market” time for IoT products. It can also be used to easily interface hardware devices, APIs, and other online services together in new and interesting ways.
Node-RED can directly access data from microcontroller boards like Arduino, Raspberry Pi using the predefined port number or pin number.
In this tutorial, we are going to build a Home Automation System that can control lights and can monitor temperature and humidity graphically on gauge created on the Dashboard. Throughout this tutorial, we will cover how to install and set up Node-RED on Windows.
Then we will also design Node-Red Dashboard and use different input, output, and functions nodes to create a Node-Red flow. Also, check out our previous Node-Red Projects.
Components Required for Home Automation using Node-Red
- Raspberry Pi
- Relay Module
- DHT11 Sensor
- AC Bulb
- LED
- Breadboard
- Jumper Wires
Install Node-RED on Raspberry Pi
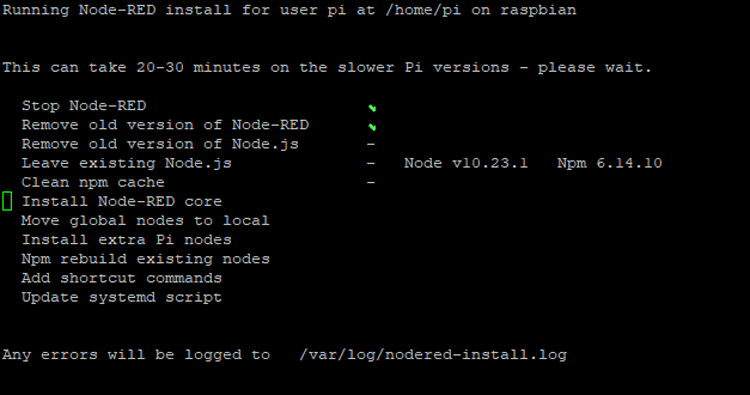
Node-RED comes pre-installed on the Raspbian Stretch OS. In case you don’t have Node-RED installed on your Pi, you can use the command given below to install Node.js, npm, and Node-RED onto a Raspberry Pi. This command can also be used to upgrade an existing installation.
bash <(curl -sL https://raw.githubusercontent.com/node-red/linux-installers/master/deb/update-nodejs-and-nodered)
The command will do the following things:
- Remove the old version of Node-RED and Node.js if present.
- Install the latest Node.js LTS version. If it detects Node.js is already installed, it will ensure that it is at least Node version 8.
- Clean out npm cache
- Install the latest version of Node-RED using npm
- Ask if you want to install a collection of useful Raspberry Pi nodes
- Will set up Node-RED to run as a service and provide a set of commands to work with the service
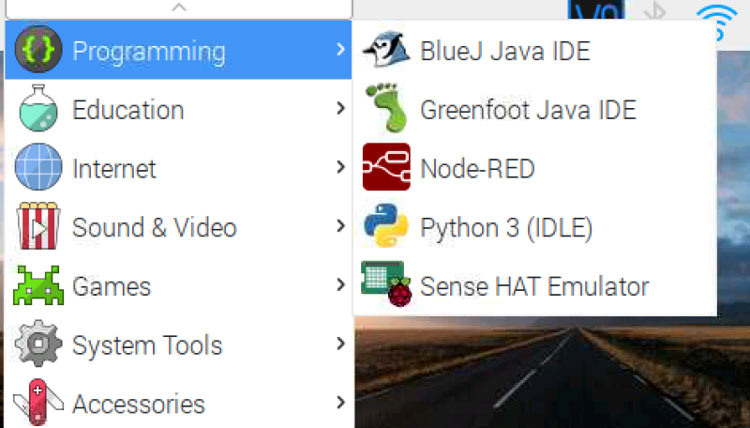
When the installation completes, you should see the Node-RED icon under the programming apps list.
Starting Node-RED on Raspberry Pi
Node-RED can be either launched via Pi’s Desktop Interface or via Raspberry Pi terminal window.
From the Pi’s Desktop Interface: Select Menu -> Programming -> Node-RED
Remotely from your Computer’s Terminal: Run node-red-start in a new Raspberry Pi terminal window. To launch from the Pi’s Desktop Interface, click on Menu > Programming > Node-RED.
To launch it from the Raspberry Pi Terminal window, navigate to Terminal and enter the command given below:
node-red-start
Opening the Node-RED Interface
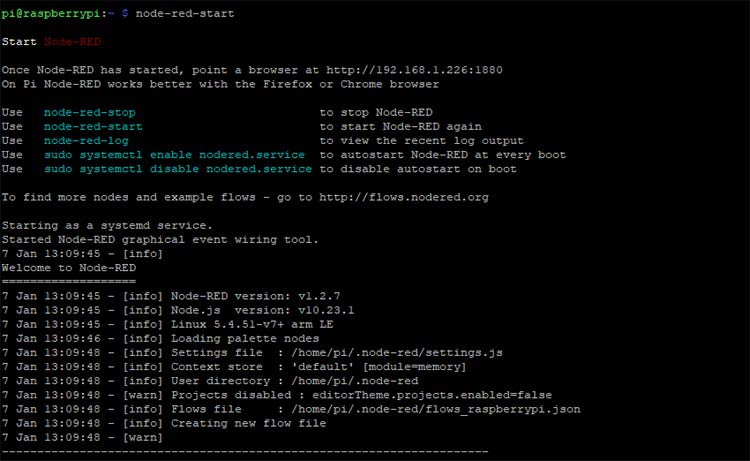
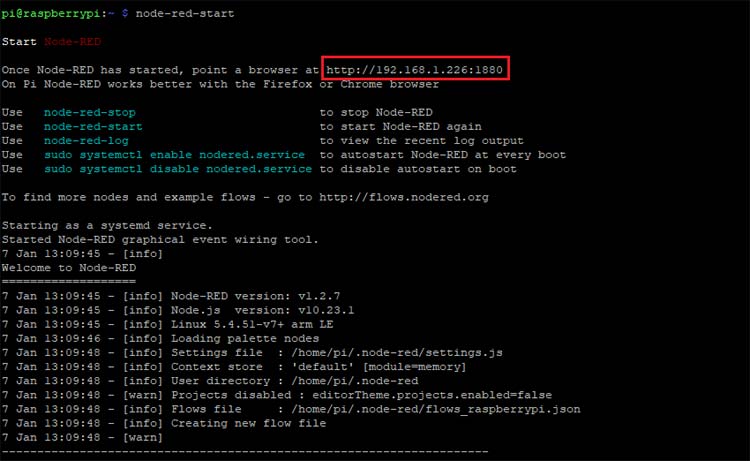
With Node-RED now installed and started up on Raspberry Pi, we can proceed to access its web interface. For that, navigate to the browser and write http://your_pi_ip-address:1880 in the address bar. Raspberry Pi IP address is shown in the first mainline of the Node-RED terminal as shown below.
After this, you will be greeted with the following screen.
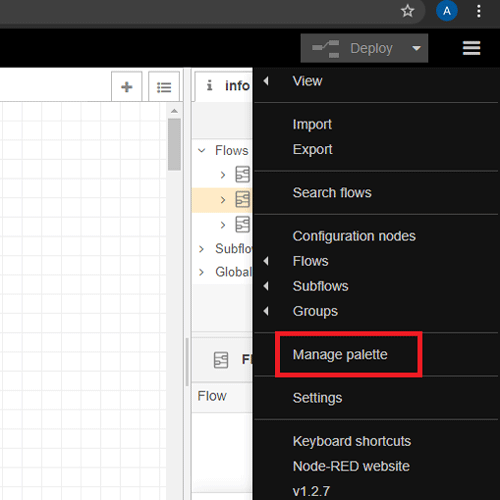
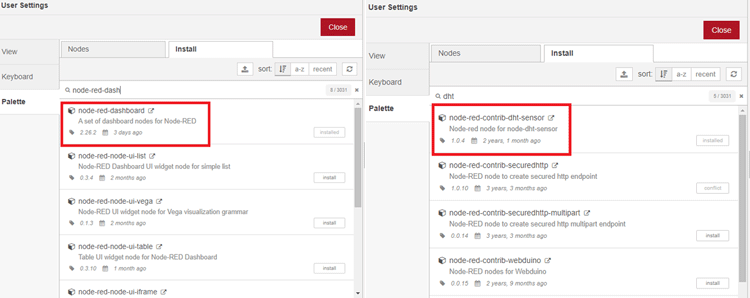
Before we start building the Node-Red flows, we need to install the palette for the Dashboard and DHT11 sensor in node-red. For that, click the menu icon in the top right corner, and then click on “Manage Palette”
Go to the Install tab, and then search and install ‘node-red-dashboard’ and 'node-red-contrib-dht-sensor’ nodes.
Creating a Flow in Node-RED
With all the required nodes installed, we can proceed with creating a Node-red flow to control an LED and read DHT11 sensor data. The first step is to create a dashboard layout.
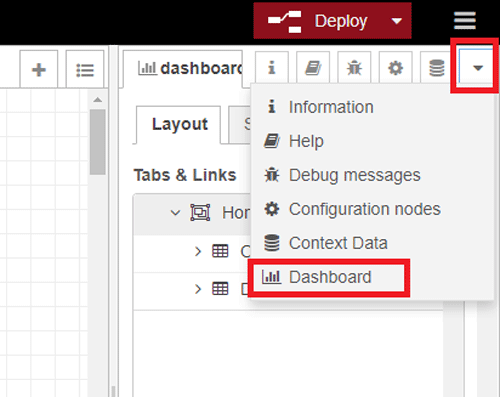
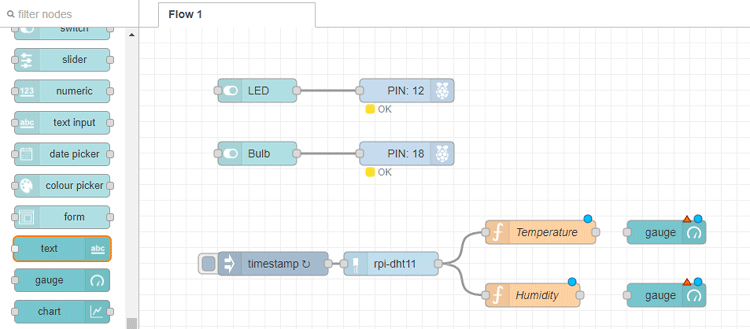
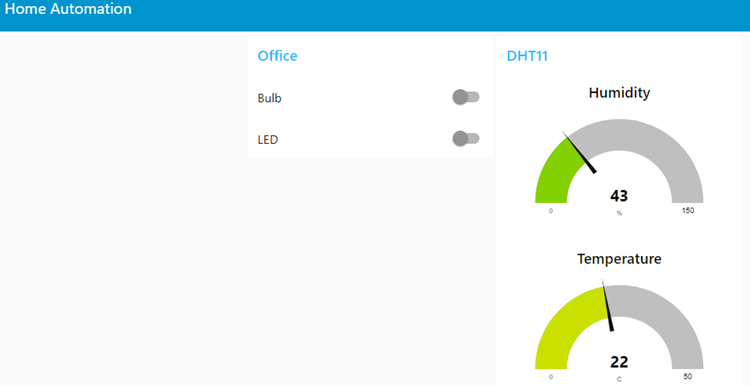
In this project, we’ll have two switches to control an LED and bulb; two gauges to display temperature and humidity values. In the top right corner, click on the dropdown menu icon, and select the dashboard tab.
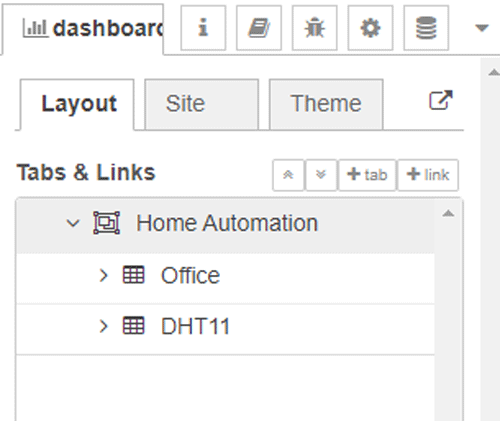
Then create a tab called ‘Home Automation’ and inside this tab, create two groups: Office and DHT, as shown below.
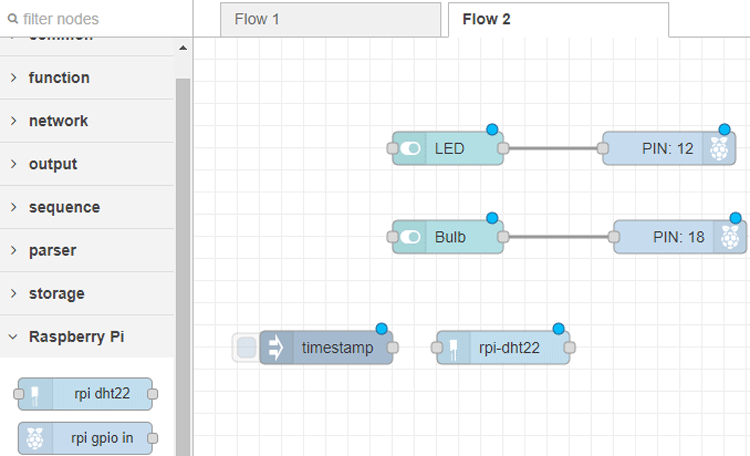
Now, go to the Dashboard tab and drag the Switch node into the flow section.

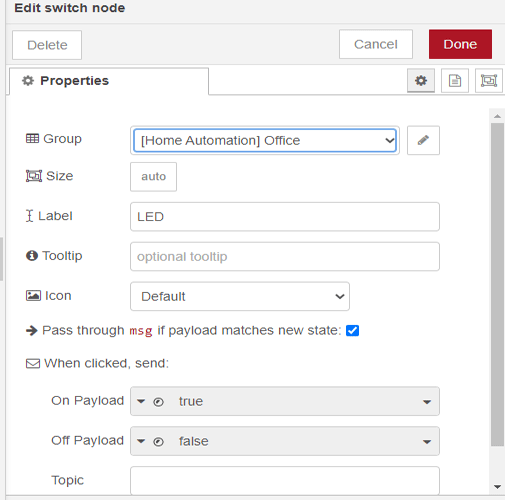
Now, double-click on the Switch node to edit it. Rename the Switch node as LED. Add Name of Group “Home Automation” for grouping the node.
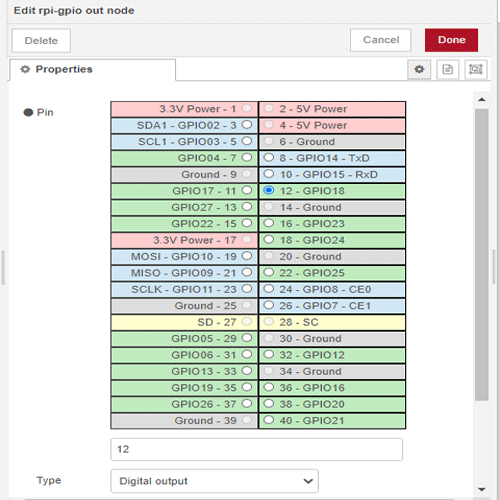
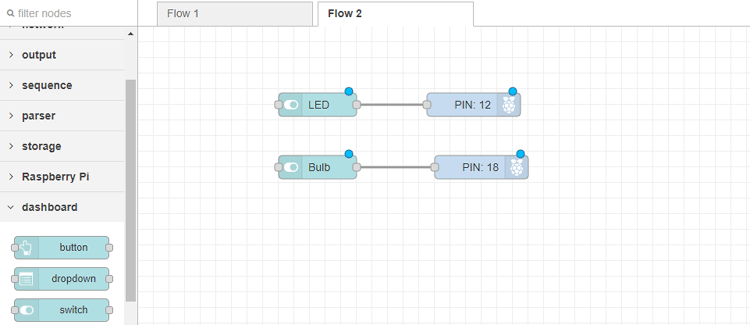
Then go to the Raspberry Pi tab and drag the ‘rpi gpio out’ node into the flow section.
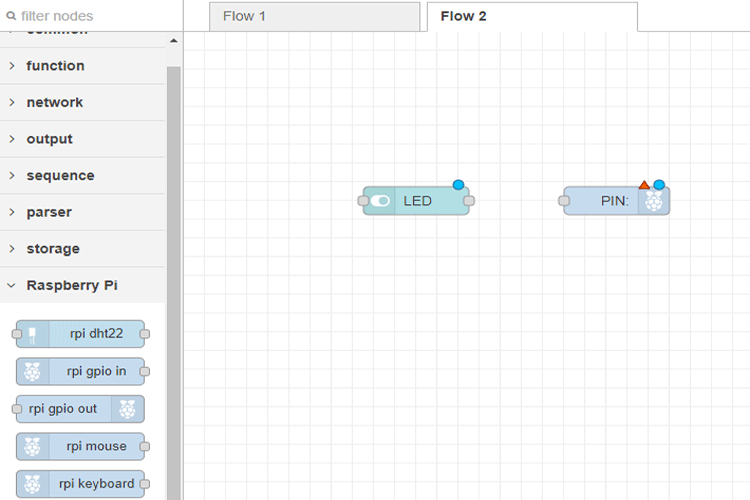
Then double-click on the node, select the GPIO18 pin, and select ‘Digital Output’ as the output type.
Follow the same procedure for adding another switch.
Now in the next step, add nodes to read DHT11 sensor data. For that, go to the Common node palette and drag the inject node to the flow. Double click on the inject node and then set the interval to every 1 second.
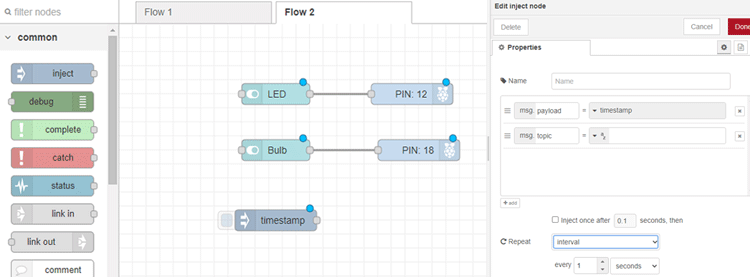
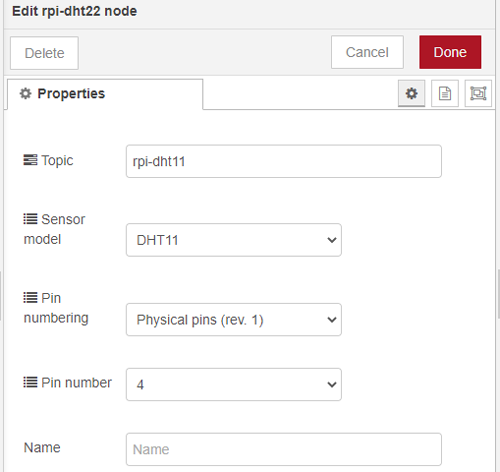
Then go to the Raspberry Pi tab and drag the rpi-dht22 node to the flow.
Double click on the rpi-dht22 node and then select the DHT11 as sensor module and 4 in a pin number.
Now, in the next step, go to the Function tab and drag two functions nodes to the flow as shown below.
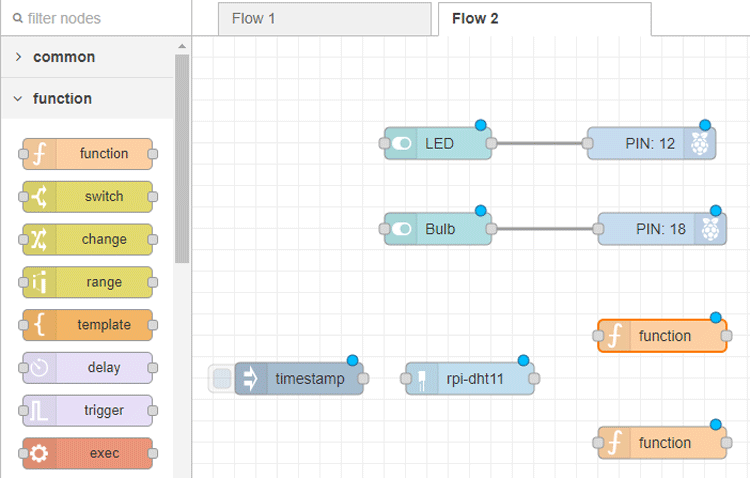
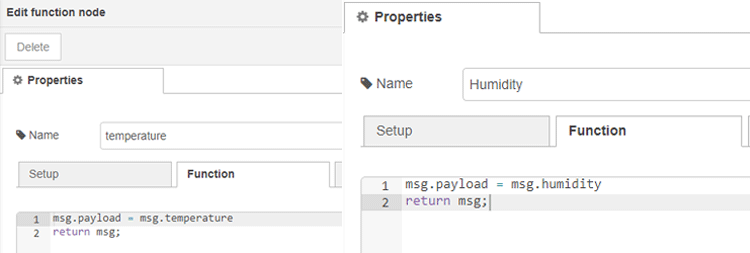
Double click on the function, rename it to Temperature, and then add a line to get only temperature data. Do the same for the second function node to get humidity data.
Now, in the next step, go to the Dashboard tab and drag two gauge nodes to the flow as shown below.
Double click on nodes to configure them. You can specify the following, as seen in the picture here:

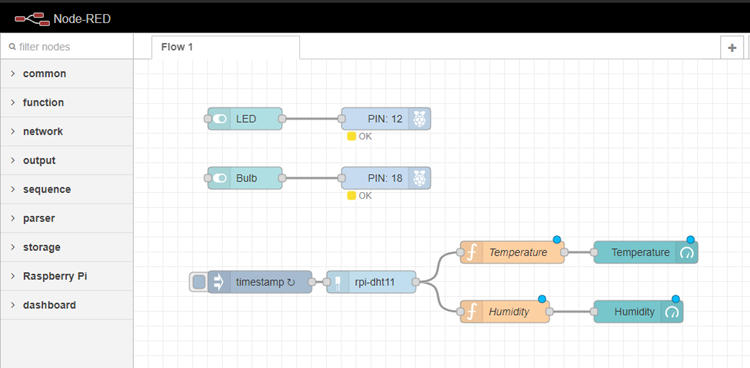
The final flow will look like this:
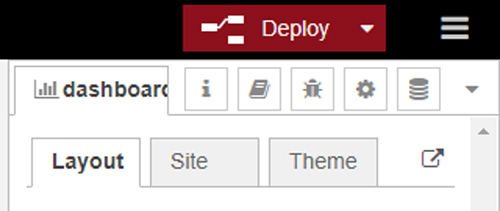
With this done, we are now ready to deploy the project. Click the Deploy button in the top right corner.
Now, to see how the Node RED dashboard looks, go to http://your-pi-ip-address/ui.

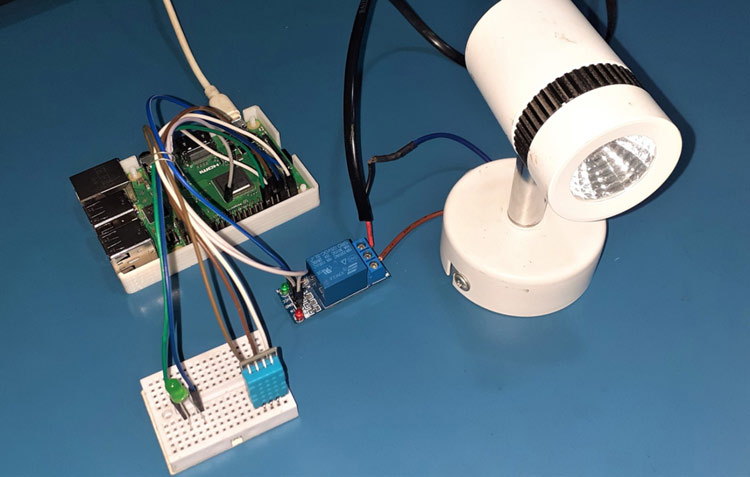
Raspberry Pi Home Automation using Node-Red Circuit Diagram
The circuit diagram for Node-RED Home Automation is given below:
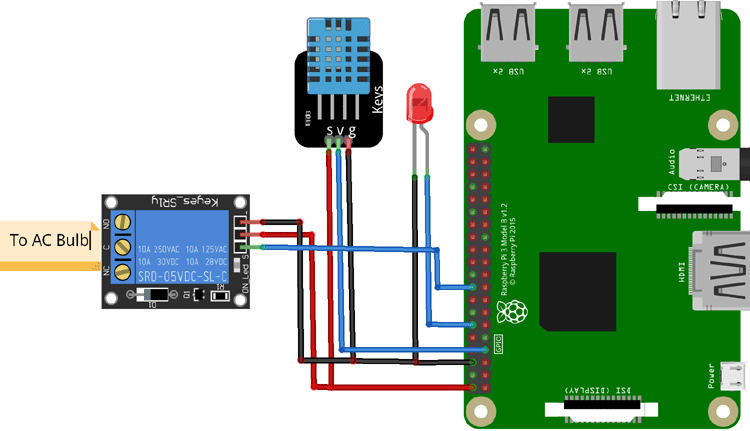
The LED is connected to the GPIO18 pin while the input pin of the relay is connected to the GPIO24 pin of Raspberry Pi. The data pin of DHT 11 is connected to GPIO4.
With this done, go to Node-RED Dashboard to control the LED and Bulb.
This is how you can turn on lights and monitor sensors on Raspberry Pi using Node-RED. You can follow these basic steps to build more advanced projects.