


Previously we covered a tutorial to use ThingSpeak IoT Cloud with ESP32, today in this tutorial we will use another popular IoT application “Blynk” to control LED using ESP32 Wi-Fi module.
Blynk is an IoT Platform to control Arduino, Raspberry Pi, NodeMCU and other microcontrollers over the Internet. Blynk app can be downloaded from Google play store or Apple store.
Blynk app provides a digital dashboard where you can build a graphic interface for any IoT based project by simply dragging and dropping widgets. It's simple and easy to use IoT platform to build complex applications. Blynk is not bounded to some specific board or platform but it can be used with any microcontroller, provided that the microcontroller is connected to internet. Raspberry Pi has inbuilt Wi-Fi and other microcontroller like Arduino can be connected to internet using some Wi-Fi module like ESP8266 etc. We previously used Blynk App with Raspberry Pi to control its GPIO pin.
Component Required
- ESP32 module
- USB Cable
- Arduino IDE
- Blynk App
- LED
- Breadboard
- Jumper wires
- Resistor 1K
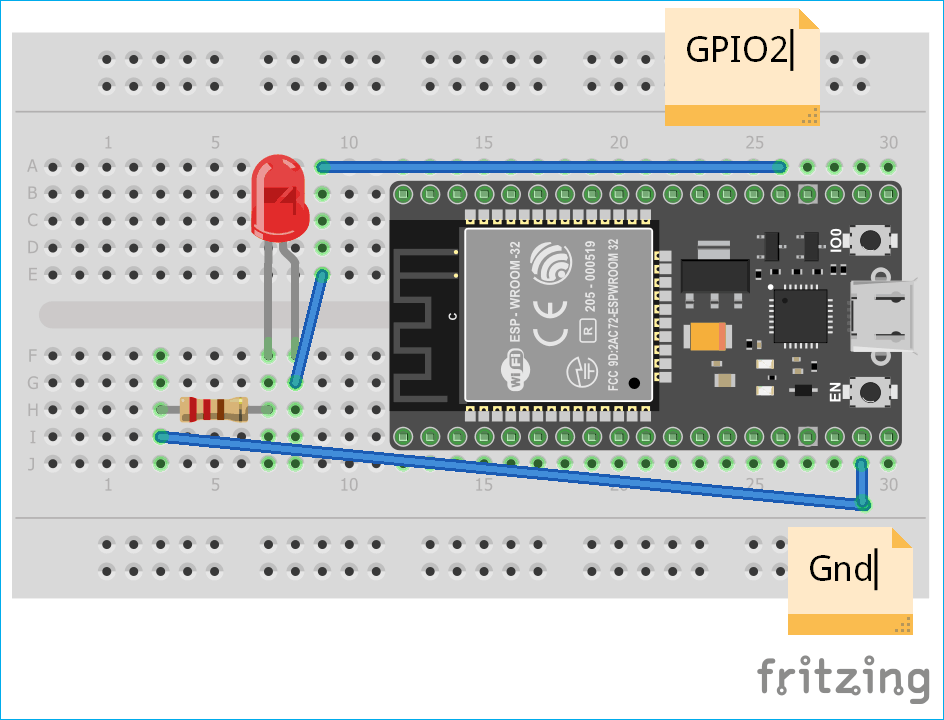
Circuit Diagram
Configuring Blynk App for ESP32
Following are the steps to configure Blynk app in your phone and use it for a project:
- Firstly, download Blynk app in your phone from Google play store and install it.
- After installing, you need to create an account in this app; you may use your current Gmail account.
- After creating account a window will open, in this click on New Project.
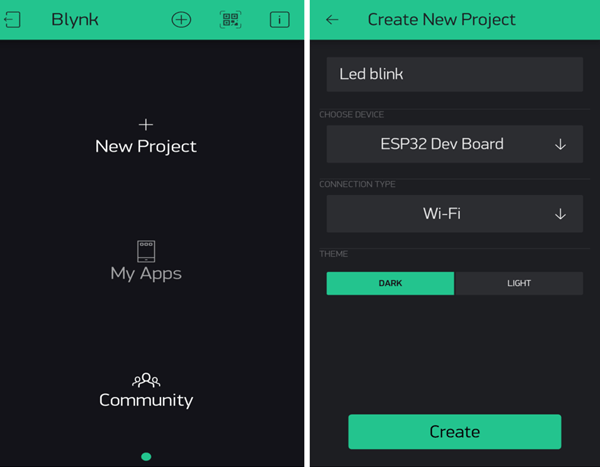
- Now give project a name according to your choice and in device choose ESP32 Dev Board and in Connection type choose Wi-Fi and then click on Create.
- Now a window will come which shows that your authentication token which you will need later sent to your concerned mail ID. You can open your email to check authentication key.
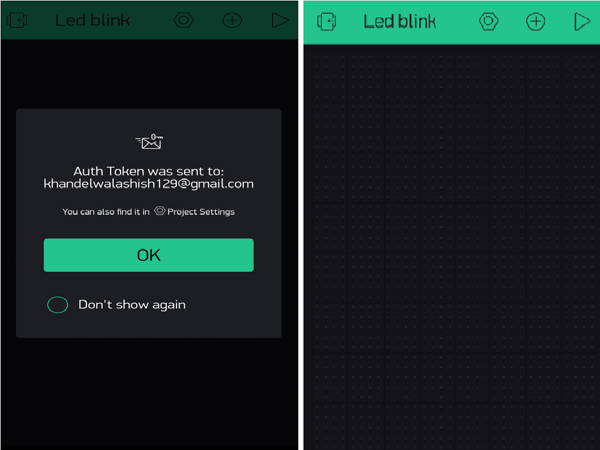
- After clicking on OK, you will find canvas window.
- Now, tap anywhere on the canvas to open the widget box. All the available widgets are located here. Now choose a button.
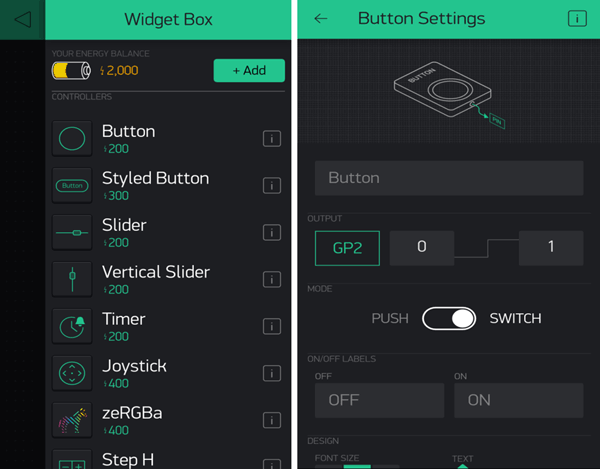
- Click on the Button widget to change the setting.
- Set output pin to gp2 as I am taking output here from GPIO2 pin, you can change according to you. In Mode select to switch.
- When you are done with this setting, you are ready to work with this app. On pressing Play button it will switch you from EDIT mode to PLAY mode where you can interact with the hardware. In PLAY mode, you will not be able to drag or set new widgets, press STOP to get back to STOP mode.
Programming ESP32 for Blynk Application
First of all, you have to download the Blynk library from the given link.
https://github.com/blynkkk/blynk-library
It is a zip file, download it and extract it and then copy this library file to Arduino Library files. You can find your Arduino library file in Documents--> Arduino--> libraries. Copy this library file here.
Now in programming, the first thing you have to do is include the required libraries.
#include <WiFi.h>
#include <WiFiClient.h>
#include <BlynkSimpleEsp32.h>
Now define your output pin, here I am taking my output from GPIO 2 so I will include pin 2.
int pin = 2;
Now enter your Authentication token and your network credentials inside double inverted commas.
char auth[] = "             ";
char ssid[] = "     ";
char pass[] = "      ";
In void setup() function, we will initialize the baud rate, LED output and will connect the module with the Wi-Fi using WiFi.begin(ssid,password); function. This function begins the Wi-Fi connection.
void setup() {
  pinMode(pin, OUTPUT);
  pinMode(pin, HIGH);
  Serial.begin(115200);
  delay(10);
  Serial.print("Connecting to ");
  Serial.println(ssid);
  WiFi.begin(ssid, pass);
  int wifi_ctr = 0;
  while (WiFi.status() != WL_CONNECTED) {
    delay(500);
    Serial.print(".");
  }
 Serial.println("WiFi connected");
  Blynk.begin("66d1e7b99b92458295f8257b80fd2b03", ssid, pass);
}
In the loop function include Blynk.run() command.
void loop(){
    Blynk.run();
}
The complete code is provided at the end of this article, you can check from there.
Programming of ESP32 with Arduino IDE and Blynk app
Now you are in a stage to upload the code in your ESP32 and perform the project, for this following steps should be performed:
- Connect ESP32 to your PC via USB cable and make circuit as given above, here I am using GPIO2 you can use according to you.
- Open your Arduino IDE and copy this code to your IDE window but make sure that you provide correct WiFi credentials of your network.
- Now go to Tools--> Board--> ESP32 Dev module.
- Then Tools-->Port and select port to which your ESP32 is connected.
- Now click on upload to upload the code.
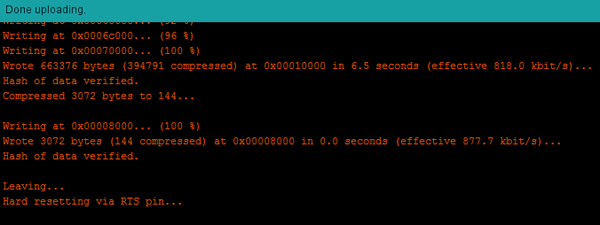
- After complete uploading you will find message like this in your output console.
- Now open your serial monitor and press reset button of ESP32 and now ESP starts connecting to your network, once connected it will give you IP of your ESP and message like this:

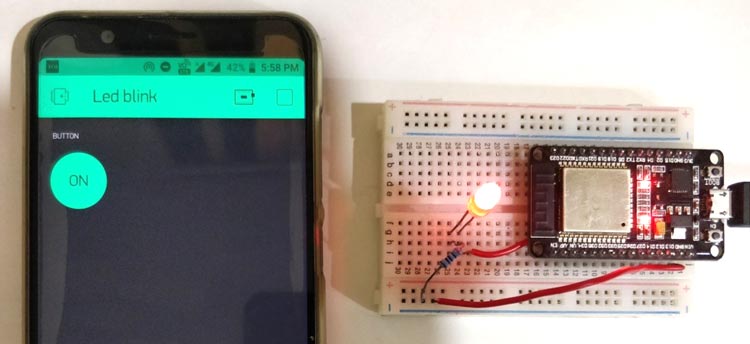
- Now open Blynk app and go to the project you created earlier and tap on PLAY.
- Now you can see on clicking on button your LED will change its state.
This is how you are successfully able to control LED using ESP32 with Blynk App.
#define BLYNK_PRINT Serial
#include <WiFi.h>
#include <WiFiClient.h>
#include <BlynkSimpleEsp32.h>
int pin = 2;
char auth[] = " "; // You should get Auth Token in the Blynk App.
char ssid[] = " "; // Your Wi-Fi Credentials
char pass[] = " ";
void setup() {
pinMode(pin, OUTPUT);
pinMode(pin, HIGH);
Serial.begin(115200);
delay(10);
Serial.print("Connecting to ");
Serial.println(ssid);
WiFi.begin(ssid, pass);
int wifi_ctr = 0;
while (WiFi.status() != WL_CONNECTED) {
delay(500);
Serial.print(".");
}
Serial.println("WiFi connected");
Blynk.begin("Your auth. Token", ssid, pass);
}
void loop(){
Blynk.run();
}


