


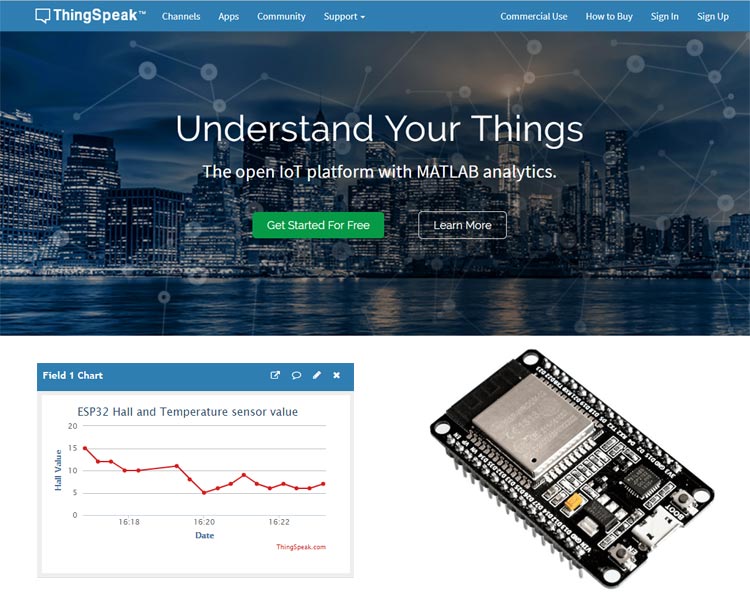
ESP32 is the powerful tool for IoT applications having inbuilt Bluetooth, temperature senso, hall sensor etc. We already learned how to program ESP32 using Arduino IDE in previous tutorial. In this DIY tutorial we will see how to upload or send data to ThingSpeak cloud using ESP32. For the sake of simplicity here the inbuilt temperature sensor and hall sensor data will be sent to ThingSpeak, in next tutorial we will interface a temperature sensor with ESP32 and monitor it from anywhere in the world.
ThingSpeak is a free web service for displaying the data online and you can access and monitor the data from ThingSpeak from anywhere. You can use any IoT device to send data to ThingSpeak like previously we used Raspberry Pi to connect with ThingSpeak cloud.
Prerequisite
- ESP32
- USB Cable
- Arduino IDE
Preparing ESP32 in Arduino IDE
Step 1: Firstly you have to download and install Arduino IDE software which you can download from https://www.arduino.cc/en/Main/Software for free. If you have already installed in your PC then make sure that it is latest version of IDE as older version doesn’t include ESP32 board.
Step 2: After installing, open IDE and go to Files -> Preferences and open preference window and see the “Additional Boards Manager URL’s” as:
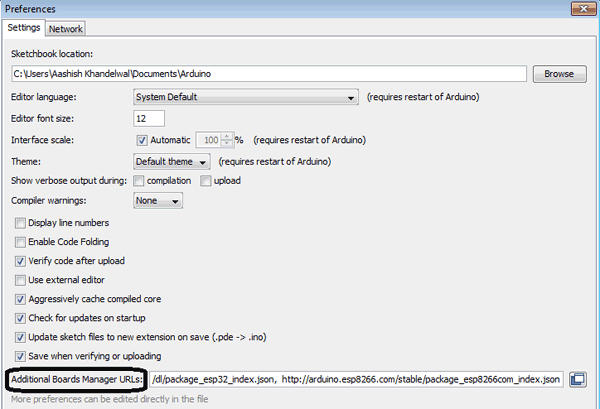
Step 3: This box maybe empty or contain some other URL if you have used it previously for ESP8266. You just have to paste below URL into this box if the box contains already another URL then paste it by separating another URL using comma(,).
https://dl.espressif.com/dl/package_esp32_index.json
Step 4: After pasting the given URL my window looks like this as I already used ESP82666, Now press OK and the window will disappear.

Step 5: Now go to Tools-> Board-> Board Manager and search for ESP32 and press install, it will take some time to install make sure that you have internet connection while installing after installing your window looks like this:
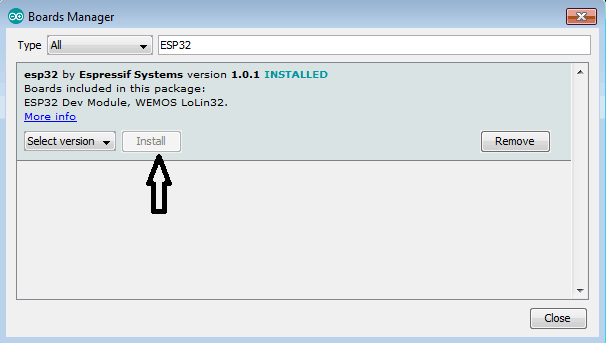
After this close the window of board manager and your IDE is ready to work with ESP32.
ThingSpeak Setup for ESP32
ThingSpeak is a free web service which helps us in IoT based projects. By using ThingSpeak server, we can monitor our data over the internet using the API and channels provided by ThingSpeak. In this section I am explaining about how to send sensor data of ESP32 to ThingSpeak server. For this you have to follow following steps:
- Firstly go to https://thingspeak.com/ and create an account and sign in to this server.
- After signing in you will find below window in which number of channels are listed in this go to New channel.
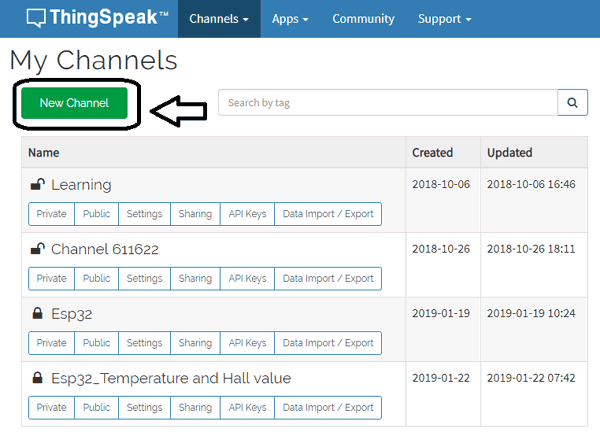
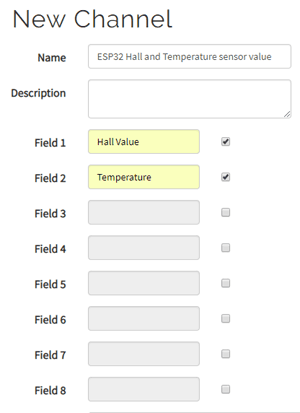
- After clicking on New Channel you will find a window in which you have to enter some details about the channel, in this project we want to analyze temperature and Hall sensor value of ESP32 so you will require 2 fields. So enter the details as shown and save the channel.
- After saving of channel you will find channel stats window showing details about your channels.

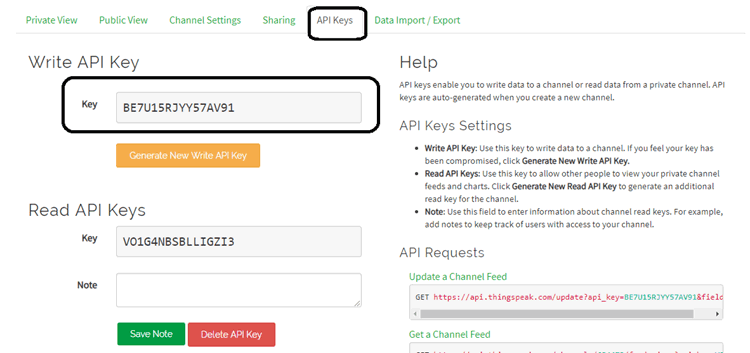
- Now go to API key menu which shows you Write API keys and Read API key, Copy Write API key as you will required this API during programming of ESP32.
Programming ESP32 using Arduino IDE
Programming part of this project plays an important role to perform the task, in this project I will program my ESP32 using Arduino IDE. As I said earlier that it has inbuilt Hall sensor and temperature sensor so I have to include library of both the parameters to measure them.
I will explain you whole program by dividing it in various parts.
This section of programming will measure temperature by including temperature_sens_read() library.
#ifdef __cplusplus
extern "C" {
#endif
uint8_t temprature_sens_read();
#ifdef __cplusplus
}
#endif
uint8_t temprature_sens_read();
Now, by including WiFi.h library I am allowing my controller to connect to the internet.
In this section you have to enter your Write API key from ThingSpeak server and give SSID and password of your hotspot.
String apiKey = "W7ZAEX8K7MM41KW5";     //  Enter your Write API key from ThingSpeak
const char *ssid =  "Ashish";     // replace with your wifi ssid and password
const char *pass =  "12345678";
const char* server = "api.thingspeak.com";
WiFiClient client;
This section allows connecting your ESP to your hotspot.
Serial.begin(115200);
delay(10);
Serial.println("Connecting to ");
Serial.println(ssid);
WiFi.begin(ssid, pass);
while (WiFi.status() != WL_CONNECTED)
{
delay(500);
Serial.print(".");
}
Serial.println("");
Serial.println("WiFi connected");
In this section initialize required parameters
void loop()
{
int h = 0;
float t =0;
h = hallRead();
t = ((temprature_sens_read()-32)/1.8);
In the below section I am defining my ThingSpeak server fields that on which field I want to obtain temperature or Hall sensor value as defined previously in ThingSpeak field number.
String postStr = apiKey;
 postStr +="&field1=";
postStr += String(h);
postStr += "&field2=";
postStr += String(t);
postStr += "\r\n\r\n";
In the below code I am giving details about host and API key. And print temperature and hall sensor values on serial monitor as well.
client.print("POST /update HTTP/1.1\n");
 client.print("Host: api.thingspeak.com\n");
 client.print("Connection: close\n");
 client.print("X-THINGSPEAKAPIKEY: "+apiKey+"\n");
client.print("Content-Type: application/x-www-form-urlencoded\n");
client.print("Content-Length: ");
client.print(postStr.length());
client.print("\n\n");
client.print(postStr);
Serial.print("Hall: ");
Serial.println(h);
Serial.print("Temperature:");
Serial.print(t);
Serial.println(" C");
The Complete code of this project is given at the end of this article. Now to upload the program in ESP32 we have to follow some steps as follows:
- Open your Arduino IDE and create a new file and save it where you want.
- Copy the given code.
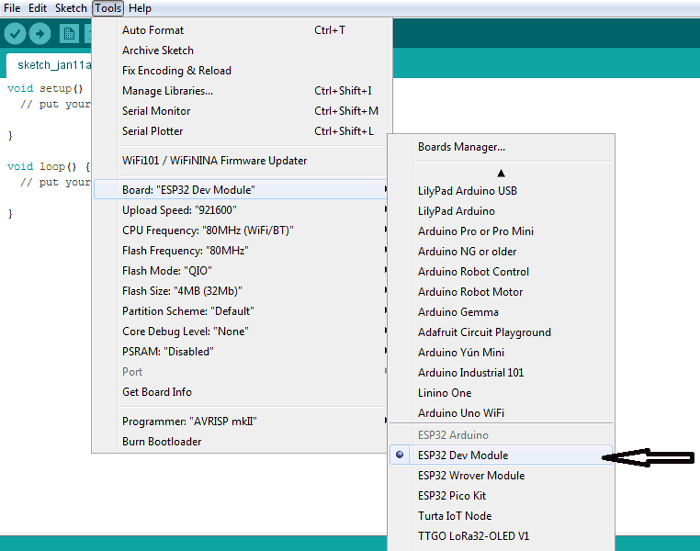
- Now go to Tools--> Board--> ESP32 Dev Module.
- Now go to Tools-->Port and select port to which your ESP32 is connected.
- Now click on upload to upload the code.
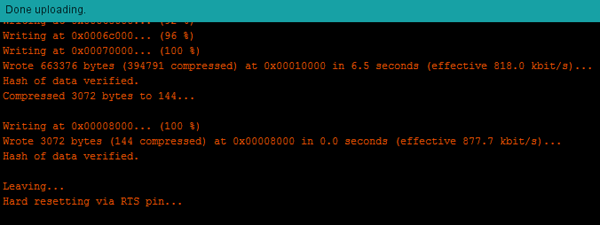
- After complete uploading you will find message like this in your output console.
- Now open your serial monitor and press reset button of your ESP32, it starts connecting to your hotspot.

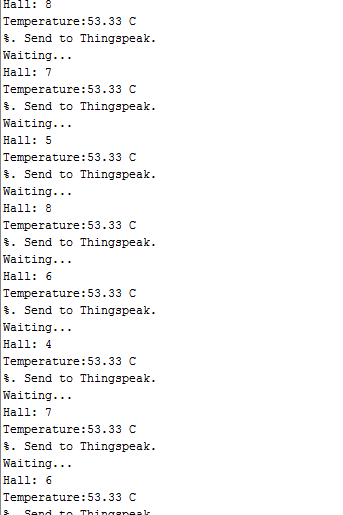
- After connecting successfully it starts displaying temperature and hall sensor value on your serial monitor window and sending these values to ThingSpeak.
- Now open your ThingSpeak account in your browser and you will find graphs displaying temperature and hall sensor values.
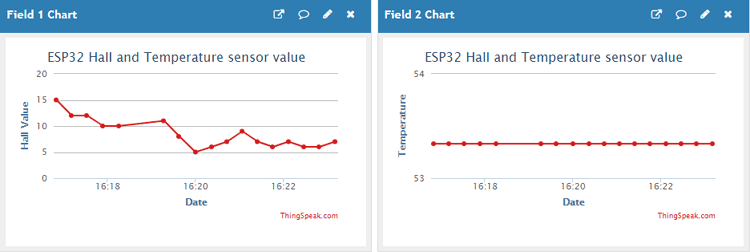
This is how you are successfully able to send temperature and hall sensor values to ThingSpeak cloud using ESP32. Now you can simply add any sensor to ESP32 and can send the sensor value to ThingSpeak IoT cloud to be monitored from anywhere.
#ifdef __cplusplus
extern "C" {
#endif
uint8_t temprature_sens_read();
#ifdef __cplusplus
}
#endif
uint8_t temprature_sens_read();
#include <WiFi.h>
String apiKey = "BE7U15RJYY57AV91"; // Enter your Write API key from ThingSpeak
const char *ssid = "Ashish"; // replace with your wifi ssid and wpa2 key
const char *pass = "12345678";
const char* server = "api.thingspeak.com";
WiFiClient client;
void setup()
{
Serial.begin(115200);
delay(10);
Serial.println("Connecting to ");
Serial.println(ssid);
WiFi.begin(ssid, pass);
while (WiFi.status() != WL_CONNECTED)
{
delay(500);
Serial.print(".");
}
Serial.println("");
Serial.println("WiFi connected");
}
void loop()
{
int h = 0;
float t =0;
h = hallRead();
t = ((temprature_sens_read()-32)/1.8); //changing temperature parameter to celsius
if (client.connect(server,80)) // "184.106.153.149" or api.thingspeak.com
{
String postStr = apiKey;
postStr +="&field1=";
postStr += String(h);
postStr += "&field2=";
postStr += String(t);
postStr += "\r\n\r\n";
client.print("POST /update HTTP/1.1\n");
client.print("Host: api.thingspeak.com\n");
client.print("Connection: close\n");
client.print("X-THINGSPEAKAPIKEY: "+apiKey+"\n");
client.print("Content-Type: application/x-www-form-urlencoded\n");
client.print("Content-Length: ");
client.print(postStr.length());
client.print("\n\n");
client.print(postStr);
Serial.print("Hall: ");
Serial.println(h);
Serial.print("Temperature:");
Serial.print(t);
Serial.println(" C");
Serial.println("%. Send to Thingspeak.");
}
client.stop();
Serial.println("Waiting...");
delay(10000);
}


