


Previously we learned about face recognition using Raspberry Pi and OpenCV. Today we will use these two to build a number plate recognition system using python. Real-Time license plate detection and recognition can be very useful for automating toll booths, finding out traffic rule breakers, and for addressing other vehicle-related security and safety issues.
So in this tutorial, we are going to build a Real-Time License Plate Recognition System using Raspberry Pi and Pi Camera. This system automatically recognizes and reads vehicle license plates using OpenCV and Optical Character Recognition. Pi camera module continuously captures the frames, and when a key is pressed on the keyboard, it saves the last frame as a new image. Then it uses the contour function from OpenCV to detect the license plate. And finally, Raspberry Pi crops out that particular area and perform optical character recognition to read the license plate numbers.
Components Required
- Raspberry Pi
- Pi Camera
Here only Raspberry Pi and Pi camera are used to build this Raspberry Pi Plate Recognition System. We previously used Pi camera with Raspberry pi, and built few projects using it like Web Controlled Raspberry Pi Surveillance Robot, IoT based Smart Wi-Fi doorbell, Smart CCTV Surveillance System, etc.
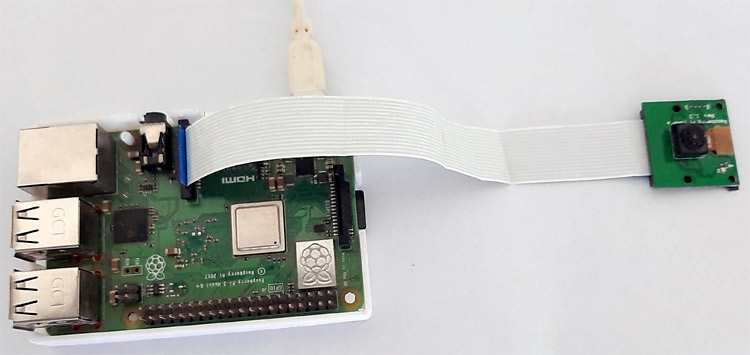
To learn more about how to interface Pi camera with Raspberry Pi, follow our previous tutorial.
Pre-requisites for Number Plate Recognition OpenCV Python
Here we use the OpenCV library to detect and recognize number plates, and the Tesseract library is used to read the characters. So before proceeding further, first install the OpenCV, Tesseract, and other required libraries. We previously used OpenCV in Face Recognition using the Raspberry Pi project.
Installing OpenCV in Raspberry Pi 3
Here OpenCV library is used to detect and recognize faces. To install the OpenCV, first, update the Raspberry Pi.
sudo apt-get update
Then use the following commands to install the required dependencies for installing OpenCV on your Raspberry Pi.
sudo apt-get install libhdf5-dev -y
sudo apt-get install libhdf5-serial-dev –y
sudo apt-get install libatlas-base-dev –y
sudo apt-get install libjasper-dev -y
sudo apt-get install libqtgui4 –y
sudo apt-get install libqt4-test –y
After that, use the below command to install the OpenCV on your Raspberry Pi.
pip3 install opencv-contrib-python==4.1.0.25
Installing Tesseract
To install the Tesseract, first, configure the Debian Package (dpkg) using the below command:
sudo dpkg - -configure –a
After that, install the Tesseract OCR (Optical Character Recognition) using the apt-get option.
sudo apt-get install tesseract-ocr
After that, install the pytesseract using the pip.
pip install pytesseract
After this, install the PYTTSX3 library for text to speech conversion using the below command:
pip install pyttsx3
Installing imutils
imutils is used to make essential image processing functions such as translation, rotation, resizing, skeletonization, and displaying Matplotlib images easier with OpenCV. Use the below command to install the imutils:
pip3 install imutils
SMTP Mail Setup for Raspberry Pi Car Plate Recognition
SMTP (Simple Mail Transfer Protocol) is the standard protocol for providing email services on a TCP/IP network. This server provides the ability to receive and send email messages. We are using SMTP to send a mail when the Raspberry Pi detects and recognizes a license plate.
To use the SMTP services on Raspberry Pi, we first have to install the SMTP library on Pi. Use the below command to install the same:
sudo apt-get install ssmtp
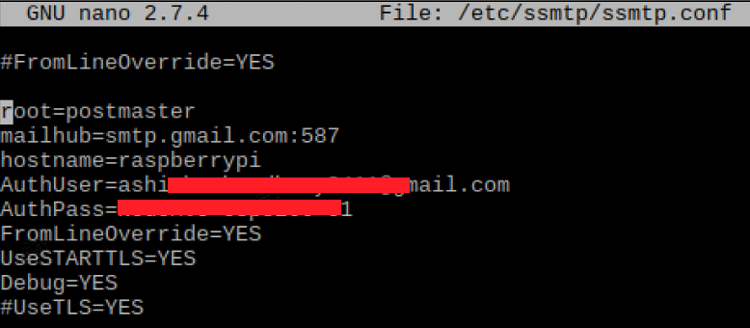
Now we have to edit the configure file. For that, open Configuration file using the below command:
sudo nano /etc/ssmtp/ssmtp.conf
And add the below lines. Don’t forget to add your email and email password.
root=postman
mailhub=smpt.gmail.com:587
[email protected]
AuthPass=youremailpassword
FromLineOverride=YES
UseSTARTTLS=YES
Python Programming for Number Plate Recognition using Raspberry Pi
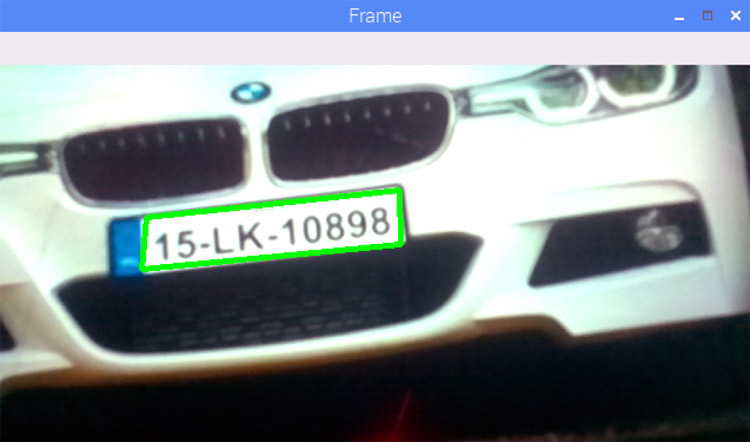
License plate recognition OpenCV python code involves three major steps. The first step is License Plate Detection. The contour function will be used to detect the rectangular objects in the image to find the number plate. The second step is Character Segmentation. Once Contour detects the License Plate, we have to crop it out and save it as a new image. And the final step is Character Recognition. We will perform Optical Character Recognition on the cropped image to detect the number.
Complete Number Plate Recognition code in python is given at the end of the page. Here we are explaining the code.
At the starting of the code, import the required packages for this project.
import cv2
import imutils
import numpy as np
import pytesseract
from PIL import Image
from picamera.array import PiRGBArray
from picamera import PiCamera
import smtplib
Then initialize the camera object and set the resolution at (640, 480) and the frame rate at 30 fps.
camera = PiCamera()
camera.resolution = (640, 480)
camera.framerate = 30
Then use the capture_continuous function to start capturing the frames from the Raspberry Pi camera. We are using the keyboard key ‘S’ to capture a particular frame.
for frame in camera.capture_continuous(rawCapture, format="bgr", use_video_port=True):
        image = frame.array
        cv2.imshow("Frame", image)
        key = cv2.waitKey(1) & 0xFF
        rawCapture.truncate(0)
When the keyboard key is pressed, it will take the last frame. After capturing the last frame, it will use a bilateral filter function to remove the unwanted details from the captured image.
if key == ord("s"):
             gray = cv2.cvtColor(image, cv2.COLOR_BGR2GRAY) #convert to grey scale
             gray = cv2.bilateralFilter(gray, 11, 17, 17) #Blur to reduce noise
After removing the unwanted details, use the Canny Edge Method to perform edge detection.
edged = cv2.Canny(gray, 30, 200)
Now we will look for contours on our image. After that sort the detected contours from big to small.
cnts = cv2.findContours(edged.copy(), cv2.RETR_TREE,              cv2.CHAIN_APPROX_SIMPLE)
             cnts = imutils.grab_contours(cnts)
             cnts = sorted(cnts, key = cv2.contourArea, reverse = True)[:10]
             screenCnt = None
The Raspberry Pi can find multiple contours, so we have to filter the license plate contour by searching for a rectangle shape contour with four sides and a closed figure among the obtained results.
   for c in cnts:
                peri = cv2.arcLength(c, True)
                approx = cv2.approxPolyDP(c, 0.018 * peri, True)
                if len(approx) == 4:
                  screenCnt = approx
                  break
After finding the license plate, mask everything except the license plate
mask = np.zeros(gray.shape,np.uint8)
new_image = cv2.drawContours(mask,[screenCnt],0,255,-1,)
new_image = cv2.bitwise_and(image,image,mask=mask)
After masking the entire image except the license plate region, we will crop out the license plate area and save it as a new image.
(x, y) = np.where(mask == 255)
             (topx, topy) = (np.min(x), np.min(y))
             (bottomx, bottomy) = (np.max(x), np.max(y))
             Cropped = gray[topx:bottomx+1, topy:bottomy+1]
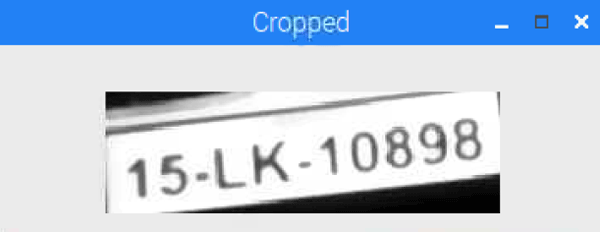
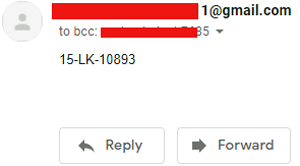
Now in the final step, read the characters from the license plate image using the Tesseract library and store the recognized characters in the ‘text’ variable. As mentioned earlier, we are also sending a mail when Pi detects a license plate. So the license plate information will be sent to the mentioned email address. The code for sending the mail is given below.
text = pytesseract.image_to_string(Cropped, config='--psm 11')
print("Detected Number is:",text)
server.sendmail("Receiver Mail1","Receiver Mail2",text)

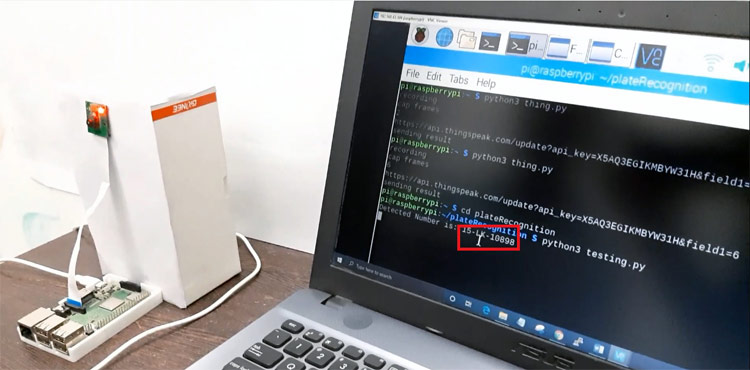
This is how you can build a Number Plate Recognition using Python and Raspberry Pi. Results from this project will not be 100% accurate. Sometimes it fails to detect the license plate, or sometimes it reads some garbage values. Results largely depend on image quality and image orientation.
A working video and complete python code are given below.
import cv2
import imutils
import numpy as np
import pytesseract
from PIL import Image
from picamera.array import PiRGBArray
from picamera import PiCamera
import smtplib
server=smtplib.SMTP('smtp.gmail.com',587)
server.starttls()
server.login("Your Email ID", "Email ID Password")
camera = PiCamera()
camera.resolution = (640, 480)
camera.framerate = 30
rawCapture = PiRGBArray(camera, size=(640, 480))
for frame in camera.capture_continuous(rawCapture, format="bgr", use_video_port=True):
image = frame.array
cv2.imshow("Frame", image)
key = cv2.waitKey(1) & 0xFF
rawCapture.truncate(0)
if key == ord("s"):
gray = cv2.cvtColor(image, cv2.COLOR_BGR2GRAY) #convert to grey scale
gray = cv2.bilateralFilter(gray, 11, 17, 17) #Blur to reduce noise
edged = cv2.Canny(gray, 30, 200) #Perform Edge detection
cnts = cv2.findContours(edged.copy(), cv2.RETR_TREE, cv2.CHAIN_APPROX_SIMPLE)
cnts = imutils.grab_contours(cnts)
cnts = sorted(cnts, key = cv2.contourArea, reverse = True)[:10]
screenCnt = None
for c in cnts:
peri = cv2.arcLength(c, True)
approx = cv2.approxPolyDP(c, 0.018 * peri, True)
if len(approx) == 4:
screenCnt = approx
break
if screenCnt is None:
detected = 0
print ("No contour detected")
else:
detected = 1
if detected == 1:
cv2.drawContours(image, [screenCnt], -1, (0, 255, 0), 3)
mask = np.zeros(gray.shape,np.uint8)
new_image = cv2.drawContours(mask,[screenCnt],0,255,-1,)
new_image = cv2.bitwise_and(image,image,mask=mask)
(x, y) = np.where(mask == 255)
(topx, topy) = (np.min(x), np.min(y))
(bottomx, bottomy) = (np.max(x), np.max(y))
Cropped = gray[topx:bottomx+1, topy:bottomy+1]
text = pytesseract.image_to_string(Cropped, config='--psm 11')
print("Detected Number is:",text)
server.sendmail("Sender's Email [email protected]","Sender's Email [email protected]",text)
cv2.imshow("Frame", image)
cv2.imshow('Cropped',Cropped)
cv2.waitKey(0)
break
cv2.destroyAllWindows()


