


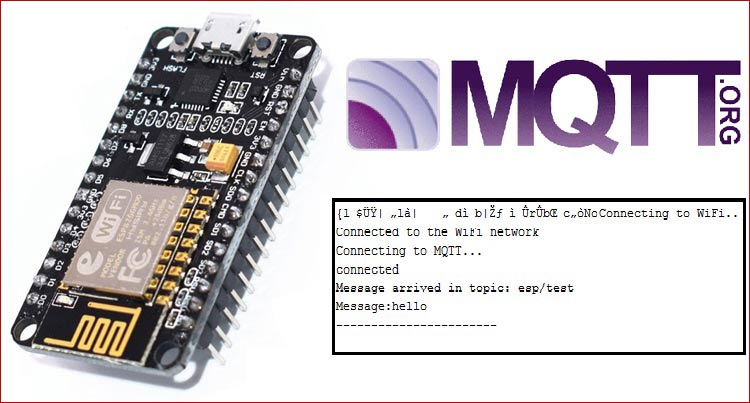
MQTT is the machine-to-machine connectivity protocol. It is an ideal IoT platform to connect multiple devices. In this project, we will connect an ESP8266 with MQTT broker. We will use cloud MQTT as our broker platform and Arduino IDE to program our ESP8266.
Like MQTT there are many other platforms available. But, cloud MQTT has a free plan option, so we can just create an account and use it. Using MQTT platform we can send a message to the device and can receive a message from the device.
What is MQTT?
MQTT stands for Message Queuing Telemetry Transport. It’s a system where we can publish and subscribe messages as a client. By using MQTT you can send commands to control outputs, read and publish data from sensors and much more. Therefore, by using MQTT you can establish communication between multiple devices. Using MQTT you can send a command with a client to control output or you can read data from a sensor and publish it to a client. There are two main terms in MQTT i.e. Client and Broker. Let’s discuss what actually a MQTT client and MQTT broker is:
MQTT Client: An MQTT client runs a MQTT library and connects to an MQTT broker over a network. Both publisher and subscriber are MQTT clients. The publisher and subscriber refer that whether the client is publishing messages or subscribing to messages.
MQTT Broker: The broker receives all messages, filter the messages, determine who is subscribed to each message, and send the message to these subscribed clients.
Components Required
- NodeMCU
- Cloud MQTT
Cloud MQTT Account Setup
To set up an account on Cloud MQTT navigate to its official website (www.cloudmqtt.com) and sign up using your email.
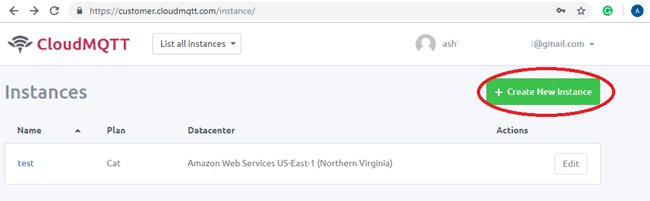
After login, click on ‘+ Create New Instance’ to create a new instance.
Now enter your instance name and select ‘Cute Cat’ in plan option.
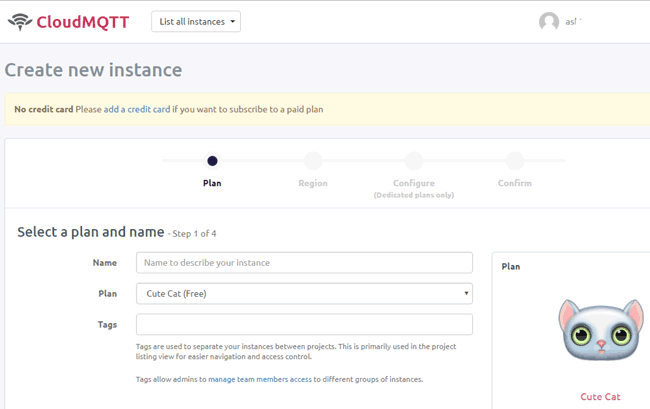
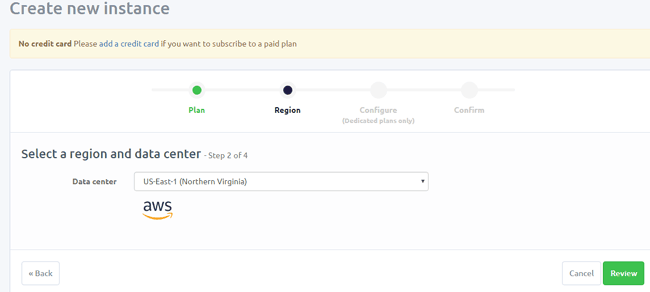
In new tab select region and click on ‘Review’.
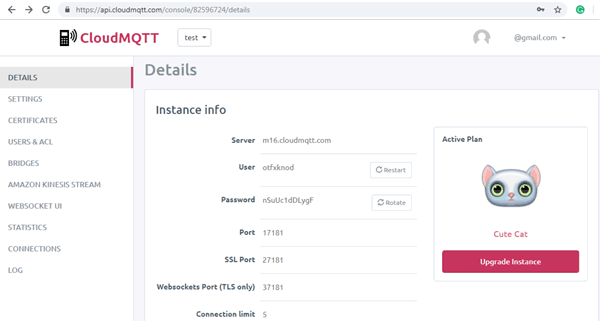
Your instance is created and you can view your details like user and password.
Code Explanation
The complete code for Connecting ESP8266 with MQTT broker is given at the end. Here, we are using Arduino IDE to program ESP8266. First, install ESP8266WiFi and PubSubClient library.
PubSubClient library allows us to publish/subscribe messages in topics.
#include <ESP8266WiFi.h>
#include <PubSubClient.h>
Now declare some global variables for our WiFi and MQTT connections. Enter your WiFi and MQTT details in below variables:
const char* ssid = "WiFi Name"; // Enter your WiFi name
const char* password =  "WiFi Password"; // Enter WiFi password
const char* mqttServer = "m16.cloudmqtt.com";
const int mqttPort = 37181;
const char* mqttUser = "otfxknod";
const char* mqttPassword = "nSuUc1dDLygF";
In the setup function, it will check the WiFi, whether it is connected to network or not and print it on the serial monitor.
void setup() {
Serial.begin(115200);
WiFi.begin(ssid, password);
while (WiFi.status() != WL_CONNECTED) {
delay(500);
Serial.println("Connecting to WiFi..");
}
Serial.println("Connected to the WiFi network");
In the below, while loop function, it will connect to the MQTT server and will print it on the serial monitor. This process will run in a loop until it gets connected.
 while (!client.connected()) {
    Serial.println("Connecting to MQTT...");
    if (client.connect("ESP8266Client", mqttUser, mqttPassword )) {
      Serial.println("connected");
    } else {

      Serial.print("failed with state ");
      Serial.print(client.state());
      delay(2000);
Now to check the setup function it will it will publish and subscribe a message on topic and for that it will use publish and subscribe method.
  client.publish("esp/test", "hello"); //Topic name
  client.subscribe("esp/test");
Now we will specify a call back function and in this function, we will first print the topic name and then received message.
void callback(char* topic, byte* payload, unsigned int length) {
  Serial.print("Message arrived in topic: ");
  Serial.println(topic);

  Serial.print("Message:");
  for (int i = 0; i < length; i++) {
    Serial.print((char)payload[i]);
Testing MQTT with ESP8266
Now to test the code upload this code into ESP8266 using Arduino IDE and open the serial monitor.
To subscribe and publish to MQTT topics, a Google Chrome application MQTTlens will be used. You can download the app from here.
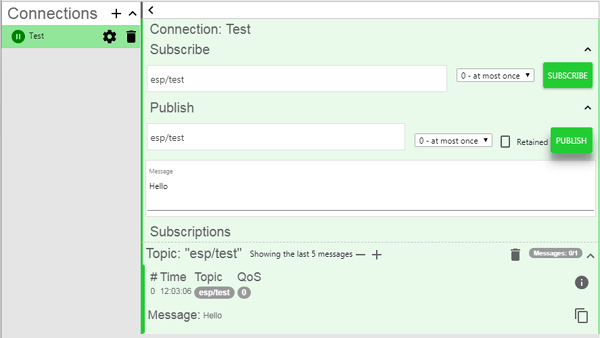
Launch this app and set up a connection with MQTT broker. To setup, connection click on ‘connections’ and in next window enter your connection details from Cloud MQTT account.
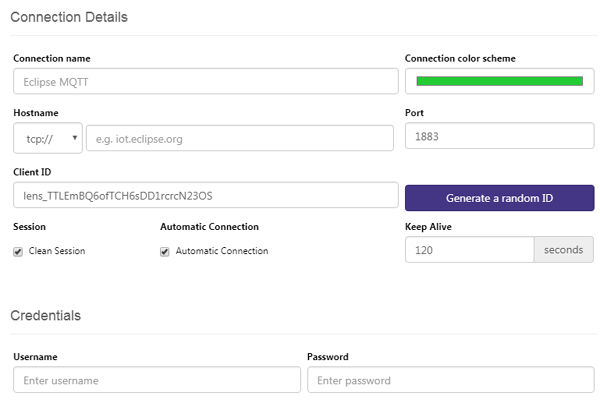
Save this connection, and now you can subscribe and publish a message on your MQTT broker using ESP8266.
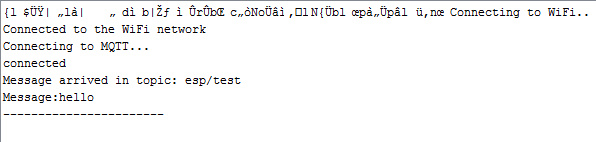
To subscribe or publish a message enter your topic name in subscribe and publish option and enter the default message. Your message will be shown on serial monitor as shown in the above image of the serial monitor.
Hence, we have successfully connected the MQTT broker with ESP8266. Stay Tuned with us for more amazing IoT projects.
#include <ESP8266WiFi.h>
#include <PubSubClient.h>
const char* ssid = "WiFi Name"; // Enter your WiFi name
const char* password = "WiFi Password"; // Enter WiFi password
const char* mqttServer = "m16.cloudmqtt.com";
const int mqttPort = 37181;
const char* mqttUser = "otfxknod";
const char* mqttPassword = "nSuUc1dDLygF";
WiFiClient espClient;
PubSubClient client(espClient);
void setup() {
Serial.begin(115200);
WiFi.begin(ssid, password);
while (WiFi.status() != WL_CONNECTED) {
delay(500);
Serial.println("Connecting to WiFi..");
}
Serial.println("Connected to the WiFi network");
client.setServer(mqttServer, mqttPort);
client.setCallback(callback);
while (!client.connected()) {
Serial.println("Connecting to MQTT...");
if (client.connect("ESP8266Client", mqttUser, mqttPassword )) {
Serial.println("connected");
} else {
Serial.print("failed with state ");
Serial.print(client.state());
delay(2000);
}
}
client.publish("esp/test", "hello"); //Topic name
client.subscribe("esp/test");
}
void callback(char* topic, byte* payload, unsigned int length) {
Serial.print("Message arrived in topic: ");
Serial.println(topic);
Serial.print("Message:");
for (int i = 0; i < length; i++) {
Serial.print((char)payload[i]);
}
Serial.println();
Serial.println("-----------------------");
}
void loop() {
client.loop();
}


