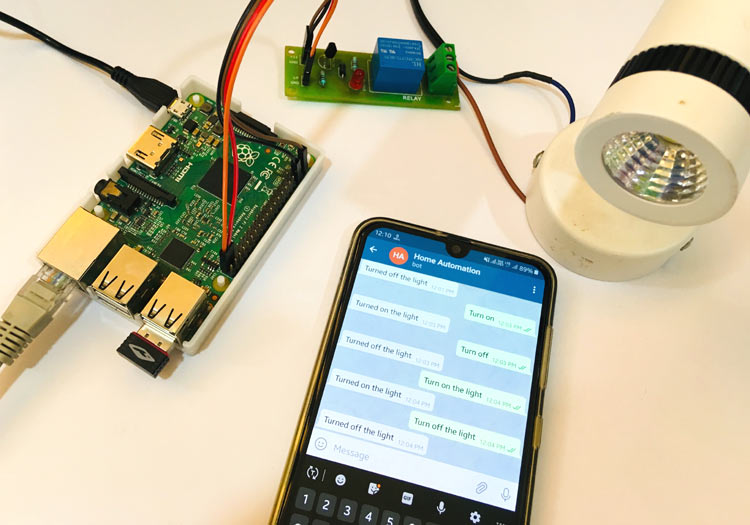
Home automation now becomes an essential part of IoT applications and people use their smartphone to control home appliances from anywhere over internet. There are various ways to control AC appliances with smartphone, some of them we have covered in our previous IoT Home Automation Tutorials including the Telegram controlled AC Appliances with NodeMCU. This time we will use Raspberry Pi in place of NodeMCU to control appliance through our smart phone. In this IoT project we will control an AC lamp with a text message from Telegram application using Raspberry Pi.
In our previous projects, we controlled Raspberry Pi GPIO with various IoT platforms, some of them are listed below:
- Control Raspberry Pi GPIO with Adafruit IO to trigger an LED
- IoT based Home Automation using Blynk App and Raspberry Pi
- How to Trigger LED using IFTTT and Raspberry Pi
- Control Home Appliances with ARTIK Cloud and Raspberry Pi
- IoT Controlled LED using Thingsboard and Raspberry Pi
Components Required
- Raspberry Pi
- Lamp
- Jumper wires
- Telegram Application
Circuit Diagram
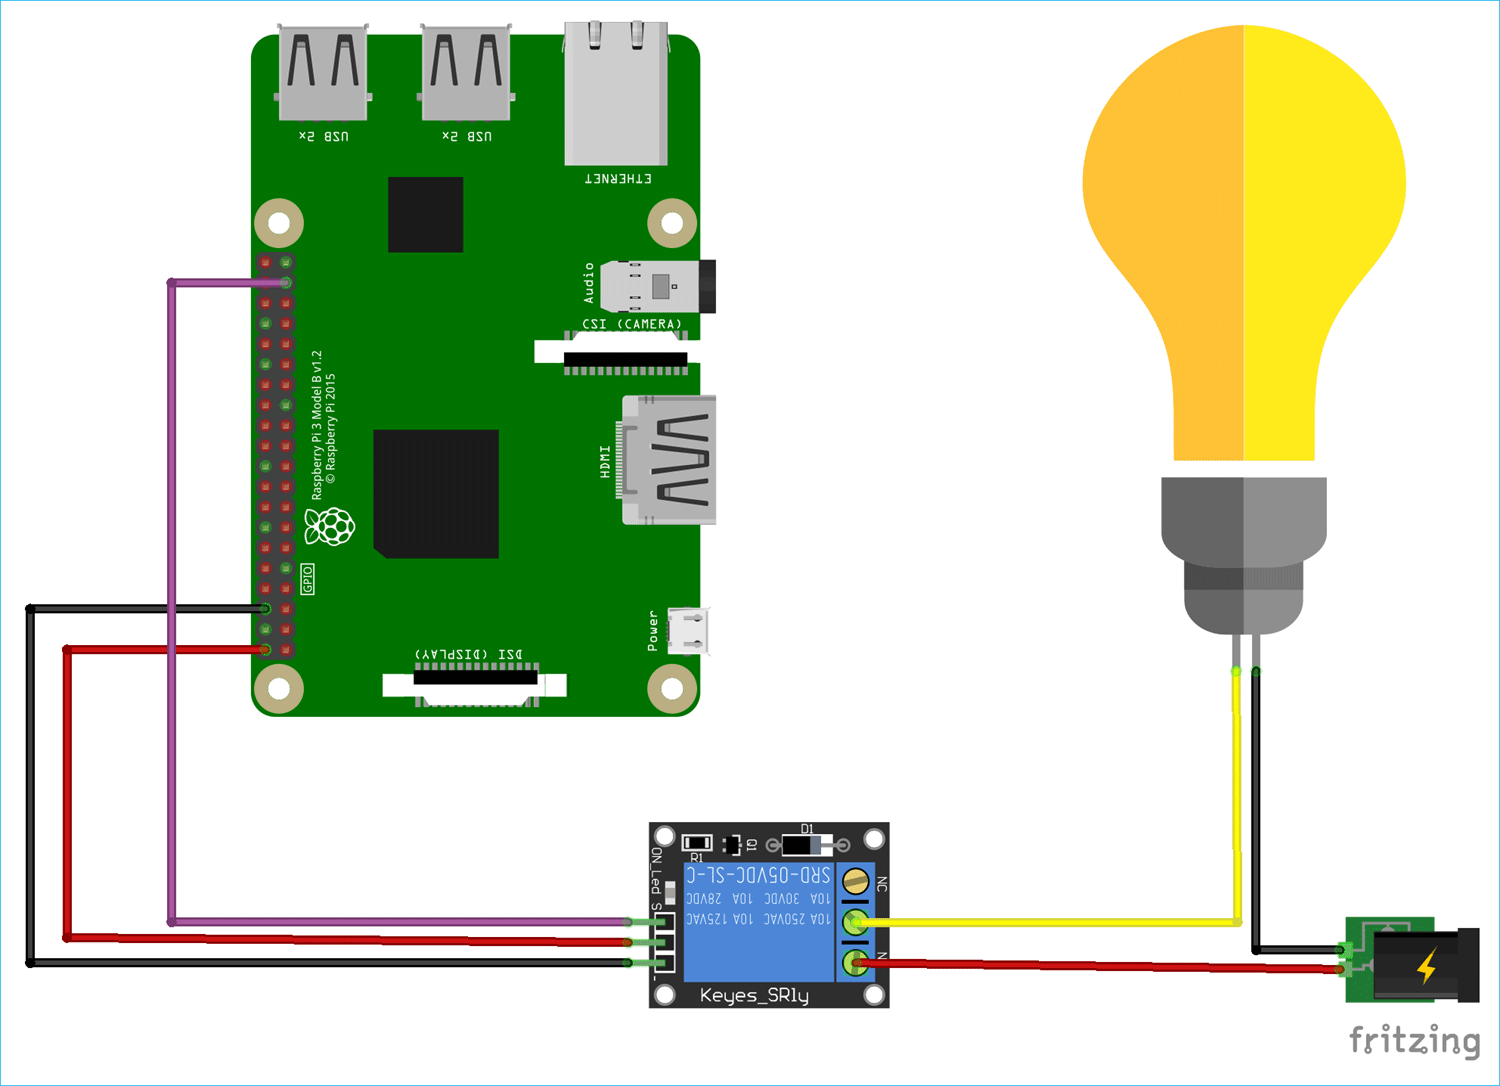
Circuit diagram for this Raspberry Pi Telegram controlled Home Automation project is given below:
Also check Telegram Home Automation with ESP8266 NodeMCU.
Code Explanation
To build this project using Raspberry Pi and Python, we need to install two important libraries. One for Telegram and another is for using GPIO pins of Raspberry Pi. To install the libraries open the terminal and type following commands. Update the Raspberry Pi before installing libraries.
sudo apt-get update
sudo apt-get install Rpi.GPIO
sudo pip install telepot
Complete Python code with a working video is given at the end of this tutorial, here we are explaining few important parts of the program.
Start by importing all the necessary libraries:
import time
import RPi.GPIO as GPIO
import telepot
from telepot.loop import MessageLoop
GPIO pin 26 is set as output pin to change the state of the relay. Initially the relay is set at “0” state to keep the Lamp in Off state.
bulb = 26
GPIO.setmode(GPIO.BCM)
GPIO.setwarnings(False)
GPIO.setup(bulb, GPIO.OUT)
GPIO.output(bulb, 0)
A function “action” is created which is called when some message is sent to the telegram bot by the user. For each message there is some particular chat id and command so that the bot can communicate with the user. This function checks if the command received has “on” or “off” string in it. If it contains “on” then change the relay state to “1” to turn on the lamp, and if the message received has “off” in the command then change the relay state to “0” to turn off the lamp.
def action(msg):
    chat_id = msg['chat']['id']
    command = msg['text']
    print 'Received: %s' % command

    if 'on' in command:
        message = "Turned on the light"
        GPIO.output(bulb, 1)
        telegram_bot.sendMessage (chat_id, message)

    if 'off' in command:
        message = "Turned off the light"
        GPIO.output(bulb, 0)
        telegram_bot.sendMessage (chat_id, message)
The code given below takes the unique token number, which we got while creating the bot, to establish a connection between telegram bot and Raspberry Pi. On successful connection it prints a message to indicate that system is ready to accept the command.
telegram_bot = telepot.Bot(66****885:A*G-X**dTYdSCt******aCQPCk***SL**b4')
print (telegram_bot.getMe())
MessageLoop(telegram_bot, action).run_as_thread()
print 'Send the command to turn on or off the light...'
Testing the Telegram controlled Home Appliances
Make the connections as shown in the circuit diagram above. Connect the data pin of the relay to the GPIO pin 26 of the Raspberry Pi. Connect the AC powered lamp correctly with the relay.
Now create a new file with extension “.py” in the pi and copy-paste the code given at the end of the tutorial then save the newly created file. Now open the terminal of Raspberry Pi and run the file using command below command
python file_name.py
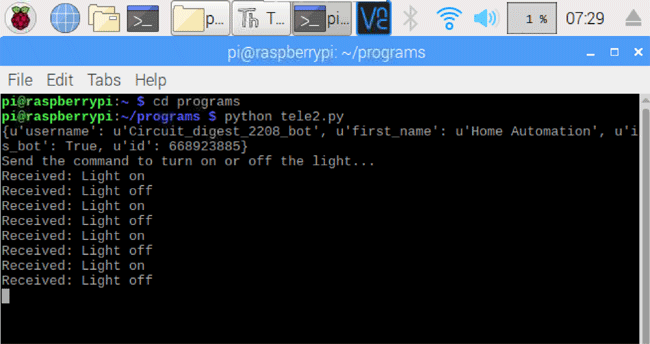
Make sure to change the directory where your python file is saved before executing the python code. The terminal will show you the output similar to as shown in the screenshot below.
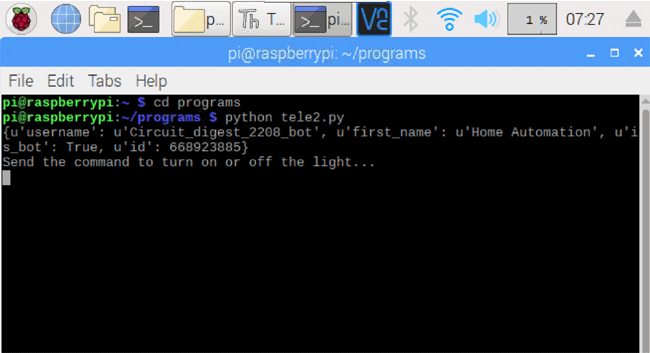
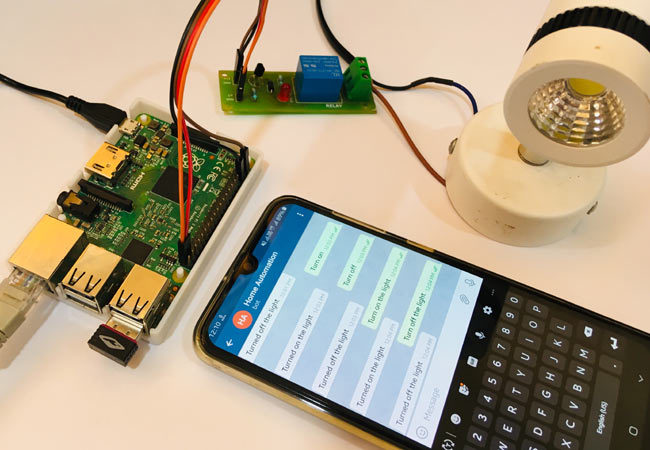
Now the connection between Telegram bot and Raspberry Pi is established and we are ready to send the command to telegram bot to turn on or turn off the light. Try to turn on and turn off the lamp by sending text messages to telegram bot as shown in the screenshot below
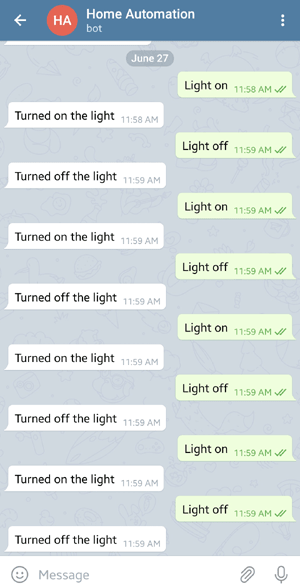
You will be able to observe the commands sent to the bot in the terminal of the Raspberry Pi.
Find the complete program and demonstration Video below. Also check other IoT Home Automation Projects.
import time
import RPi.GPIO as GPIO
import telepot
from telepot.loop import MessageLoop
bulb = 26
GPIO.setmode(GPIO.BCM)
GPIO.setwarnings(False)
GPIO.setup(bulb, GPIO.OUT)
GPIO.output(bulb, 0)
def action(msg):
chat_id = msg['chat']['id']
command = msg['text']
print 'Received: %s' % command
if 'on' in command:
message = "Turned on the light"
GPIO.output(bulb, 1)
telegram_bot.sendMessage (chat_id, message)
if 'off' in command:
message = "Turned off the light"
GPIO.output(bulb, 0)
telegram_bot.sendMessage (chat_id, message)
telegram_bot = telepot.Bot('668923885:AAG-XHddTYdSCta8vvoiaCQPCk8toSLXpb4')
print (telegram_bot.getMe())
MessageLoop(telegram_bot, action).run_as_thread()
print 'Send the command to turn on or off the light...'
while 1:
time.sleep(10)


