


Battery is the most important component for any device as it powers the whole system. And it is important to monitor the voltage level of the battery as improper charging and discharging of a lithium battery may lead to a big safety issue. There is a separate system in electric vehicles, called Battery Management System (BMS) which monitors all the properties of the battery pack like voltage, current, temperature, etc. and ensures the safety and handling of Lithium batteries.
Previously Battery Monitoring System only monitors the condition of the battery and alarms the user via battery indicator inside the vehicle. Due to the advancement in technology, now Internet of Things (IoT) can be used to notify the manufacturer and users remotely regarding the battery status. They can check the battery status of the car’s battery on their smartphones from anywhere in the world and this is considered as one of the maintenance support provided by the manufacturer.
So, in this project, we will also build an IoT based Battery Monitoring System where you can not only monitor the charging and discharging status of the battery but can also get an alert email when the battery is full or empty. Here we will use NodeMCU 12E to send the battery status data to ThingSpeak cloud and will use IFTTT to send the Email alerts on battery status.
Components Required:
- NodeMCU (ESP-12E)
- Lithium Polymer Battery
- LiPo Charger (TP4056)
- Resistors
- Any DC load like DC motors
- Jumper Wires
Calculating Battery Voltage
NodeMCU analog pin can withstand only 3.3v so we have to make an arrangement to convert high input voltage within the range of NodeMCU analog pin and then write code to compute the actual voltage being measured.
Now, the arrangement that will convert the voltage is Voltage divider circuit. The voltage divider decreases the voltage being measured within the range of the NodeMCU analog input which is 3.3v. We have to find the values of the required resistors for the circuit. The maximum input voltage will depend on the values of the resistors. So, I choose R1=44k and R2=10k (These are the printed value but actual value may be different so first measure the actual value using multimeter then use these values for further calculations). In my case, actual values are R1=47k and R2=9.5k

So by using the Voltage divider formula, the input voltage can be calculated as:
Vout (A0) = (VIN*R1) / (R1+R2)
Max Vin = Vout*(R1+R2) / R1
Consider Vout is 3.3v
After putting the resistor and Vout values Max Vin will be calculated 19v approx. But in practice, it is better to provide a voltage which is less than the max value so you can use 15v battery voltage safely. You can also use this online voltage divider calculator to calculate the values of resistor based on the input and output voltage.
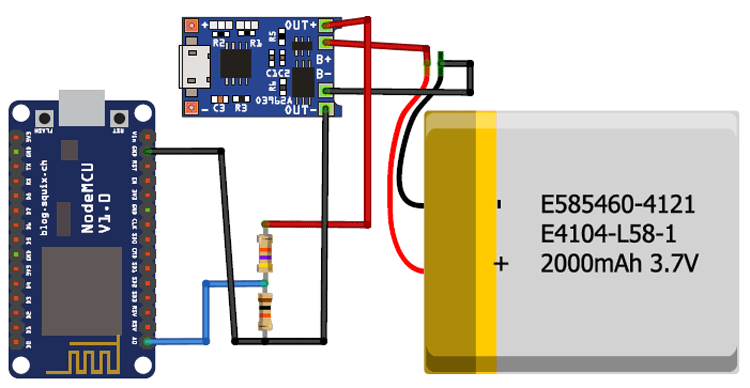
Circuit Diagram
Circuit diagram for Battery Monitoring System is shown below. Output of the voltage divider circuit is given to the A0 pin of NodeMCU. A TP4056 charging module is used for charging the LiPo battery and a DC motor is used for discharging purpose which is connected to the output terminal of TP4056.
Configuring ThingSpeak to plot Charging and Discharging Voltage
ThingSpeak provides a very good tool for IoT based projects. By using the ThingSpeak site, we can monitor our data and control our system over the Internet, using the Channels and webpages provided by ThingSpeak. ThingSpeak ‘Collects’ the data from the sensors, ‘Analyze and Visualize’ the data and ‘Acts’ by triggering a reaction.
Here we are briefly explaining to use ThingSpeak for this IoT Battery Monitoring Project. You can check various ThingSpeak based Iot projects here to learn more about it.
We will use ThingSpeak to monitor battery charging and discharging voltage. We will also use IFTTT platform to connect with ThingSpeak to send email/message alerts for a full or empty battery.
Step 1:- First of all, the user needs to Create an Account on ThingSpeak.com, then Sign In and click on Get Started.

Step 2:- Now go to the ‘Channels’ menu and click on New Channel option on the same page for further process. You will see a form for creating the channel, fill in the Name and Description as per your choice. Then fill ‘Charging Voltage’, and ‘Discharging Voltage’ in Field 1 and Field 2 labels, tick the checkboxes for the Fields. Click on Save channel at bottom of the page. Now your new channel has been created.

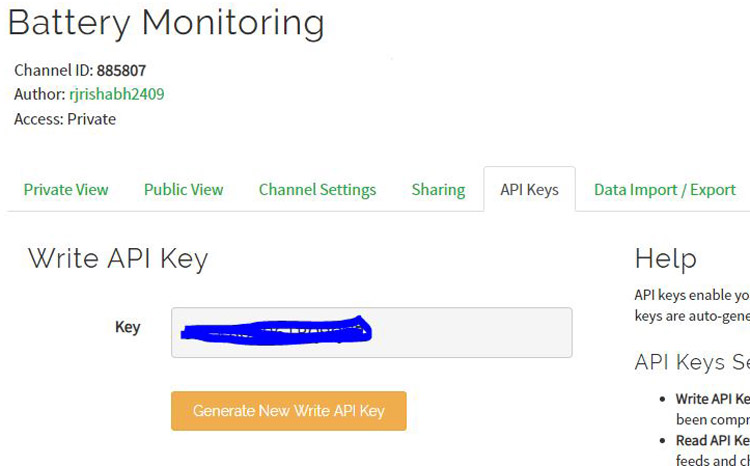
Step 3:- Click on API Keys menu and copy the Write API key. This key will be used in the code to send the data on ThingSpeak.
Step 4:- Now, we will use ThingHTTP app of the server to trigger the IFTTT applet to send mail whenever the battery is full or empty. You can specify actions in ThingHTTP, which you want to trigger using other ThingSpeak apps such as React.
To make New ThingHTTP, we will need a URL for triggering which we can be obtained from IFTTT.
Configuring IFTTT for triggering Mail/SMS for Battery Monitoring
Here we are linking ThingSpeak with IFTTT via webhooks to automatically send the email when Battery is Full or Empty. To learn more about how IFTTT works, here are many tutorials and live IoT projects using IFTTT.
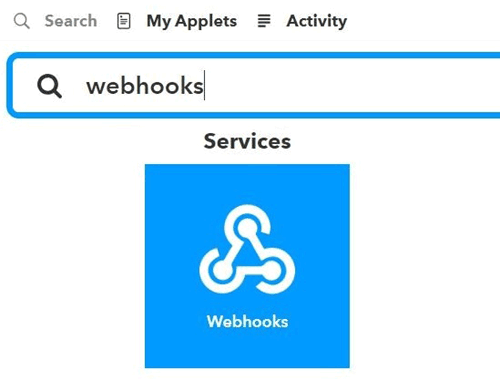
Step 1:- Login to IFTTT and search for Webhooks and click on it.
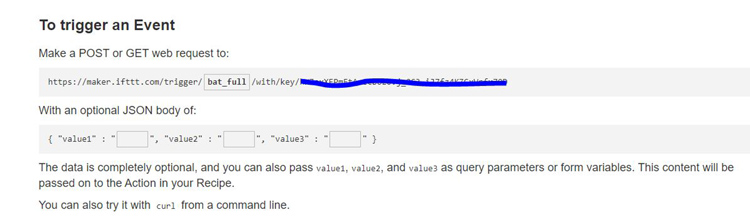
Step 2:- Click on Documentation.
Step 3:- Type “bat_full” in the event box and copy the URL. This URL will be used in ThingHTTP.
Now let’s make Applet to link ThingHTTP to Gmail to send an email. After that, we will jump to complete our ThingHTTP.
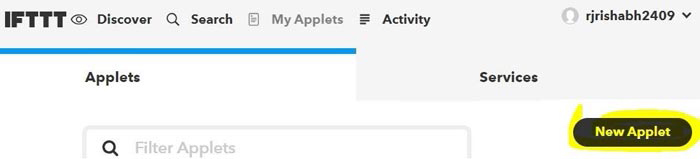
Step 4:- Click on New Applete in My Applete option.
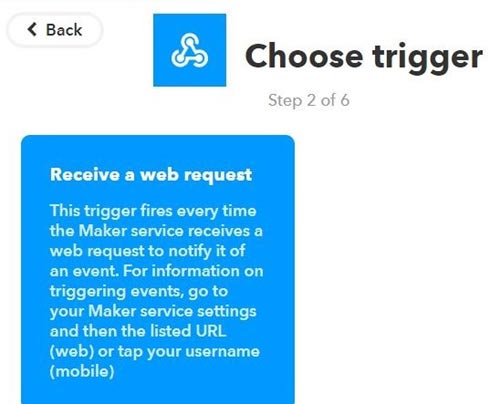
Step 5:- Click on “+this” and search for Webhooks and click on it. Choose trigger as “Receive a web request”.
Now let’s make Applet to link ThingHTTP to Google sheet and to send email/SMS. After that, we will jump to complete our ThingHTTP.
Step 6:- Click on “+this” and search for Webhooks and click on it. Choose trigger as “Receive a web request”.
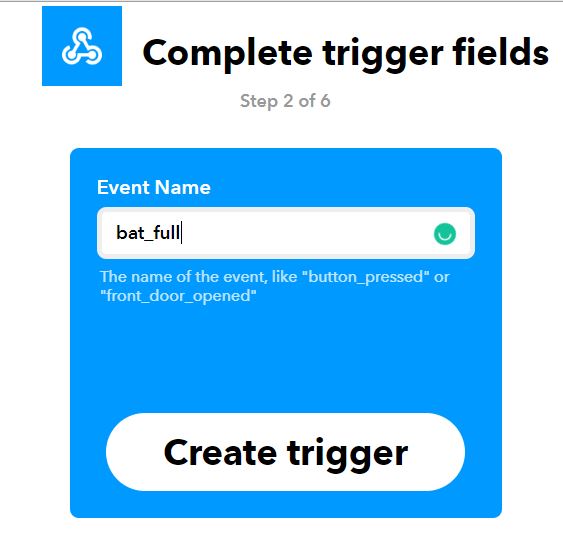
Step 7:- Type the Event Name which is the same as you write in the event box in webhooks URL. Click on Create Trigger.
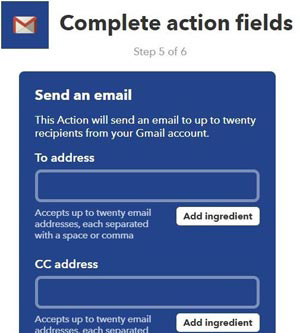
Step 8:- Click on “+that” and search for Gmail and click on it. Now, click on Send an email.

Type the email addresses on which you wish to receive an email when there is an update regarding the battery.
Type the body content you wish to send in the email and click on create action. Review it and finish.
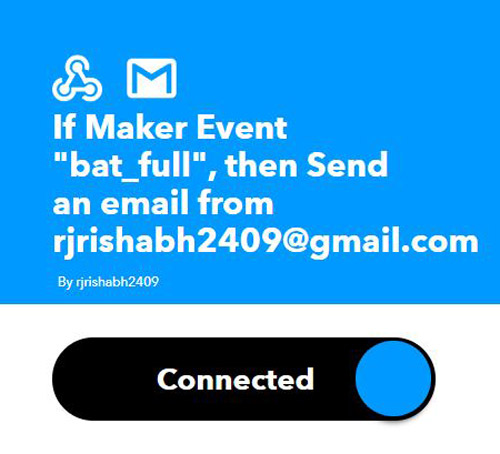
Similarly, make an applet for getting mail regarding battery empty alert.
We have made our applets to perform the tasks. Now, come back to ThingSpeak->Apps->ThingHTTP.
ThingHTTP for connecting ThingSpeak with IFTTT for Email Alerts
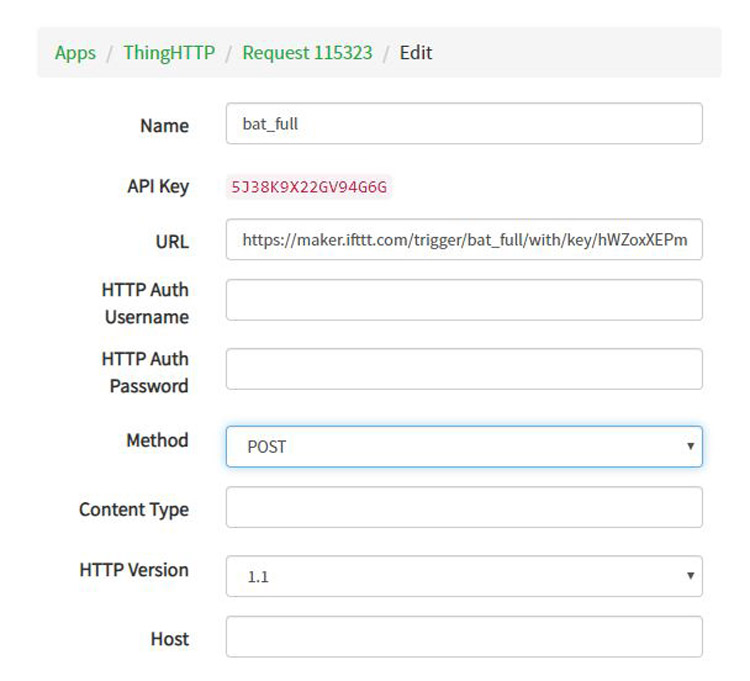
Step 1:- Click on New ThingHTTP. Give any name and Paste the URL that you copied from the webhooks documentation. Fill Remaining information as shown below.
In the same manner, we have to make ThingHTTP for “bat_empty”. Follow the same steps.
In URL, write bat_empty in place of bat_full. Body remains empty and all other information is same as in the previous ThingHTTP. Save it.
Now, we have to make React to trigger the URL.
React works with ThingHTTP app to perform actions when channel data meets a certain condition.
To make React, click on Apps -> React. Click on New React.
Step 2:- Give a name to your React. Condition type as Numeric and Test Frequency as on Data Insertion.
Choose the Condition on which you want to trigger the URL. Select your channel from the If Channel drop-down menu. Choose field 1 i.e. charging_volatge and make a condition of greater than and equal to 4.1. As shown
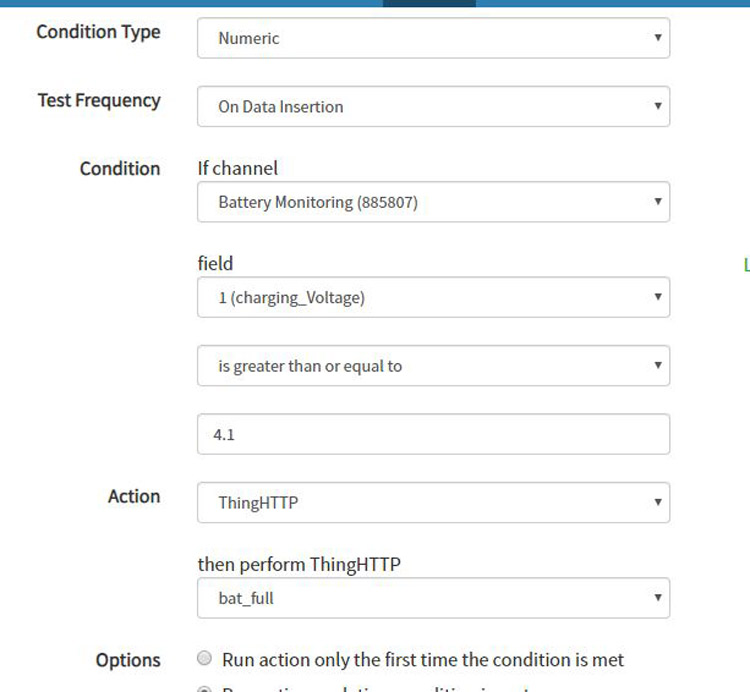
Choose ThingHTTP from Action drop-down menu and select the bat_full.
Select “Run action each time condition is met” and click on Save React.
Similarly, make react for bat_empty.
We have done with all the Web-based work. Now, we will see the code for our NodeMCU.
Code Explanation:
Complete code with a working video for this IOT based Battery Monitoring System is given at the end of this tutorial, here we are explaining the code in detail.
- First include all the required libraries. Also, initialize SSID and password of your Wi-Fi network and write API key that we had copied from ThingSpeak platform.
#include <ESP8266WiFi.h>
String apiKey = "***********";
const char* ssid =  "********";
const char* pass =  "********";
const char* server = "api.thingspeak.com";
- Now declare and initialize resistors values and some other variables and constants.
float volt =0.0;
float temp=0.0;
float r1=47000.0;
float r2=9700.0;
int flag = 1;
- In void setup() function, initialize serial communication and check for the Wi-Fi connection .
void setup()
{
   Serial.begin(115200);
   WiFi.begin(ssid, pass);
      while (WiFi.status() != WL_CONNECTED)
     {
            delay(100);
            Serial.print("*");}
- In void loop() function, we will take readings from an analog pin and will convert this value to actual voltage value as shown below.
int analog value = analogRead(A0);
    temp = (analogvalue * 3.3) / 1024.0;
    volt = temp / (r2/(r1+r2));
Now, we will use a flag variable to track the status of the battery whether the battery is full or empty then accordingly send the voltage data to the respective graph on the ThingSpeak. Initially, we have taken the flag as 1 which means the battery is charging.
if (volt >= 4.1){
    flag=0;
    }
    if (volt <= 3.2){
      flag = 1;
      }
For sending voltage data to check for the flag and upload the data in the respective graph.
if(flag == 1) {
    if (client.connect(server,80))        {
       String sendData = apiKey+"&field1="+String(volt)+"\r\n\r\n";
       client.print("POST /update HTTP/1.1\n");
       client.print("Host: api.thingspeak.com\n");
..
       }
Similarly for field 2.
Else if (flag == 0){
    if (client.connect(server,80))        {
       String sendData = apiKey+"&field2="+String(volt)+"\r\n\r\n";
       client.print("POST /update HTTP/1.1\n");
       client.print("Host: api.thingspeak.com\n");
..
Reading will be updated every 10 seconds. For this, delay or timer function can be used. Here I am using the delay function.
Now, the coding part is done. Full code is given at the end of the tutorial. Upload this code to the NodeMCU and make sure to enter the credentials correctly.
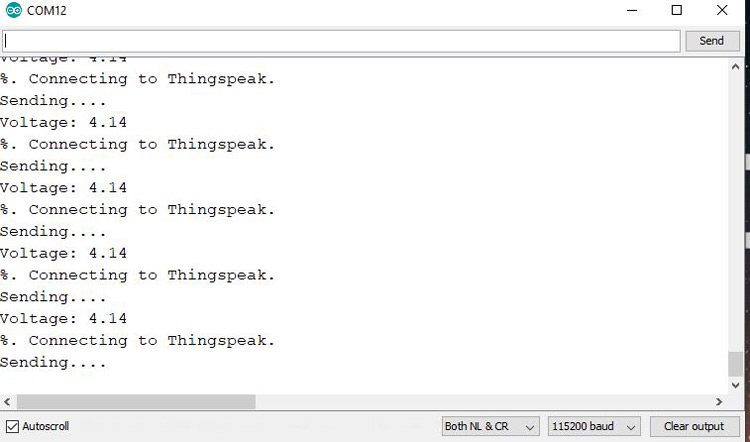
You can check the reading on the serial monitor and ThingSpeak as shown below.
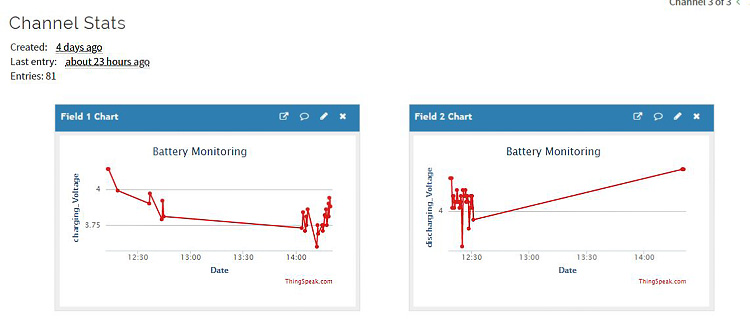
The charging and discharging curves on ThingSpeak are shown in the above figure. The left figure shows the curve during charging and the right one shows the curve during the discharging of Lithium battery.
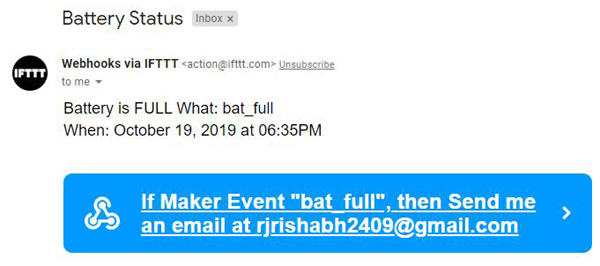
Now, whenever the battery is full or empty, the user will get an email notifying that battery is FULL or EMPTY.
So this is how a Battery voltage status can be monitored from anywhere in the world using ThingSpeak cloud and NodeMCU Wi-Fi module.
Also, check the video below.
#include <ESP8266WiFi.h>
String apiKey = "************";
const char* ssid = "awesome"; // Enter your WiFi Network's SSID
const char* pass = "awesome12"; // Enter your WiFi Network's Password
const char* server = "api.thingspeak.com";
WiFiClient client;
float volt =0.0;
float temp=0.0;
float r1=47000.0; //r1 value 47k
float r2=9700.0; //r2 value 9.7 k
int flag = 1;
void setup()
{
Serial.begin(115200);
Serial.println("Connecting to ");
Serial.println(ssid);
WiFi.begin(ssid, pass);
while (WiFi.status() != WL_CONNECTED)
{
delay(100);
Serial.print("*");
}
Serial.println("");
Serial.println("WiFi connected");
}
void loop()
{
int analogvalue = analogRead(A0);
temp = (analogvalue * 3.3) / 1024.0;
volt = temp / (r2/(r1+r2));
if (volt < 0.1)
{
volt=0.0;
}
if (volt >= 4.1){
flag=0;
}
if (volt <= 3.2){
flag = 1;
}
Serial.print("Voltage: ");
Serial.println(volt);
if(volt>=3.2 && volt<=4.2 && flag == 1) {
if (client.connect(server,80)) {
String sendData = apiKey+"&field1="+String(volt)+"\r\n\r\n";
client.print("POST /update HTTP/1.1\n");
client.print("Host: api.thingspeak.com\n");
client.print("Connection: close\n");
client.print("X-THINGSPEAKAPIKEY: "+apiKey+"\n");
client.print("Content-Type: application/x-www-form-urlencoded\n");
client.print("Content-Length: ");
client.print(sendData.length());
client.print("\n\n");
client.print(sendData);
Serial.println("%. Connecting to Thingspeak.");
}
client.stop();
Serial.println("Sending....");
}
else if(volt>=3.2 && volt < 4.2 && flag == 0){
if (client.connect(server,80)) // "184.106.153.149" or api.thingspeak.com
{
String sendData = apiKey+"&field2="+String(volt)+"\r\n\r\n";
client.print("POST /update HTTP/1.1\n");
client.print("Host: api.thingspeak.com\n");
client.print("Connection: close\n");
client.print("X-THINGSPEAKAPIKEY: "+apiKey+"\n");
client.print("Content-Type: application/x-www-form-urlencoded\n");
client.print("Content-Length: ");
client.print(sendData.length());
client.print("\n\n");
client.print(sendData);
Serial.println("Connecting to Thingspeak.");
}
client.stop();
Serial.println("Sending....");
}
delay(10000);
}


