


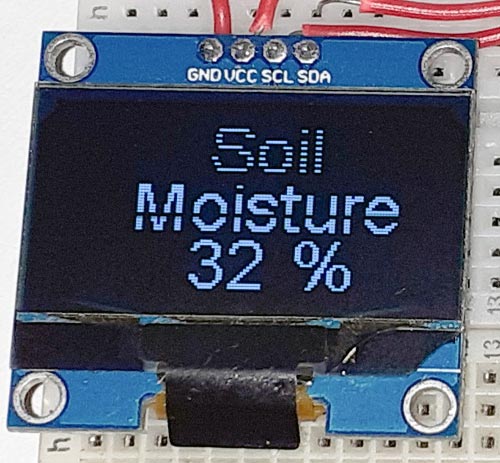
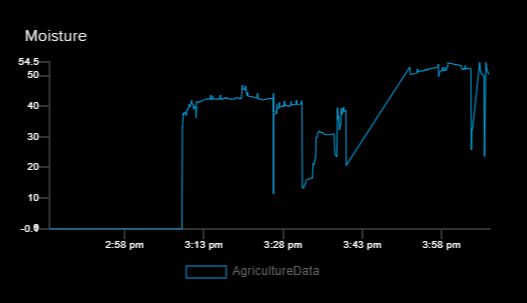
We previously used a soil moisture sensor with ESP8266 to build a smart irrigation system. Today we used soil moisture sensor with ESP32 to build an IoT based moisture monitoring System, where the soil moisture will be displayed in percentage (%) on Adafruit dashboard in form of graph as well as on OLED display in form of numbers.
Components Required
- ESP32
- Soil Moisture Sensor
- OLED Display
- Connecting Wires
OLED Display
The OLED displays are one of the most common and easily available displays for a microcontroller. This display can easily be interfaced with microcontroller using IIC or using SPI communication and has a good view angle and pixel density which makes it reliable for displaying small level graphics. It is compatible with any 3.3V-5V microcontroller, such as Arduino. The OLED display comes with a powerful single-chip CMOS OLED driver controller – SSD1306 that handles the entire RAM buffering. The SSD1306 driver has a built-in 1KB Graphic Display Data RAM (GDDRAM). We previously interfaced OLED with ESP32.
Specifications
- OLED Driver IC: SSD1306
- Resolution: 128 x 64
- Visual Angle: >160°
- Input Voltage: 3.3V ~ 6V
- Pixel Colour: Blue
- Working temperature: -30°C ~ 70°C
Circuit Diagram
Circuit Diagram for ESP32 Moisture Sensor is given below.
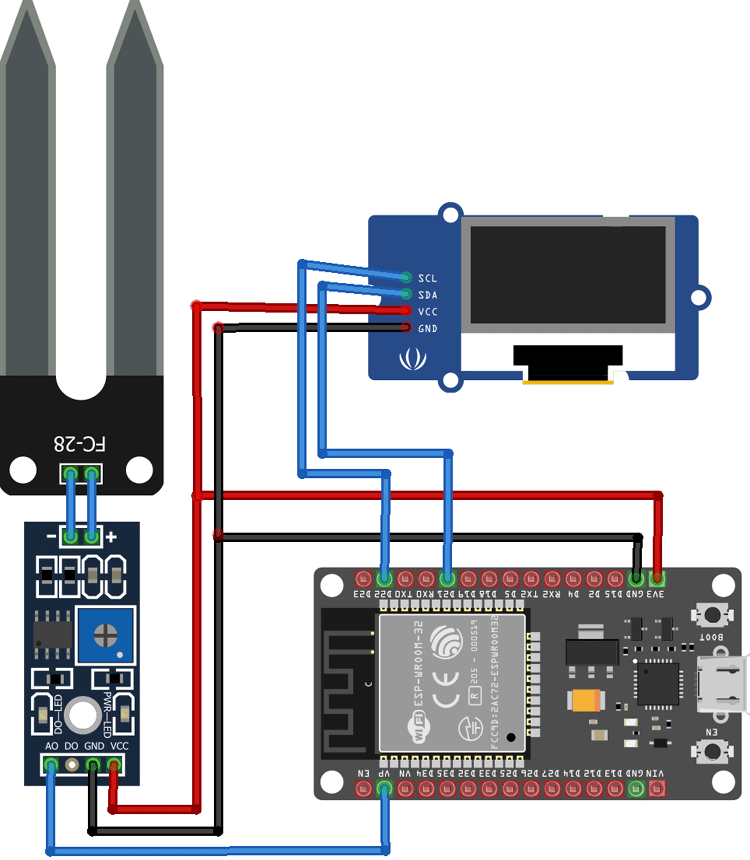
We are interfacing the ESP32 with Soil Moisture Sensor and OLED Display. Vcc and GND pin of the Soil Moisture sensor is connected to 3.3V and GND of ESP32, while the Analog pin of Moisture sensor is connected to the VP pin of ESP32. I2C mode is used to connect the OLED display Module (SSD1306) with ESP32. Connections between ESP32 and OLED Display are given as:
|
OLED Pin |
ESP32 Pin |
|
Vcc |
3.3v |
|
GND |
GND |
|
SCL |
D22 |
|
SDA |
D21 |
Adafruit IO Setup for ESP32 Soil Moisture Sensor
Adafruit IO is an open data platform that allows you to aggregate, visualize, and analyze live data on the cloud. Using Adafruit IO, you can upload, display, and monitor your data over the internet, and make your project IoT enabled. You can control motors, read sensor data, and make cool IoT applications over the internet using Adafruit IO. We previously used Adafruit with ESP32 and also built many IoT based applications using Adafruit.
To use Adafruit IO, first, you have to create an account on Adafruit IO. To do this, go to the Adafruit IO website and click on ‘Get started for Free’ on the top right of the screen.

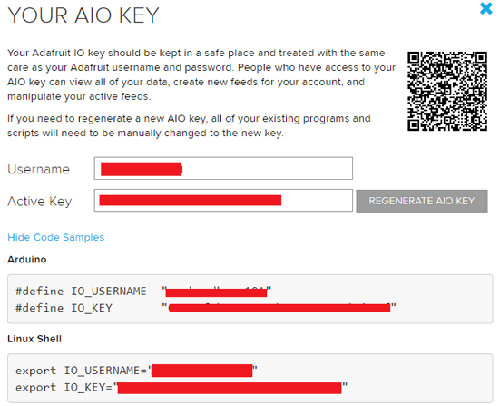
After finishing the account creation process, log in to your account and click on ‘View AIO Key’ on the top right corner to get your account username and AIO key.
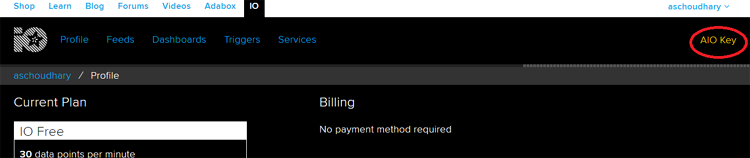
When you click on ‘AIO Key,’ a window will pop up with your Adafruit IO AIO Key and username. Copy this key and username, it will be needed later in the code.
Now after this, you need to create a feed. To create a feed, click on ‘Feed.’ Then click on ‘Actions’, you will see some options, from them, click on ‘Create a New Feed.’

After this, a new window will open where you need to input the Name and Description of your feed. The writing description is optional.
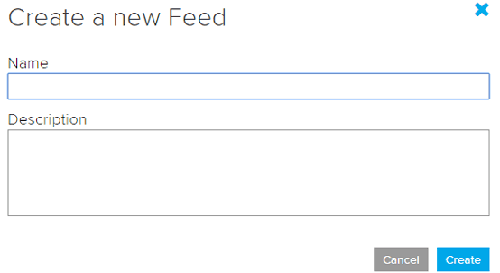
Click on ‘Create’ and you will be redirected to your newly created feed.
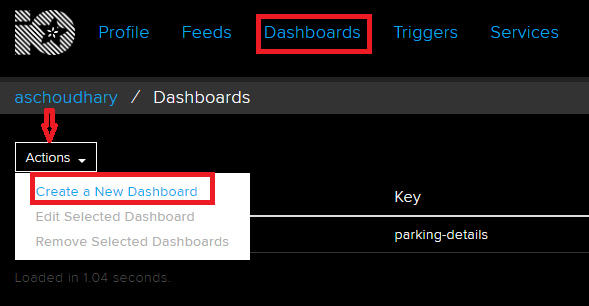
After creating the feed, now we will create an Adafruit IO dashboard to visualize the feed data. To create a dashboard, click on the Dashboard option and then click on the ‘Action’ and after this, click on ‘Create a New Dashboard’.
In the next window, enter the name for your dashboard and click on ‘Create’.
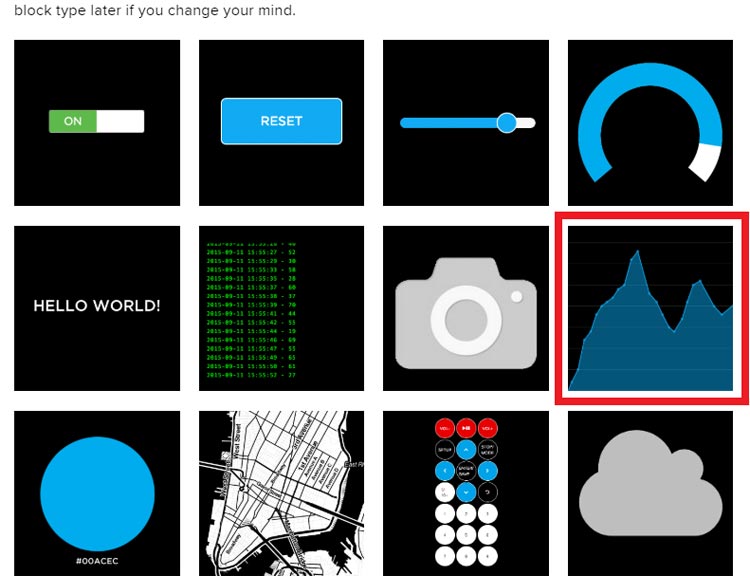
As our dashboard is created, now we will add some visualization blocks in the dashboard. To add a block, click on the ‘+’ in the top right corner.

Here we are going to use a link chart to visualize our Moisture data in Graph format.
To add a Line chart on the dashboard, select the line chart block.
In the next window, it will ask you to choose the feed, so click on Agriculture data feed.
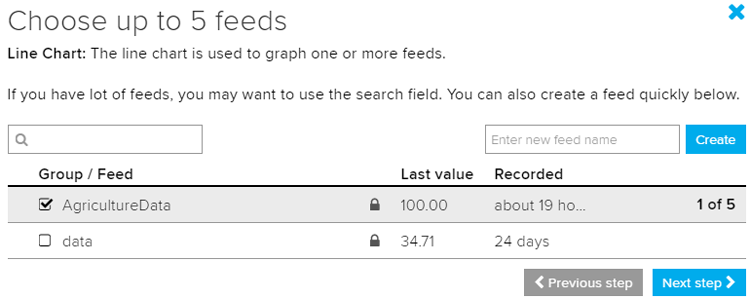
After this, click on ‘Next step’ and then enter the X-axis and Y-axis label names. With this step, your dashboard is ready to visualize the Moisture data.
Programming ESP32 for Moisture Monitoring
The complete code for the ESP32 Soil Moisture Monitoring System is given at the end of the article. Here we are explaining some important parts of code. Here few libraries are used (Wire.h, SH1106.h, and Adafruit_MQTT.h) which can be downloaded from below links:
So as usual, start the code by including all the required libraries.
#include <WiFi.h>
#include <Wire.h>
#include<SH1106.h>
#include "Adafruit_MQTT.h"
#include "Adafruit_MQTT_Client.h"
Then include the WiFi and Adafruit IO credentials that are copied from the Adafruit IO server. These will include the MQTT server, Port No, User Name, and AIO Key.
const char *ssid =  "WiFi Name";     // Enter your WiFi Name
const char *pass =  "Password";  // Enter your WiFi Password
#define MQTT_SERV "io.adafruit.com"
#define MQTT_PORT 1883
#define MQTT_NAME "User Name"
#define MQTT_PASS "AIO Key"
After that define all the pins where you have connected the OLED display and create an instance for the display.
SH1106 display(0x3c, 21, 22);
Also, define the pin where the Soil Moisture sensor is connected. The soil moisture sensor is connected to the VP pin of ESP32.
const int moisturePin = A0;
Then setup the Adafruit IO feed to publish the Moisture data. Here AgricultureData is the feed name.
Adafruit_MQTT_PublishAgricultureData = Adafruit_MQTT_Publish(&mqtt,MQTT_NAME "/f/AgricultureData");
Inside the setup() function, initialize the Serial Monitor at a baud rate of 115200 for debugging purposes and also initialize the OLED display with the begin() method.
void setup()
{
  Serial.begin(115200);
  WiFi.begin(ssid, pass);
  while (WiFi.status() != WL_CONNECTED)
  {
    delay(500);
   }
  Serial.println("WiFi connected");
  display.init();
  display.flipScreenVertically();
  display.setFont(ArialMT_Plain_10);
}
Inside the loop() function, read the moisture data from the sensor and print the readings on the OLED display.
moisturePercentage = ( 100.00 - ( (analogRead(moisturePin) / 1023.00) * 100.00 ) );
Serial.print(moisturePercentage);
Serial.println("%");
display.setTextAlignment(TEXT_ALIGN_LEFT);
display.setFont(ArialMT_Plain_24);
display.drawString(50, 0, "Soil");
display.drawString(25, 20, "Moisture");
String data1 = String(moisturePercentage);
display.drawString(45, 40, data1);
display.drawString(60, 40, "0 %");
  }
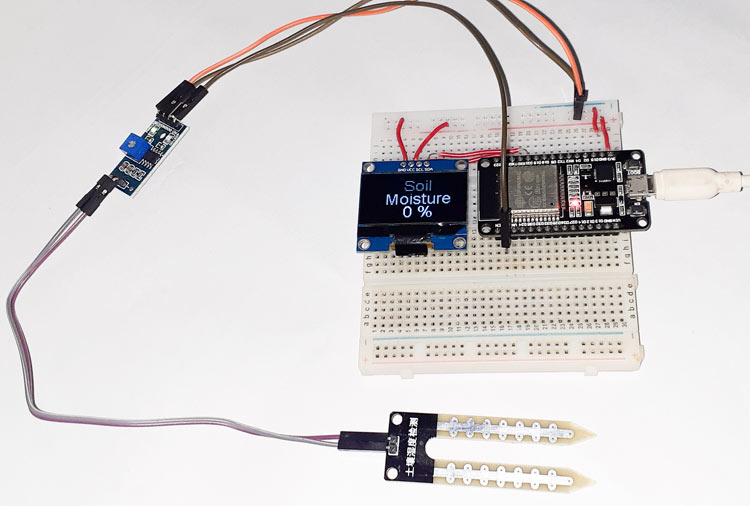
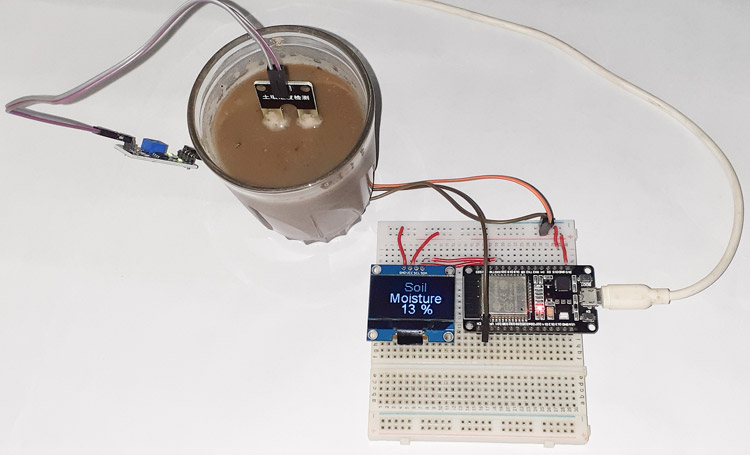
Once the hardware and the program are ready, it is time to upload the program into your ESP32 Board. Here Arduino IDE is used to upload the Moisture Monitoring code to ESP32 board, so connect the ESP32 to your laptop with a Micro USB Cable and hit the upload button. Once the code is uploaded, the OLED Display and Adafruit IO will start showing the soil moisture value in percentage (%) as shown in the below figure.
The complete code and working video for this ESP32 Soil Moisture Sensor project are given below.
#include <WiFi.h>
#include <Wire.h> // Only needed for Arduino 1.6.5 and earlier
#include<SH1106.h> // legacy: #include "SSD1306.h"
#include "Adafruit_MQTT.h"
#include "Adafruit_MQTT_Client.h"
const char *ssid = "Galaxy-M20"; // Enter your WiFi Name
const char *pass = "ac312129"; // Enter your WiFi Password
SH1106 display(0x3c, 21, 22);
WiFiClient client;
#define MQTT_SERV "io.adafruit.com"
#define MQTT_PORT 1883
#define MQTT_NAME "choudharyas" // Your Adafruit IO Username
#define MQTT_PASS "988c4e045ef64c1b9bc8b5bb7ef5f2d9" // Adafruit IO AIO key
const int moisturePin = A0; // moisteure sensor pin
int moisturePercentage; //moisture reading
//Set up the feed you're publishing to
Adafruit_MQTT_Client mqtt(&client, MQTT_SERV, MQTT_PORT, MQTT_NAME, MQTT_PASS);
Adafruit_MQTT_Publish AgricultureData = Adafruit_MQTT_Publish(&mqtt,MQTT_NAME "/f/AgricultureData"); // AgricultureData is the feed name where you will publish your data
void setup()
{
Serial.begin(115200);
delay(10);
Serial.println("Connecting to ");
Serial.println(ssid);
WiFi.begin(ssid, pass);
while (WiFi.status() != WL_CONNECTED)
{
delay(500);
Serial.print("."); // print ... till not connected
}
Serial.println("");
Serial.println("WiFi connected");
display.init();
display.flipScreenVertically();
display.setFont(ArialMT_Plain_10);
}
void loop()
{
MQTT_connect();
moisturePercentage = ( 100 - ( (analogRead(moisturePin) / 1023.00) * 100 ) );
Serial.print("Soil Moisture is = ");
Serial.print(moisturePercentage);
Serial.println("%");
display.clear();
display.setTextAlignment(TEXT_ALIGN_RIGHT);
display.drawString(10, 128, String(millis()));
display.setTextAlignment(TEXT_ALIGN_LEFT);
display.setFont(ArialMT_Plain_24);
display.drawString(50, 0, "Soil");
display.drawString(25, 20, "Moisture");
//display.setFont(ArialMT_Plain_24);
String data1 = String(moisturePercentage);
display.drawString(45, 40, data1);
display.drawString(60, 40, "0 %");
display.display();
if (! AgricultureData.publish(moisturePercentage)) //This condition is used to publish the Variable (moisturePercentage) on adafruit IO. Change thevariable according to yours.
{
delay(5000);
}
delay(6000);
}
void MQTT_connect()
{
int8_t ret;
// Stop if already connected.
if (mqtt.connected())
{
return;
}
uint8_t retries = 3;
while ((ret = mqtt.connect()) != 0) // connect will return 0 for connected
{
mqtt.disconnect();
delay(5000); // wait 5 seconds
retries--;
if (retries == 0)
{
// basically die and wait for WDT to reset me
while (1);
}
}
}


