


Inventory management is essential to almost every type of business in which goods are stored and processed. A healthy inventory management helps in smooth delivery of products. So it is very important to know how much of your products are left in your stock. Inventory management is also essential to ensure that there is enough material for the current project and to decide when to reorder the products? Etc. In large inventory where thousands of items are stored, it is very difficult for humans to manually check the inventory on regular basis and it might also lead to errors.
In this era of the Internet of Things and advanced sensors, you can manage your inventory very easily. With the help of IoT enabled inventory management system, you can monitor the inventory from your home/office and can manage the products according to it. So today we are going to make an IoT enabled inventory management system using an Ultrasonic Sensor, NodeMCU ESP8266, and ThingSpeak cloud platform. In this system Ultrasonic sensor is used to count the number of products stored in a rack, ThingSpeak is used for live monitoring of data, and IFTTT is used to send a mail whenever the products count goes below the user-defined criteria.
We have previously used ThingSpeak with ESP8266 to build Air Quality Monitor system, IoT weather station, and Smart Street light. You can, check all the ThingSpeak and ESP2866 related projects by following the respective links.
Components Required
Hardware components
- NodeMCU ESP8266
- Ultrasonic Sensor (2)
- Breadboard
- Jumper Wires
Software apps and online services
- Arduino IDE
- ThingSpeak
- IFTTT
Circuit Diagram
The complete circuit diagram for IoT Inventory System is shown below. It is pretty simple as we only need to connect two ultrasonic sensors with our ESP NodeMCU board.
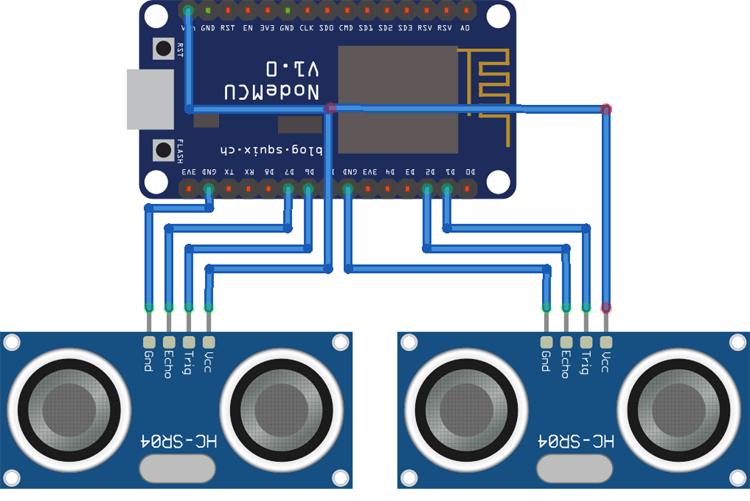
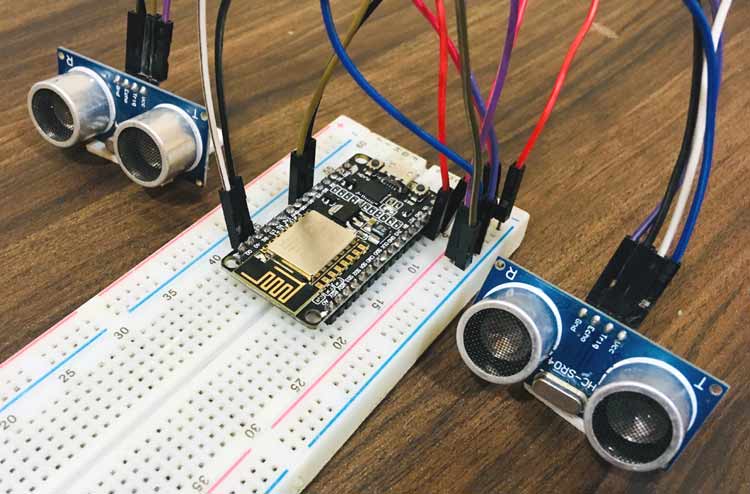
The Vcc and GND pin of both ultrasonic sensors are connected with Vin and GND pin of NodeMCU. While the trig and echo pins of the first ultrasonic sensor is connected with D1 and D2 and trig and echo pin of the second ultrasonic sensor is connected with D6 and D7 pins respectively. The complete set-up will be powered by the micro-USB port of Node-MCU through a USB cable. I made the connections using connector wires, and it looked like something below
The ultrasonic sensor is a 4-pin multi-use sensor. It can be used as an obstacle avoider and distance calculator. Ultrasonic sensors measure distance by using ultrasonic waves. It emits an ultrasonic wave and receives the wave reflected from the target. The distance can be calculated with the following formula:
Distance D = 1/2 × T × C
Where T= Time and C= Speed
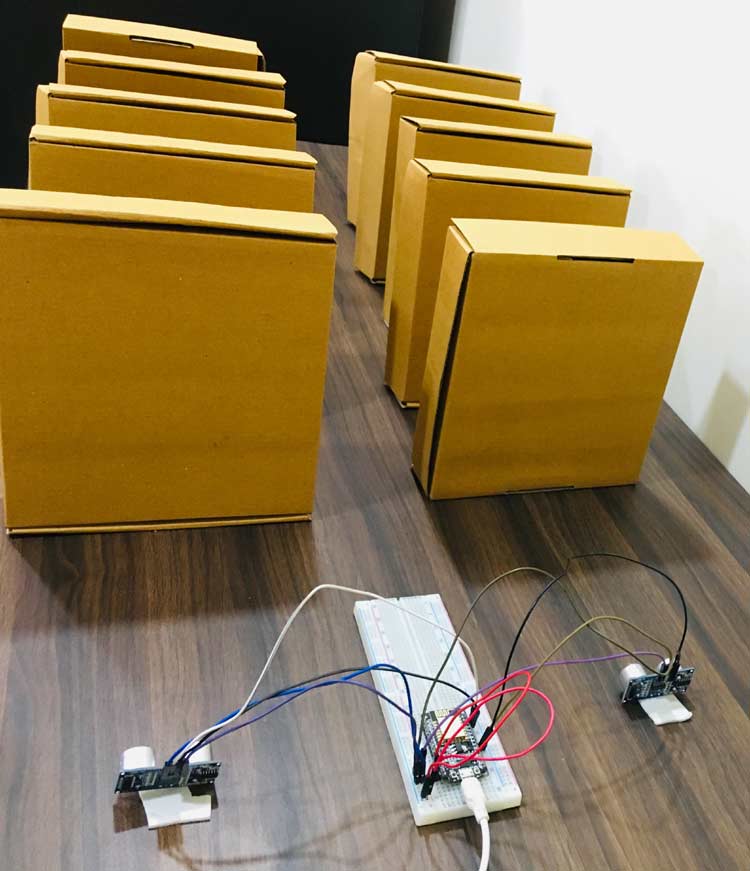
The idea is to use the ultrasonic sensor to measure the distance between the sensor and the boxes that are stack. Based on this value of distance we can predict how much box is currently stacked in a row if we know the width of one box. My project arrangement was something like this.
As you can see I have used two different ultrasonic sensors to detect two different types of boxes (assume chocolate and ice-cream box). The sensor position is fixed so that the distance between the sensor and number of box will always be fixed.
ThingSpeak Setup
ThingSpeak is an open data IoT Analytics platform that allows you to aggregate, visualize, and analyze live data in the cloud. You can control your devices using ThingSpeak, you can send data to ThingSpeak from your devices, and even you can create instant visualizations of live data, and send alerts using web services like Twitter and ThingHTTP.
Step 1: Sign up
To send data to Thingspeak, a Thingspeak account is required. To do so navigate to Thingspeak website

Click on the ‘Sign up’ option in the top right corner and fill out the required details
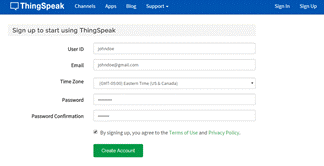
After this verify your E-mail id and click on continue.
Step 2: Create a Channel for Your Data
Now as you are logged in your account, create a new channel by clicking “New Channel” button.
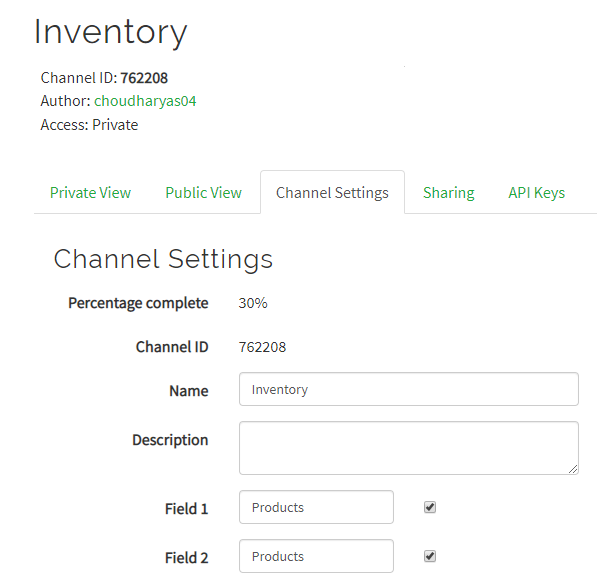
After clicking on “New Channel,” enter the Name and Description of the data you want to upload on this channel. For example, I named it as “Inventory.” Enter the name of your data in Field1 and Field2. If you want to use more than two Field, you can check the box next to Field option and enter the name and description of your data.
After that, click on save channel button to save your details. ThingSpeak usually shows data in Graph format, but you can add some widgets in your channel. To add a widget, click on the ‘Add Widgets’ option and choose the widget you want to use. In this project, I am using the ‘Numeric Display’ widget.
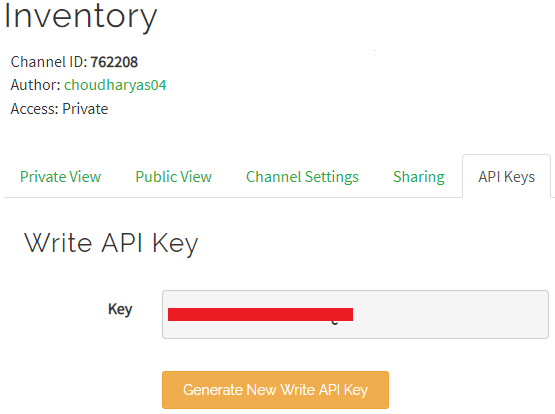
Step 3: API Key
To send data to ThingSpeak, we need a unique API key, which we will use later in our code to send values from ESP8266 to ThingSpeak. Click on “API Keys” button to get your unique API key for uploading sensor data. Now copy your “Write API Key.” We will use this API key in our code.
Code Explanation
First of all, download all the required libraries and add then in your Arduino IDE. You can download the Thingspeak.h library from below link. The other libraries will be present by default.
ThingSpeak Library for ESP8266
The code starts by including the ThingSpeak library and ESP8266 wifi library. ThingSpeak library is used to send data to ThingSpeak Platform. After that, enter the ThingSpeak API key, Wifi name and password and define the variables that will be used in the code.
#include <ESP8266WiFi.h>
#include <WiFiClient.h>;
#include <ThingSpeak.h>;
const char * myWriteAPIKey = "API Key";
const char *ssid =  "WiFi Name";     // Enter your WiFi Name
const char *pass =  "WiFi Password"; // Enter your WiFi Password
Void Product1 loop is used to count the number of products and send the data to ThingSpeak using ThingSpeak.writeField. Number of products is counted using different distance conditions.
void Product1(){
delay(500);// reading will be taken after ....milliseconds
Serial.println("\n");
int duration, distance;
    digitalWrite (trigPin, HIGH);
    delayMicroseconds (10);
    if (distance <25) {  // Change the number for long or short distances.
    Icecream=5;
        Serial.print(Icecream);
        }
………………………………………………
………………………………………………
ThingSpeak.writeField(myChannelNumber, 1,Icecream, myWriteAPIKey);
 }
Void Product2 loop is the same as the Product1 loop. It is used to count the no. of products in the second column.
void Product2(){
delay(500);// reading will be taken after ....milliseconds
Serial.println("\n");
int duration, distance;
    digitalWrite (trigPin, HIGH);
    delayMicroseconds (10);
    if (distance <25) {  // Change the number for long or short distances.
    Chocolate=5;
        Serial.print(Chocolate);
        }
………………………………………………
………………………………………………
ThingSpeak.writeField(myChannelNumber, 1,Icecream, myWriteAPIKey);
Programming the NodeMCU
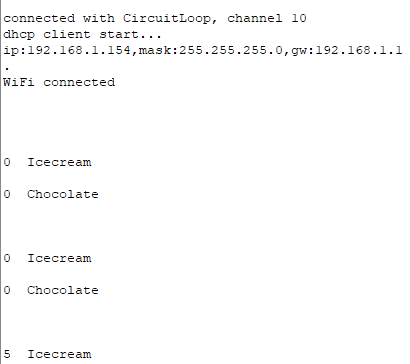
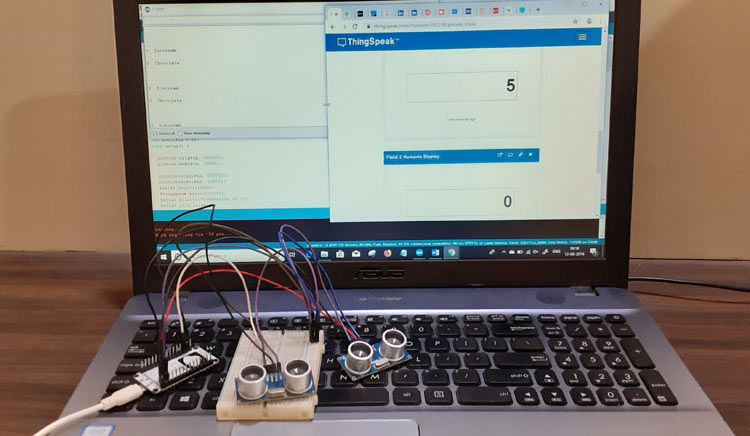
Now as our code is ready to upload, connect the NodeMCU with the laptop and choose the board and port correctly, and then click the Upload button. After uploading the code, open the serial monitor. Make the baud rate of serial monitor as 115200. You will see your Wi-Fi Id, password, and no. of products displayed on the serial monitor as shown below.
In case if you don’t know how to program NodeMCU using Arduino IDE. You can follow this tutorial.
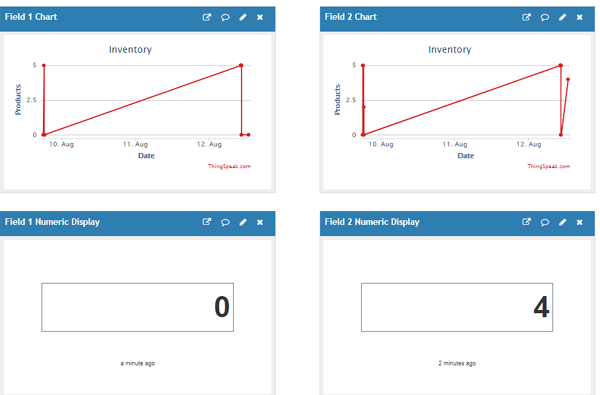
Now go to the ThingSpeak website and check your channel, you will see the no. of products in the graph and numeric values as shown below.
The complete working of this IoT Inventory management system can be found at the video given at the bottom of this page.
Sending Email using ThingSpeak and IFTTT
To send Email notifications, we will use IFTTT. IFTTT aka ‘If This Then That’ is a free web-based service to create chains of simple conditional statements, called Applets. Using these applets, we can send Email, Twitter, Facebook notifications.
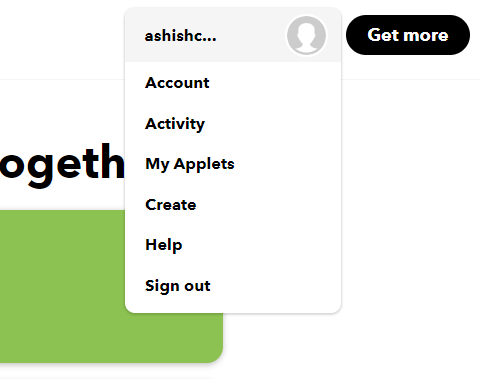
To send notifications using IFTTT, create an account on IFTTT. To do so navigate to IFTTT website and click on signup. Then fill out your details and click on create an account. Now, as you are signed in to your account, click on your profile and then click on ‘Create.’
Now in the next window, click on the ‘This’ icon that is shown below.
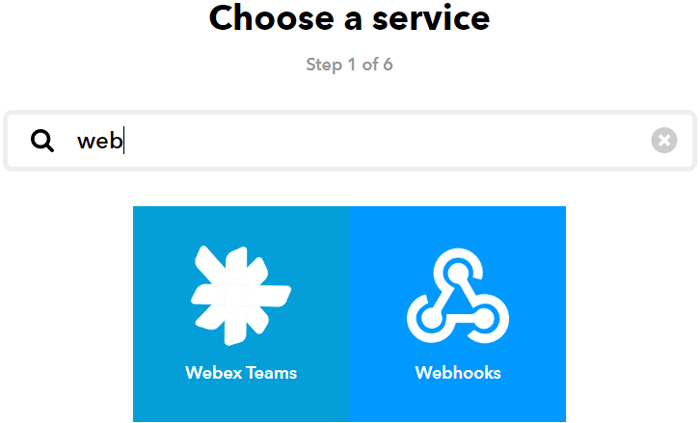
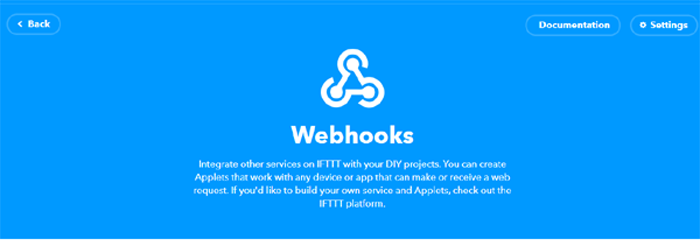
Now search for Webhooks in the search section and click on ‘Webhooks.’
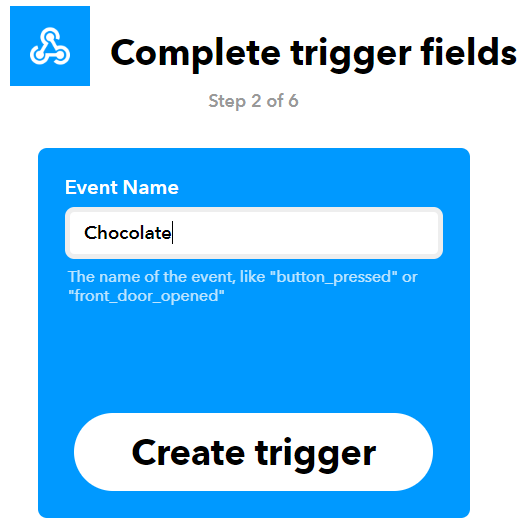
Now choose the trigger and in next window enter the event name as Chocolate and then click on create trigger. Here I have assumed my item name as chocolate you can provide any name of your desire.
After this click on ‘Then That’ and click on Email.
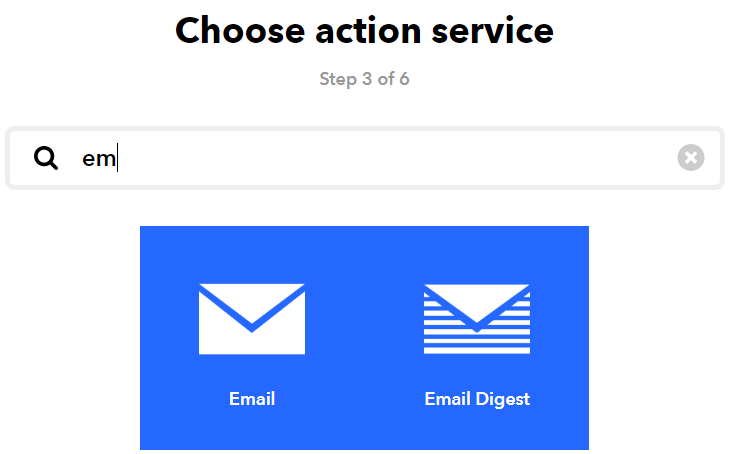
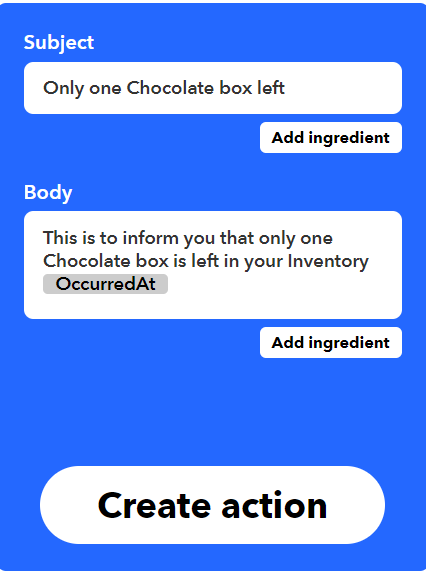
Now in email, click on ‘send me an email’ and enter the email subject and body and then click on create action.
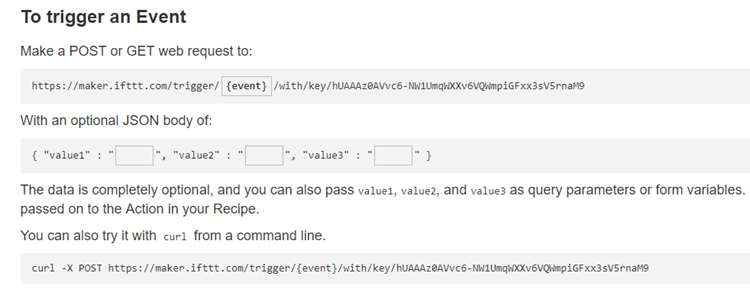
Now your applet is created. Now click on ‘Get More’ and then in services option select webhooks. On the webhooks page click on ‘Documentation’
Now in the next window, copy the web request link and enter the event name.
https://maker.ifttt.com/trigger/Chocolate/with/key/hUAAAz0AVvc6-NW1UmqWXXv6VQWmpiGFxx3sV5rnaM9
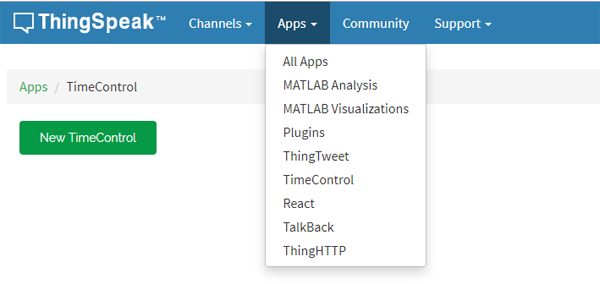
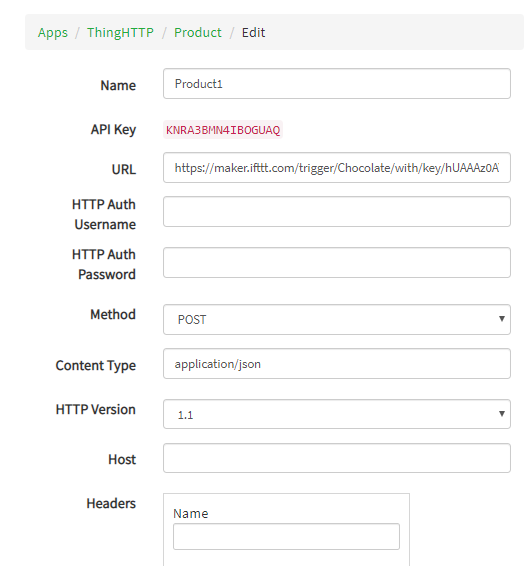
After this, now navigate to Thingspeak and click on ‘Apps’ and then click on ‘ThingHTTP.’
In next window enter the name and paste the link that you copied from IFTTT.
After this again click on ‘Apps’ and click on ‘React’ and create a new react. Fill out details as shown in below image and save the react. Now your applet and react is created.
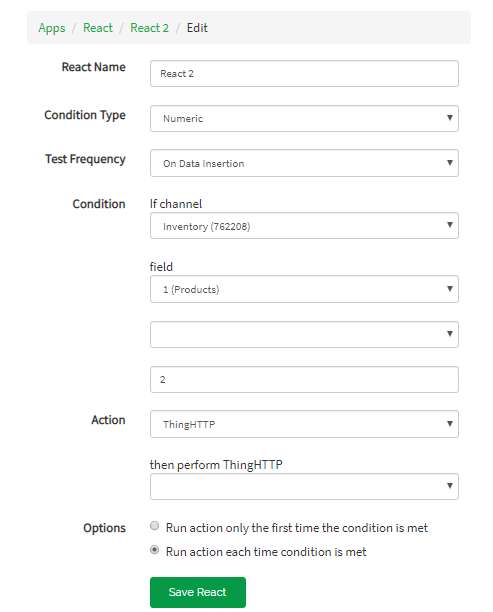
Now you have to create another applet for the second product, i.e., Ice Cream. Follow the same procedure for product2. Change the event name from chocolate to ‘Icecream’. Thereafter, whenever the product count goes below two, it will send an email that only one product is left.
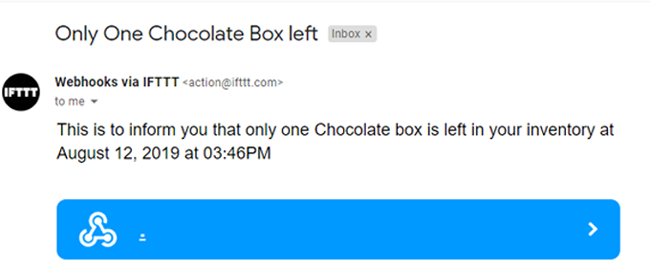
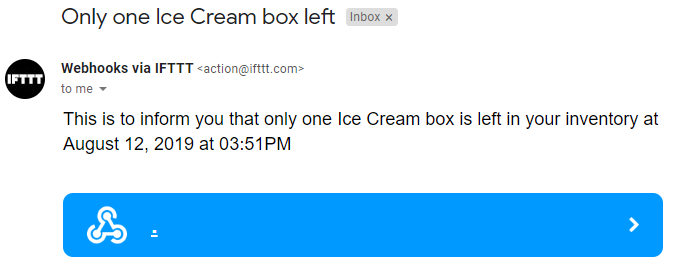
As you can see, whenever the product count goes below two, it sends an Email automatically. You can expand this IoT inventory system by using more ultrasonic sensors. If you face any difficulty while doing this project, then please comment below.
#include <ESP8266WiFi.h>
#include <WiFiClient.h>;
#include <ThingSpeak.h>;
const char * myWriteAPIKey = "API Key";
const char *ssid = "WiFi Name"; // Enter your WiFi Name
const char *pass = "WiFi Password"; // Enter your WiFi Password
unsigned long myChannelNumber = Your Channel Number;
WiFiClient client;
int trigPin = D6;
int echoPin = D7;
int Chocolate=0;
int Icecream=0;
int trig1Pin = D1;
int echo1Pin = D2;
void setup() {
pinMode(trigPin, OUTPUT);
pinMode(echoPin, INPUT);
pinMode(trig1Pin, OUTPUT);
pinMode(echo1Pin, INPUT);
Serial.begin(115200);
ThingSpeak.begin(client);
Serial.println("Connecting to ");
Serial.println(ssid);
WiFi.begin(ssid, pass);
while (WiFi.status() != WL_CONNECTED)
{
delay(550);
Serial.print(".");
}
Serial.println("");
Serial.println("WiFi connected");
}
void loop(){
Product1();
Product2();
}
void Product1(){
delay(500);// reading will be taken after ....miliseconds
Serial.println("\n");
int duration, distance;
digitalWrite (trigPin, HIGH);
delayMicroseconds (10);
digitalWrite (trigPin, LOW);
duration = pulseIn (echoPin, HIGH);
distance = (duration/2) / 29.1;
if (distance <23) { // Change the number for long or short distances.
Icecream=5;
Serial.println("\n");
Serial.print(Icecream);
Serial.print(" Icecream");
}
if (distance >23 && distance <35) { // Change the number for long or short distances.
Icecream=4;
Serial.println("\n");
Serial.print(Icecream);
Serial.print(" Icecream");
}
if (distance >35 && distance <47) { // Change the number for long or short distances.
Icecream=3;
Serial.println("\n");
Serial.print(Icecream);
Serial.print(" Icecream");
}
if (distance >47 && distance <60) { // Change the number for long or short distances.
Icecream=2;
Serial.println("\n");
Serial.print(Icecream);
Serial.print(" Icecream");
}
if (distance >60 && distance <70) { // Change the number for long or short distances.
Icecream=1;
Serial.println("\n");
Serial.print(Icecream);
Serial.print(" Icecream");
}
if(distance >70){
Icecream= 0;
Serial.println("\n");
Serial.print(Icecream);
Serial.print(" Icecream");
}
ThingSpeak.writeField(myChannelNumber, 1,Icecream, myWriteAPIKey);
}
void Product2(){
delay(500);// reading will be taken after ....miliseconds
Serial.println("\n");
int duration, distance;
digitalWrite (trig1Pin, HIGH);
delayMicroseconds (10);
digitalWrite (trig1Pin, LOW);
duration = pulseIn (echo1Pin, HIGH);
distance = (duration/2) / 29.1;
if (distance <23) { // Change the number for long or short distances.
Chocolate=5;
Serial.println("\n");
Serial.print(Chocolate);
Serial.print("Chocolate");
}
if (distance >23 && distance<35) { // Change the number for long or short distances.
Chocolate=4;
Serial.println("\n");
Serial.print(Chocolate);
Serial.print(" Chocolate");
}
if (distance >35 && distance< 47) { // Change the number for long or short distances.
Chocolate=3;
Serial.println("\n");
Serial.print(Chocolate);
Serial.print(" Chocolate");
}
if (distance >47 && distance< 60) { // Change the number for long or short distances.
Chocolate=2;
Serial.println("\n");
Serial.print(Chocolate);
Serial.print(" Chocolate");
}
if (distance >60 && distance< 70) { // Change the number for long or short distances.
Chocolate=1;
Serial.println("\n");
Serial.print(Chocolate);
Serial.print(" Chocolate");
}
if(distance>70){
Chocolate= 0;
Serial.print(Chocolate);
Serial.print(" Chocolate");
}
ThingSpeak.writeField(myChannelNumber, 2,Chocolate, myWriteAPIKey);
}


